Hello! This weekend I was left on my own by the lady and in a desperate gambit to avoid housework I decided to build my second Warhound Titan. This has the double effect of opening space in my closet of shame for my inevitable Legions Imperialis purchases, as well as giving me a little extra practice with resin ahead of my Reaver titan build (ETA December).
Almost every warhammer fan who has ever seen a titan in person before has fallen in love with them. In the lore, on the tabletop and in a display case, these massive models really showcase the scale, and absurdity of the Warhammer universe to the fore.
I have been lucky enough so see quite a few titans in person, and even luckier to acquire 3 of my own. 2 Warhounds and a Reaver titan. The two Warhounds titans are now built and I’m planning out the task of painting these incredible models now. The Reaver titan, my pride and joy, still remains in its box waiting for the day I’m brave enough to assemble it.
I picked up my Two Lucius pattern Warhounds about 18 months ago right after Adepticon 2022. I built and “painted” the first one last September in 2 weeks ahead of NOVA here in Virginia but tore it down to add magnets for stability and ease of transport about 2 months ago. The lessons I learned during that first build have gone a long way to helping me in this build.
I’ve always been drawn to the blocky shapes of the Lucius Pattern that you are about to see take shape but the Mars pattern that is more commonly seen is also stunning in person!

The first step when dealing with resin models is to wash them in warm soapy water. This removes any mold release that has stuck to the parts. This mold release will hurt the adhesive properties of any paint that you use later in the painting phase.
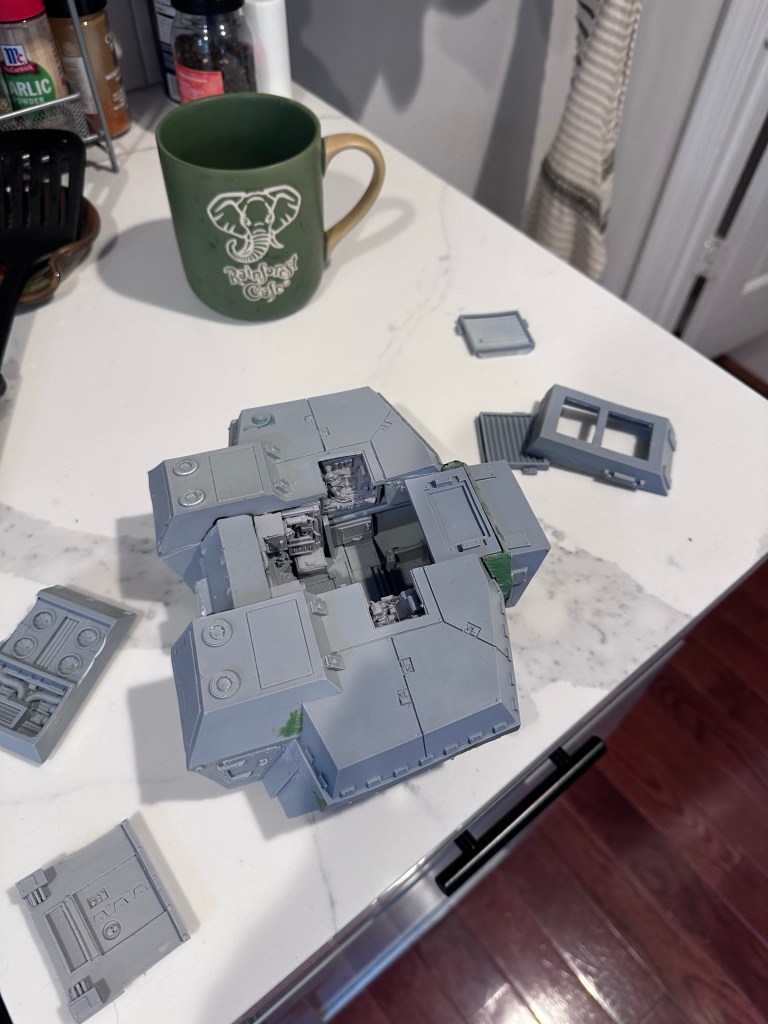
I personally like starting with the torso with my warhound titans. The instructions and common school of thought is that starting with the legs is the wiser move. I think a completed torso is easier to pose on top of the legs and helps you get a better idea of how the finished model will look.
Something to note, I don’t add the head or arms until the end as you will want to pose these after seeing how your legs are positioned.

The Lucius pattern has a tendency to warp pretty bad on these torso parts so make sure you dry fit these pieces before setting them together.
As you can see here, there are quite a few panel gaps that I have needed to address with green stuff. This is normal in my experience. These older Forgeworld kits were made without the benefit of CAD software and as such don’t usually fit together as well as we would like.

Next up- the feet! Now the feet on the Warhound titan are awesome. The possibilities are endless with the posing as each toe joint needs to be posed individually.
With this incredible range of choice comes difficulty though as there is I believe 27 parts in each foot. Each of the main toes requiring 6 resin parts and 3 brass pins to come together.
The feet are probably the most tricky part of this model due to the aforementioned part quantity as well as the simple fact that the feet must support the whole model’s weight. This means that pinning is essential for this step. I’ve seen a few Warhounds without pinned feet and after months or years of tension, the resin begins to sag.
This means that you shouldn’t follow the age old adage “measure twice cut once”. Measure thrice cut once. (And use JB weld not super glue to be safe)

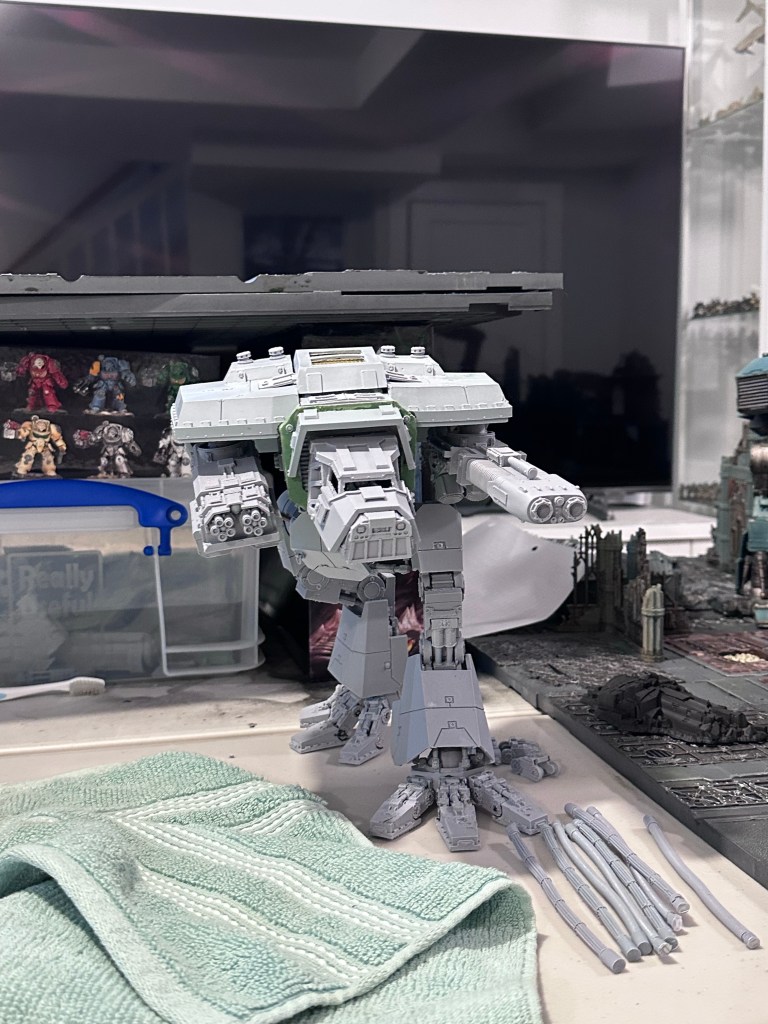
As you can see in the above pictures. I’ve decided on a striding pose for this Warhound. This titan is supposed to be quick and I want it to look like it’s running. I wouldn’t recommend this for your first titan as there are some more challenges associated with it but I’m not your father.
The legs are relatively quick compared to the feet. I like to use a sticky tack to help me dry fit all the leg joints to give me an idea of how the joints will be angled in the finished product.
Once you have your pose, time to bring out the JBweld once more. I like to do each joint individually, letting each dry fully before moving onto the next. This helps keep me honest and prevent any major mistakes with posing as you can always correct any slight errors on the next section.

As you can see, the legs are done! I’ve kept the hips pistons and the leg armor off for the time being. I like to add the pistons on last as they are dependent on how the legs are posed. whereas the armor will only be attached with tack until I get this painted.
You can also see a hole on the top of the hips. This is for a quarter inch magnet that will secured the legs to the torso. If you have any intention in gaming with your titan, I suggest magnetizing the hips and arms for ease of transport.


The head and the arms are the last steps and once you’ve gotten through the legs they are a cakewalk. Since we’ve decided to magnetize them all that needs to be done is to JBweld your magnets in place. Be careful with the polarization, you don’t want to mess that up.
I hope this guide has been helpful. I love these older titan models and after this model I am feeling much more comfortable ahead of my reaver titan build coming up this winter.
Hoping to get this beauty painted along with its partner in the next few months.
