Hello! Some of you may be a little confused, we’ve changed our name! Don’t worry, we’re still the same great group of hobbyists, the editors just thought this name better reflected the community aspect of this blog! We have some more changes on the way, and hopefully a bunch of great new content as well so stay tuned!
In the meantime, here is our monthly “Community Roundup”
Joe R
June turned out to be a deceptively good hobby month despite this relatively short article. I’m actually on vacation as I write this, so we won’t have many pictures. I have also watched several painting videos this month, largely focusing on terrain. I also watched some sponge chop tutorials which I might try when I return.
Oh. I primed SO MUCH STUFF. Those new airbrush primers are awesome. I have more primed miniatures than I have painted miniatures at this point.
Ash Wastes Terrain – Necromunda
My 3D printers have been going BRRR all month. My Fallout Gas station is printed and primed. I even started sponging on some silver craft paint which was a miserable failure. Since then I’ve printed most of this oil rig, started on this train, and printed a TON of these gem lodes. I’m planning to give a set of lodes to each of my Ash Wastes players to represent the Lithicarium mines we’re using instead of loot caskets. I’ve also been printing a bunch of rocks, which I’m hoping will serve for both Necromunda and my Cowboy related shenanigans. However, none of these items are painted (or even primed!).
After playing the first campaign session, it was clear I needed to find a solution for Ash Wastes roads. I had been using a racetrack from one of my daughter’s toys.

You may be surprised to discover that Mario Kart’s Rainbow Road doesn’t mesh well with the Ash Wastes! So I went about trying to find solutions. Tim and Mike, both esteemed hobbyists from another game group, gave some excellent recommendations using thin foam boards. I was able to find some post apocalyptic road files, so I figured I’d give that a shot first. The first batch has completed printing, but I haven’t fully inspected them. If that’s a bust, I will go get some foam board and call that good for now.
GMing and Bandits – Pathfinder 2E RPG
I’m going to keep this section short since I’m not sure it’s in the spirit of this effort. I 3D printed some bandits that were some of the first 3D printing files I purchased from My Mini Factory. I’m going to slap chop these bandits, paint them each a unique color, then provide them to the gaming group.
I’ve also been preparing to run Pathfinder for the first time since like… 2015. Thankfully I’ve had the opportunity to play in 2E, so I feel pretty good about my ability to run the system. Depending on timing, and Jerry’s good graces, I may try to post something here.
Converted/Hive Scum – 5 Parsecs from Home/Necromunda
I continued to work on the cyborg hive scum from last month. I had mentioned that I wasn’t fully pleased with my return to contrast paints. I decided to mix and match for my 3rd scummer.
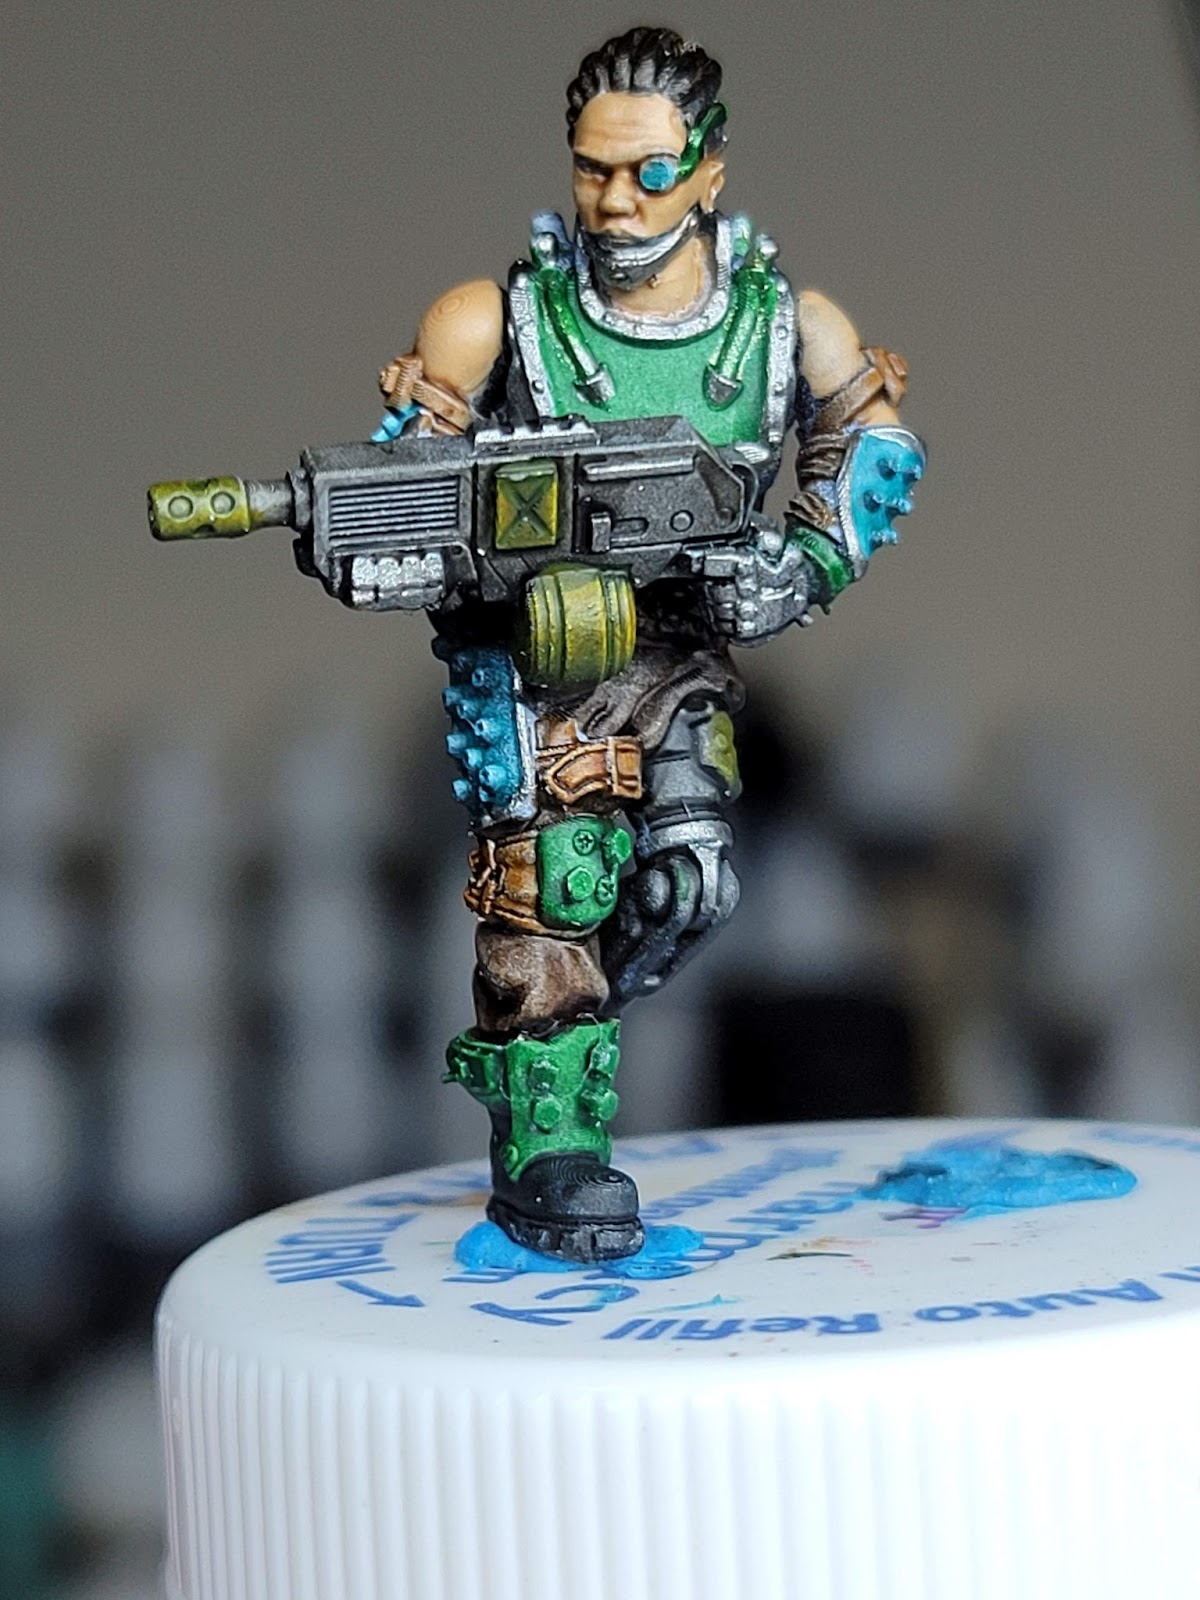
You can see a majority of the model is done with contrast. I’ve gone in and added silver to most of the metallic regions. I also added a little metallic green to some of the armor. Finally, I painted the skin with a skin tone and then washed it with a layer of 1:1 Guilliman Flesh:Contrast Medium. This has been my go-to for flesh for a while. Then I usually highlight back up to the flesh tone. I didn’t do that here.
I still have two more of these goobers to finish for my next 5PFH adventure. That said, I still need to finish my crew! My hope is to focus on them during the next month so I can play that game with limited interruptions as I see fit.
Pennyworth – Necromunda Rogue Doc
I typically don’t rush to get a Rogue Doc in Necromunda. However, I’ve had two gangers die in two games this time (including my specialist!!). So I decided to pick one up. I’m also running the campaign so that Hangers-On are included in gang selection. So my Rogue Doc needs a model who can take to the battlefield.
Now, I’ve never read Gaunt’s Ghosts, but Jerry turned me on to this Kickstarter for legally distinct models to represent the characters from this series of books. And look! A perfect Rogue Doc! Also, these files are AWESOME. Crisp details, clean and easy to remove supports, very strong recommendation if you’re looking to put together your own legally distinct Gaunt’s Ghost cohort.
I’ve been having a hard time with painting cloth. I decided to use this model as an attempt at painting without any pre-prepared washes. The intention was to just use traditional layering, with the occasional glaze thrown in to smooth things out.


As you can see, the model isn’t done. I spent a majority of my time working on the apron. It’s fine. Some days I look at it and go “Wow! I did that”, other days I’m less impressed. I’ve thought about going over the whole thing with a glaze, but so far haven’t pulled the trigger. I’m much happier with the shirt. The transitions are much smoother.
Since taking these pictures I’ve completed his pants and boot covers. I also started adding some depth to the muscles of the skin. I’ve got a game when I return from vacation, so I’d like him to be mostly done so he pops on the table. Hopefully he won’t be killed immediately…
Well, that’s it for now folks. Since I primed a ton of models I have a ton of options! Hopefully I can stay focused and actually get something finished, but we know that won’t happen. 😀
Kevin C.
This month I was able to complete two projects, in preparation for heading off for a week for family “vacation”, one terrain and one kill team.
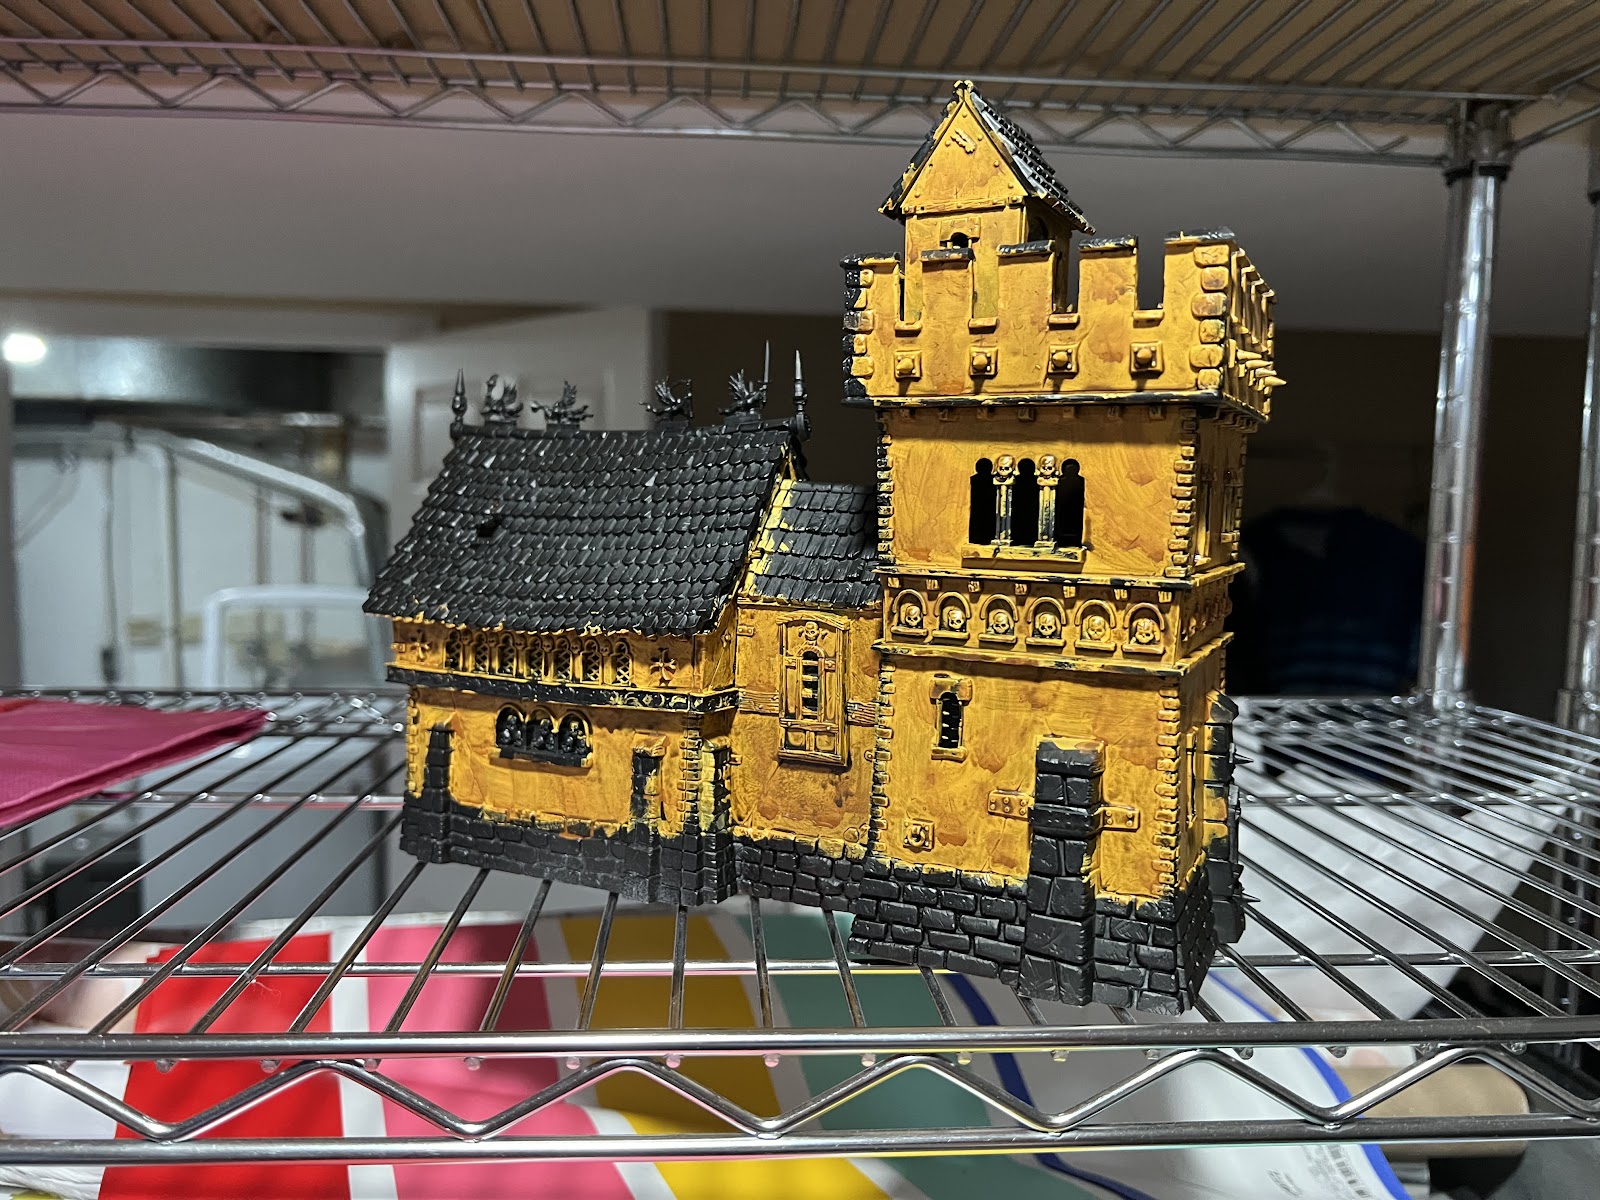
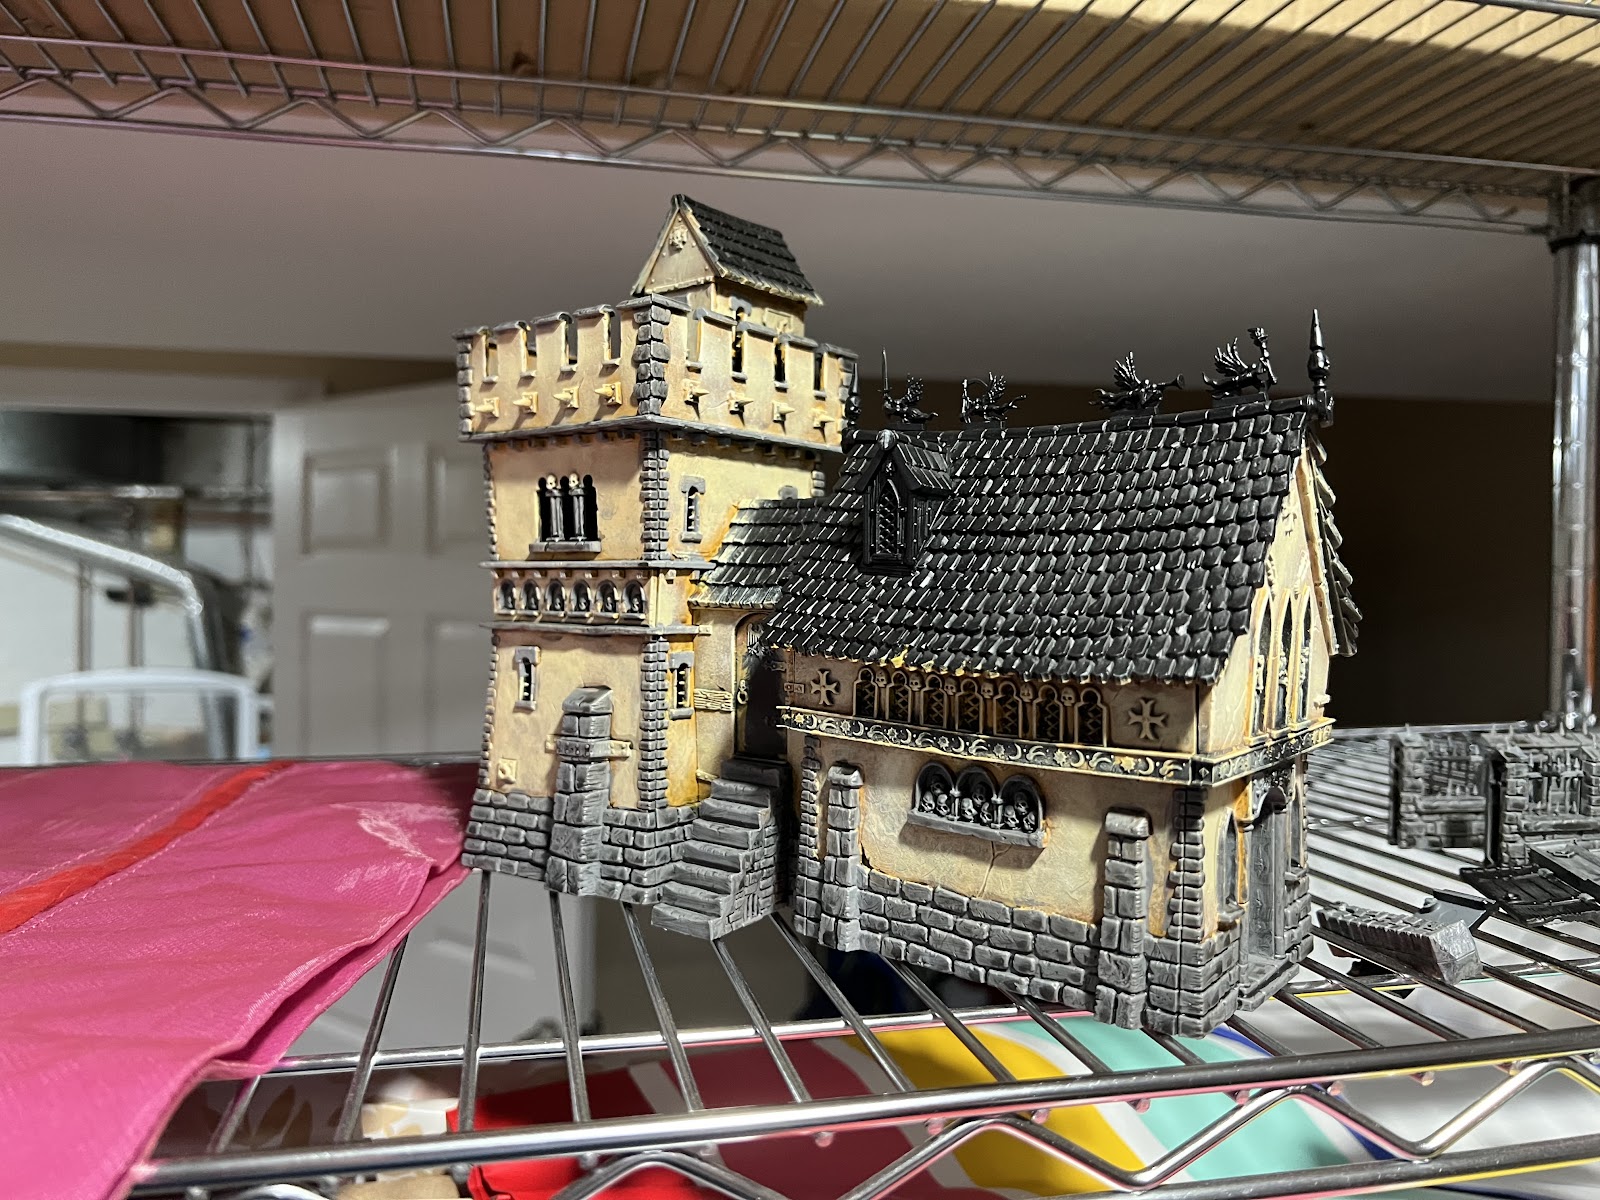
Empire Manor House
I have had this manor house on my list of things to complete for a while now. When Empire was rereleased for The Old World last year, I wanted to grab one of the most iconic pieces of terrain for The Empire. Assembling this piece of terrain was an absolute pain. Not nearly as bad as a certain Duke on Pegasus, but there were a lot of deformed sheets of plastic that did not glue together correctly. I do feel like this piece of terrain is a lot more fragile than it looks, but it is a considerable piece nonetheless.
For painting, I used this excellent guide from a 10-year-old blog, Jester Painting Studio. I don’t know what has happened to Jester in the past ten years, but his guide was indispensable for me in painting my own manor, particularly dealing with the stucco. I have never painted stucco, so I am glad I had this guide to go off of. While the building isn’t my best work, I am pleased with how the walls turned out.


Painting yellow on black is always an iffy proposal. Even with two coats, as shown above, you can see the black through the yellow coats. Since I still had 2-3 more coats to put on, I wasn’t too worried. The next step was to dirty up the undercoat with some random patches of watered down Mournfang Brown. And afterwards, it looked really bad.
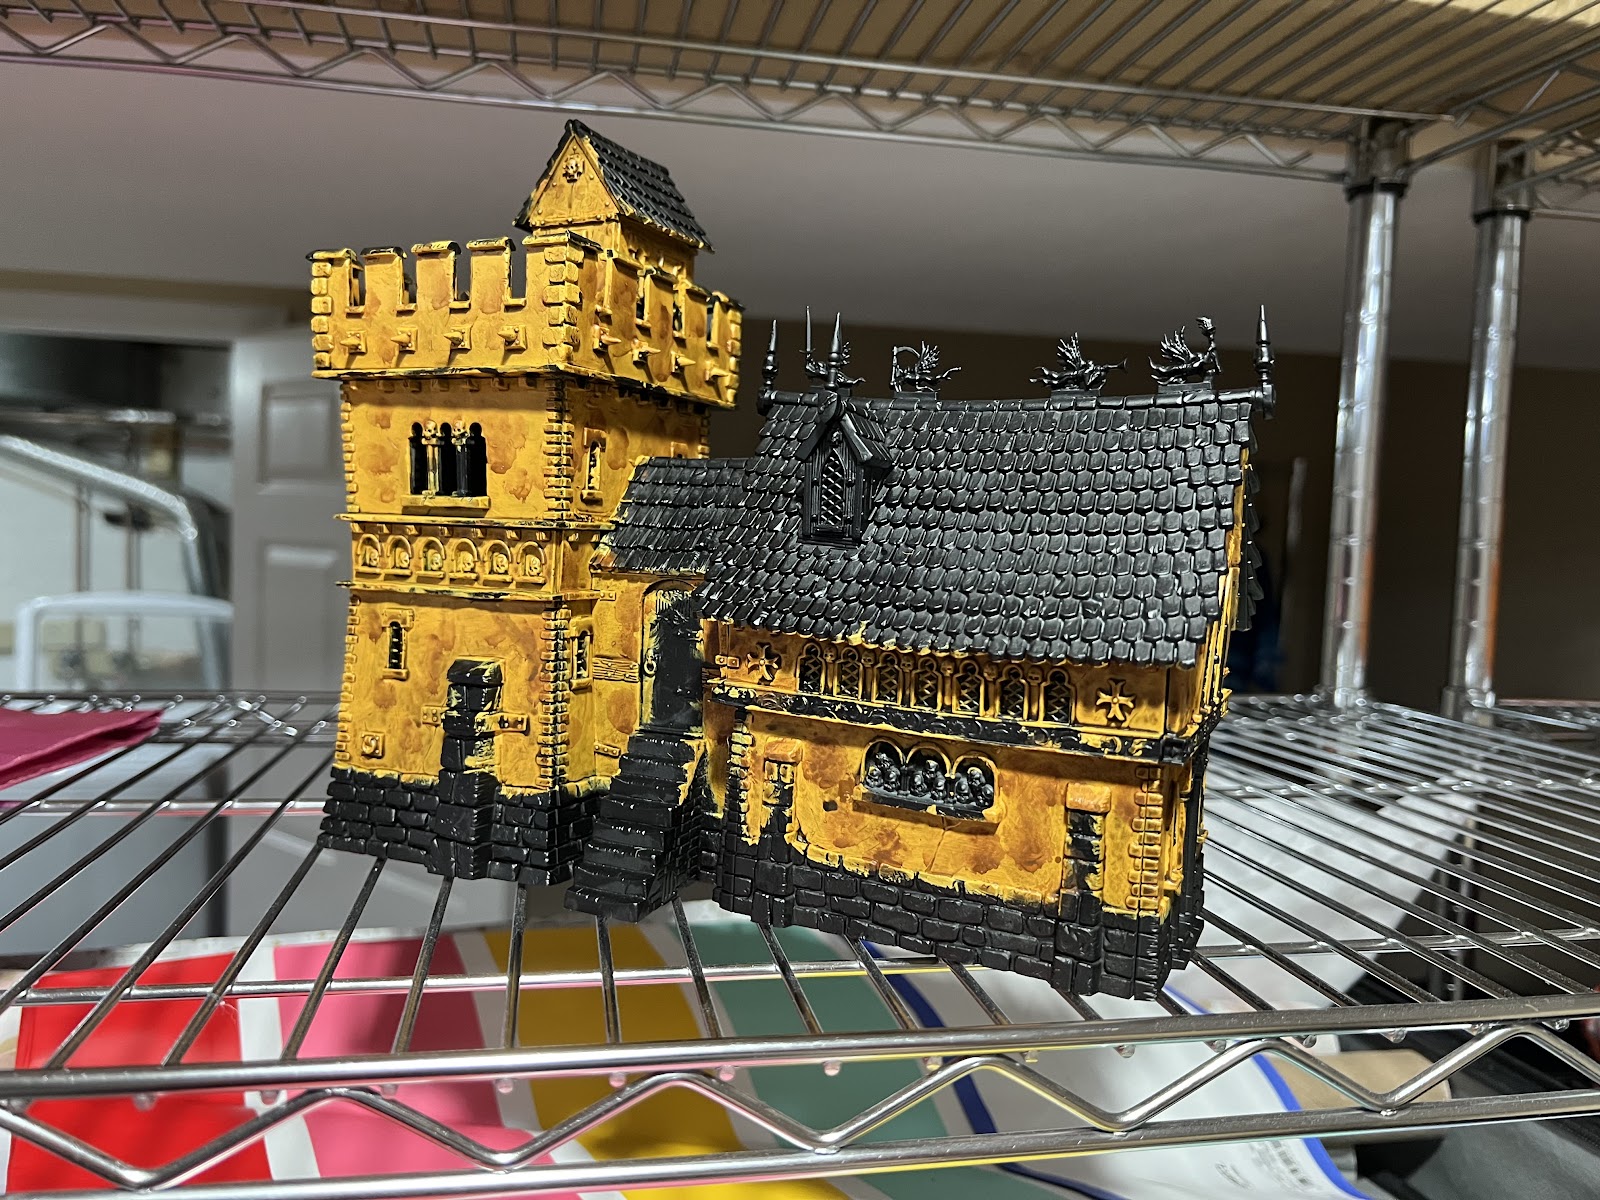
Afterwards, I put my Artis Opis drybrushes to use once again to get two nice smooth coats of the stucco. I was concerned that (a) the stucco was not looking like Jester’s pictures, and (b) I was not able to get into any of the many odd crevices. The first issue did not end up being a problem after the second drybrush coat – I think it may be because Jester ended up having more paint on his brush than I did, so my coats looked a lot smoother. The second issue actually ended up adding depth to the overall building, much like a wash, so I was okay to leave it.

Next step was to paint the stones. The guide had recommended doing a base of Dawnstone with a black wash and a drybrush, but I wish I had given a darker base first. I think the stones are a bit lighter than I would’ve liked, even with the wash, but I did get the edges I was looking for.
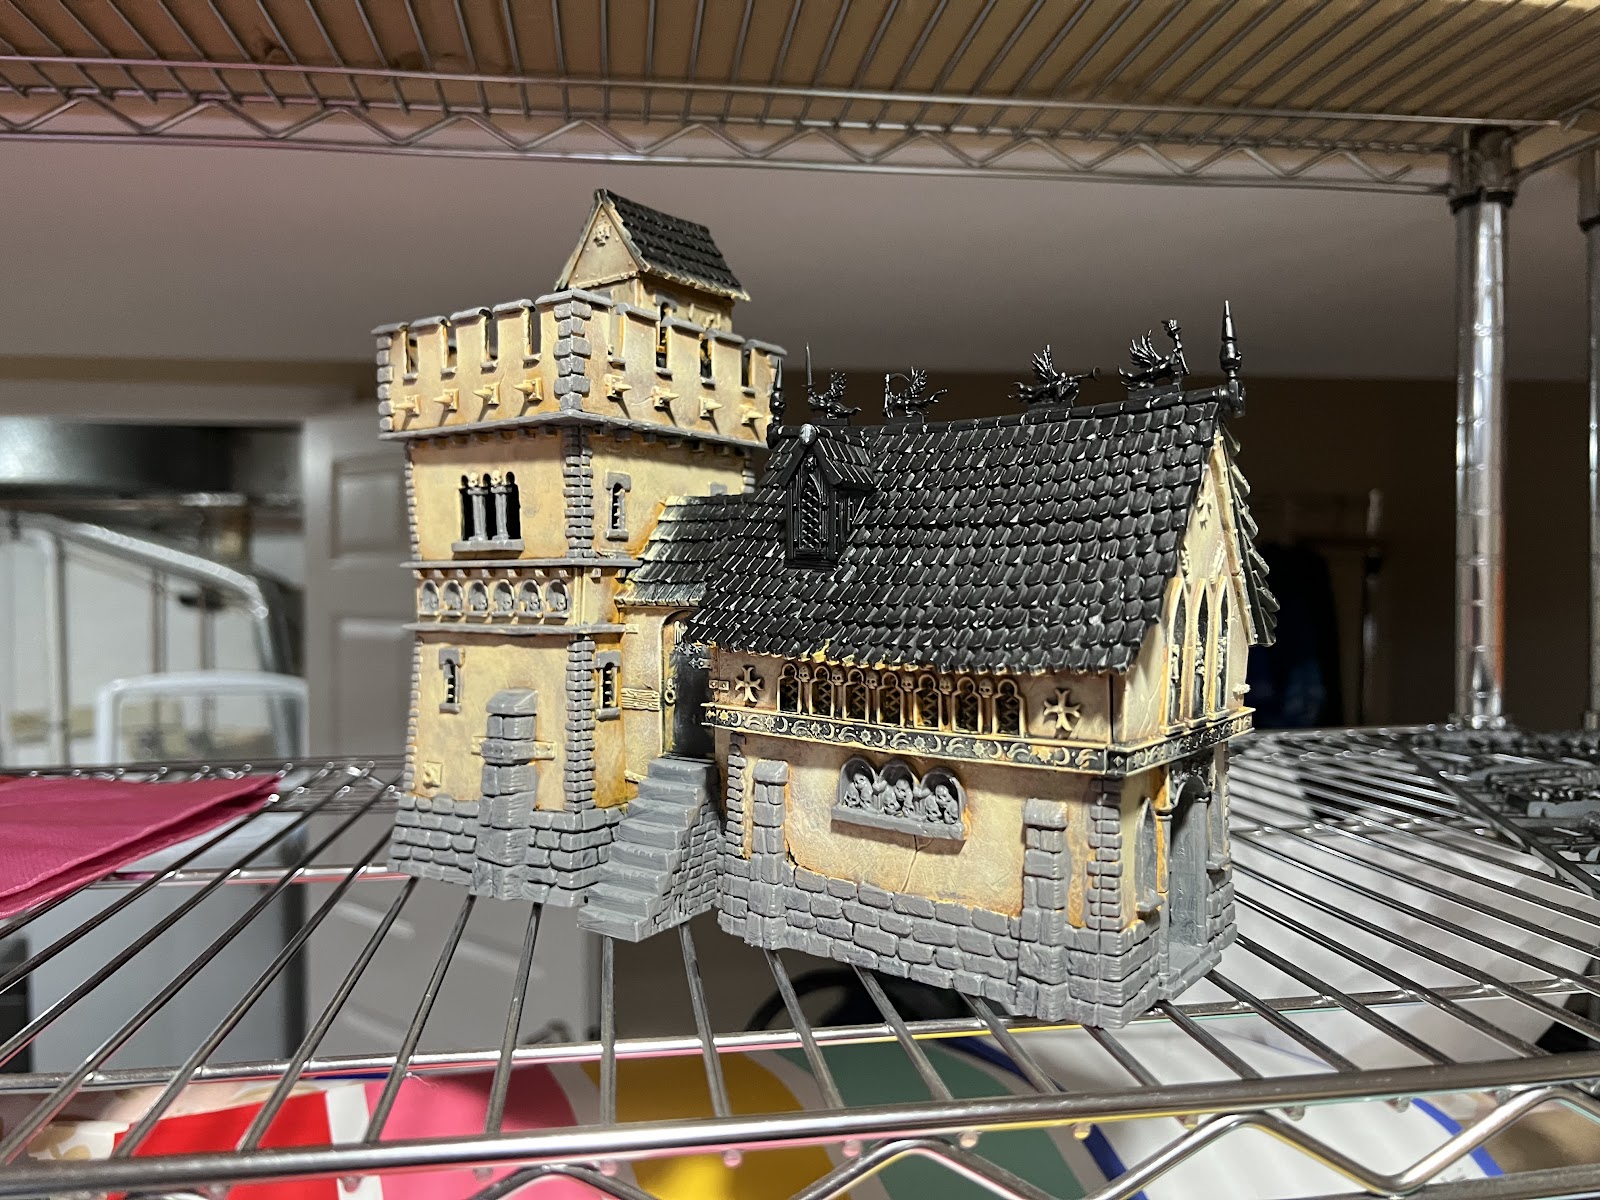


Finally, I painted the roof and all the metal bits. Unfortunately, much of this was done in offset steps, so I only got pictures of the end result. The roof was a Burnt Siena base with a heavy Agrax Earthshade wash, followed by a gradient drybrush of Burnt Siena to Unbleached Titanium. The wood floors and beams were a base coat of Rhinox Hide, wash of Agrax Earthshade, a heavy drybrush of Mournfang Brown, and a light drybrush of Ushabti Bone.
The brass was the longest part to accomplish, mostly because there are so many random bits that I kept missing (doors, etchings, points, statues, etc.). I started with a base coat of Balthazar Gold, a first wash of Agrax Earthshade, a second pass of Nihilakh Oxide, and finally a drybrush of Sycorax Bronze. It is a recipe that worked well for me with the Genestealer Cultist vehicles, so I employed it here. On the regular metal bits, I just did Iron Hands Steel with a heavy Agrax Earthshade.


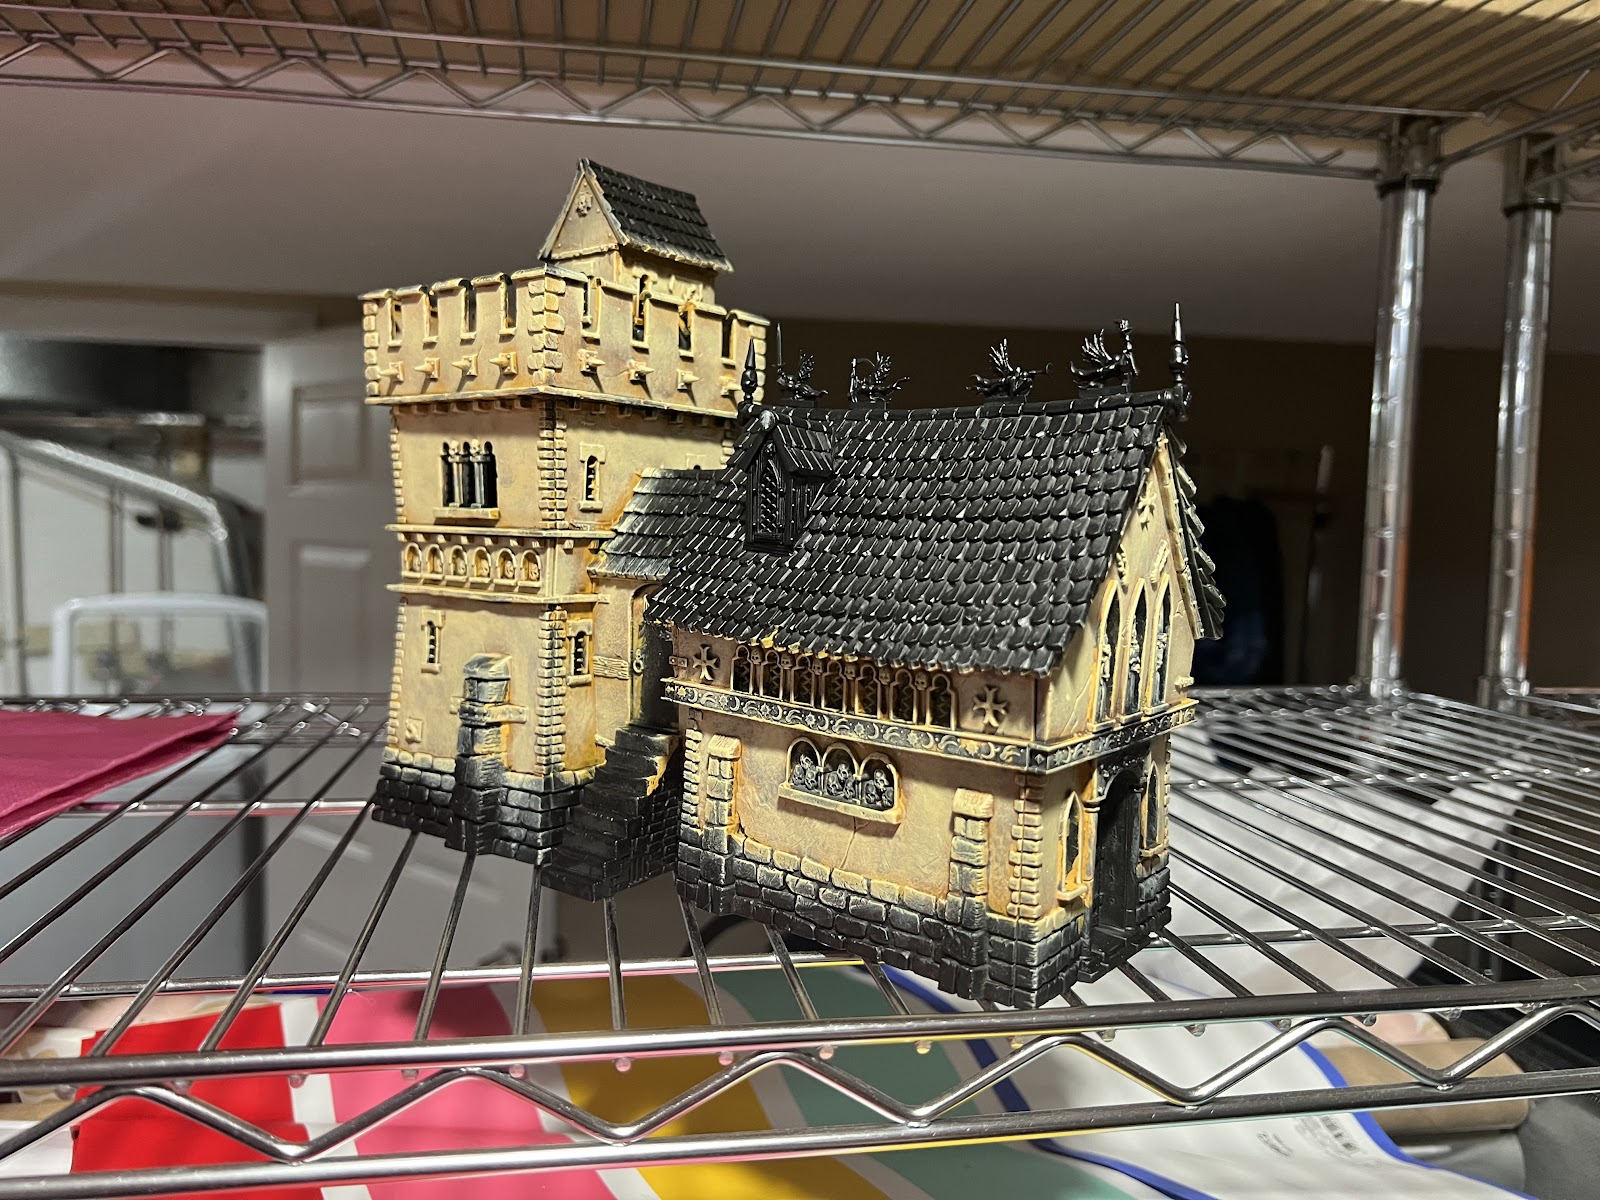
While it was a bit touch and go for a while, I am pleased with the end result. I didn’t end up finishing many of the stone walls, as those end up protruding at weird angles. Maybe I’ll end up painting those at some later time, when I can get a game in with my Empire.
More on my Empire Army at a later date.
Hearthkyn Kill Team
At the same time as I painted the manor, I tried taking care of the Hearthkyn Kill Team. I was hoping to make the armor a lot brighter of a metallic, almost like a candy metal orange. I didn’t quite achieve that effect, namely because the orange contrast on metal was not nearly as light and “candy” as I was hoping. I ended up revisiting these guys and using a tutorial from YouTube here for Trans-Hyperian League.
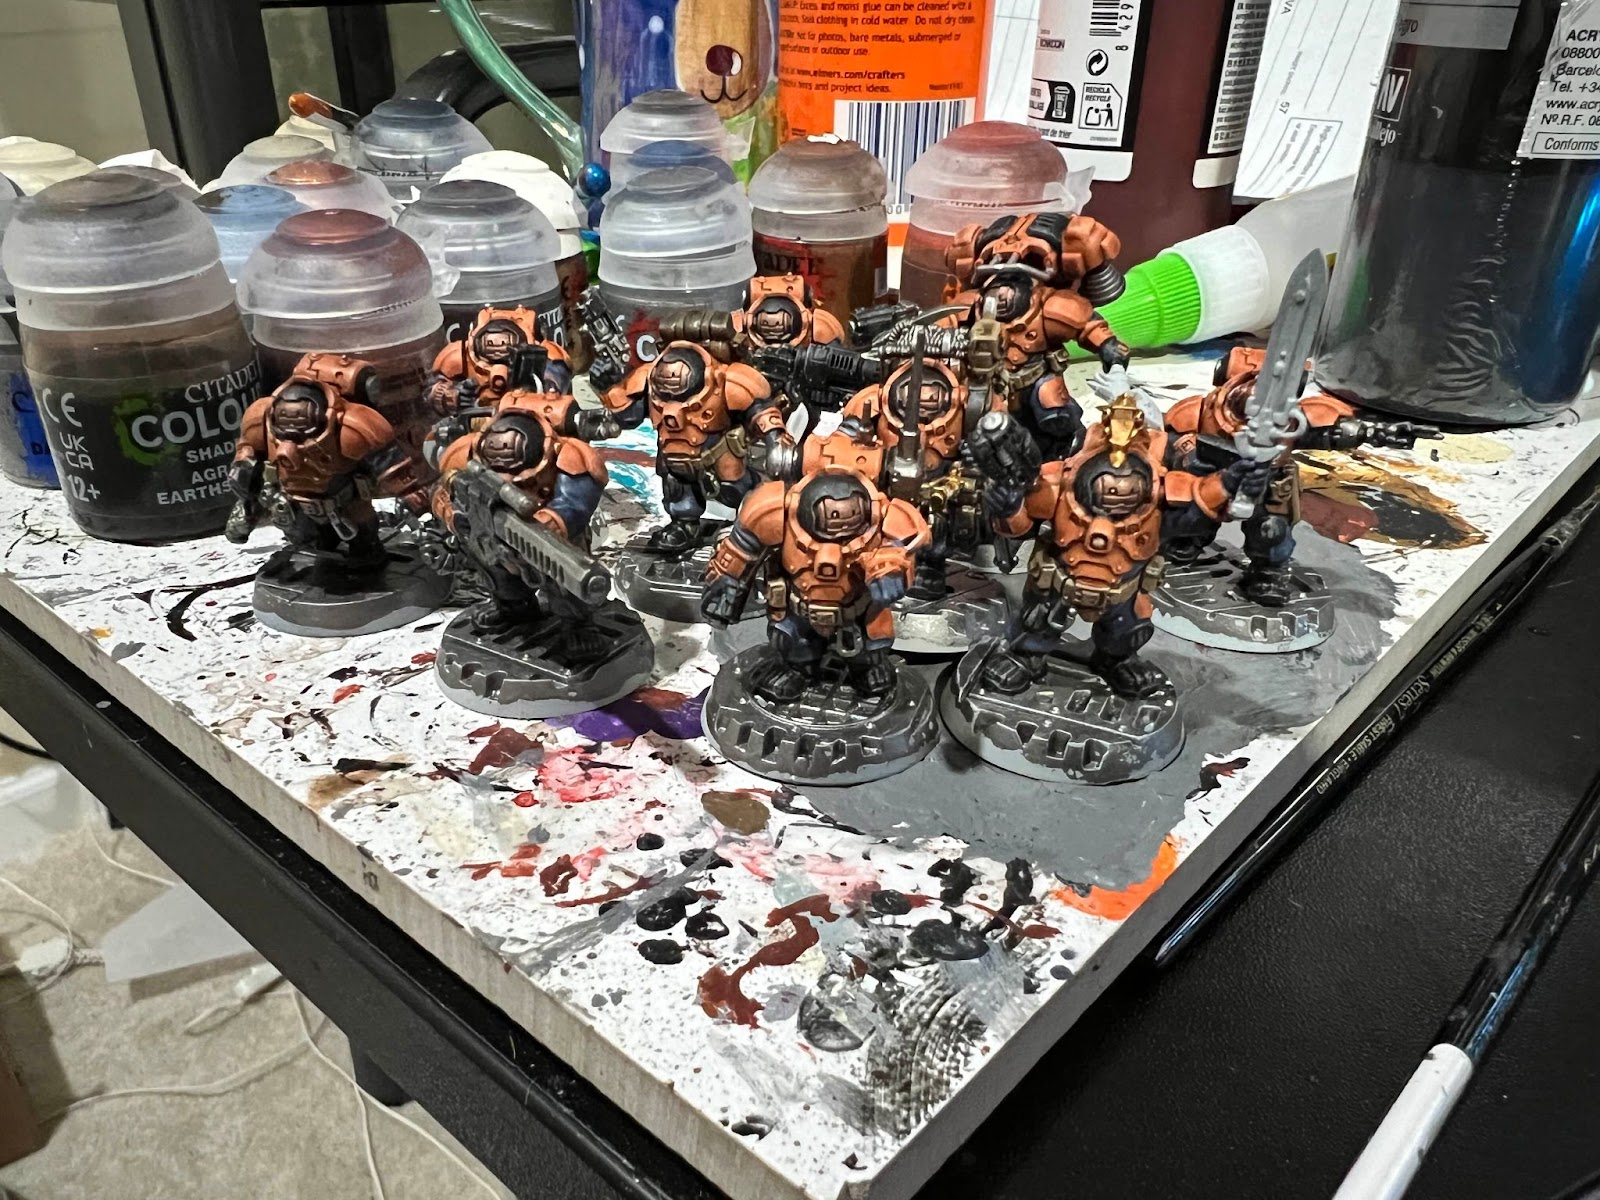
I modified the paint scheme, as I preferred a desaturated blue for the cloth, rather than the grey, since the grey feels a bit too drab to me. Also, I have always liked how blue and orange pair together since going to UVA (Go Hoos!). I used the same power weapon recipe that I used with my Deathwatch – Akhelian Green with Kroxigor Scales at the forte, with a highlight of Blue Horror.


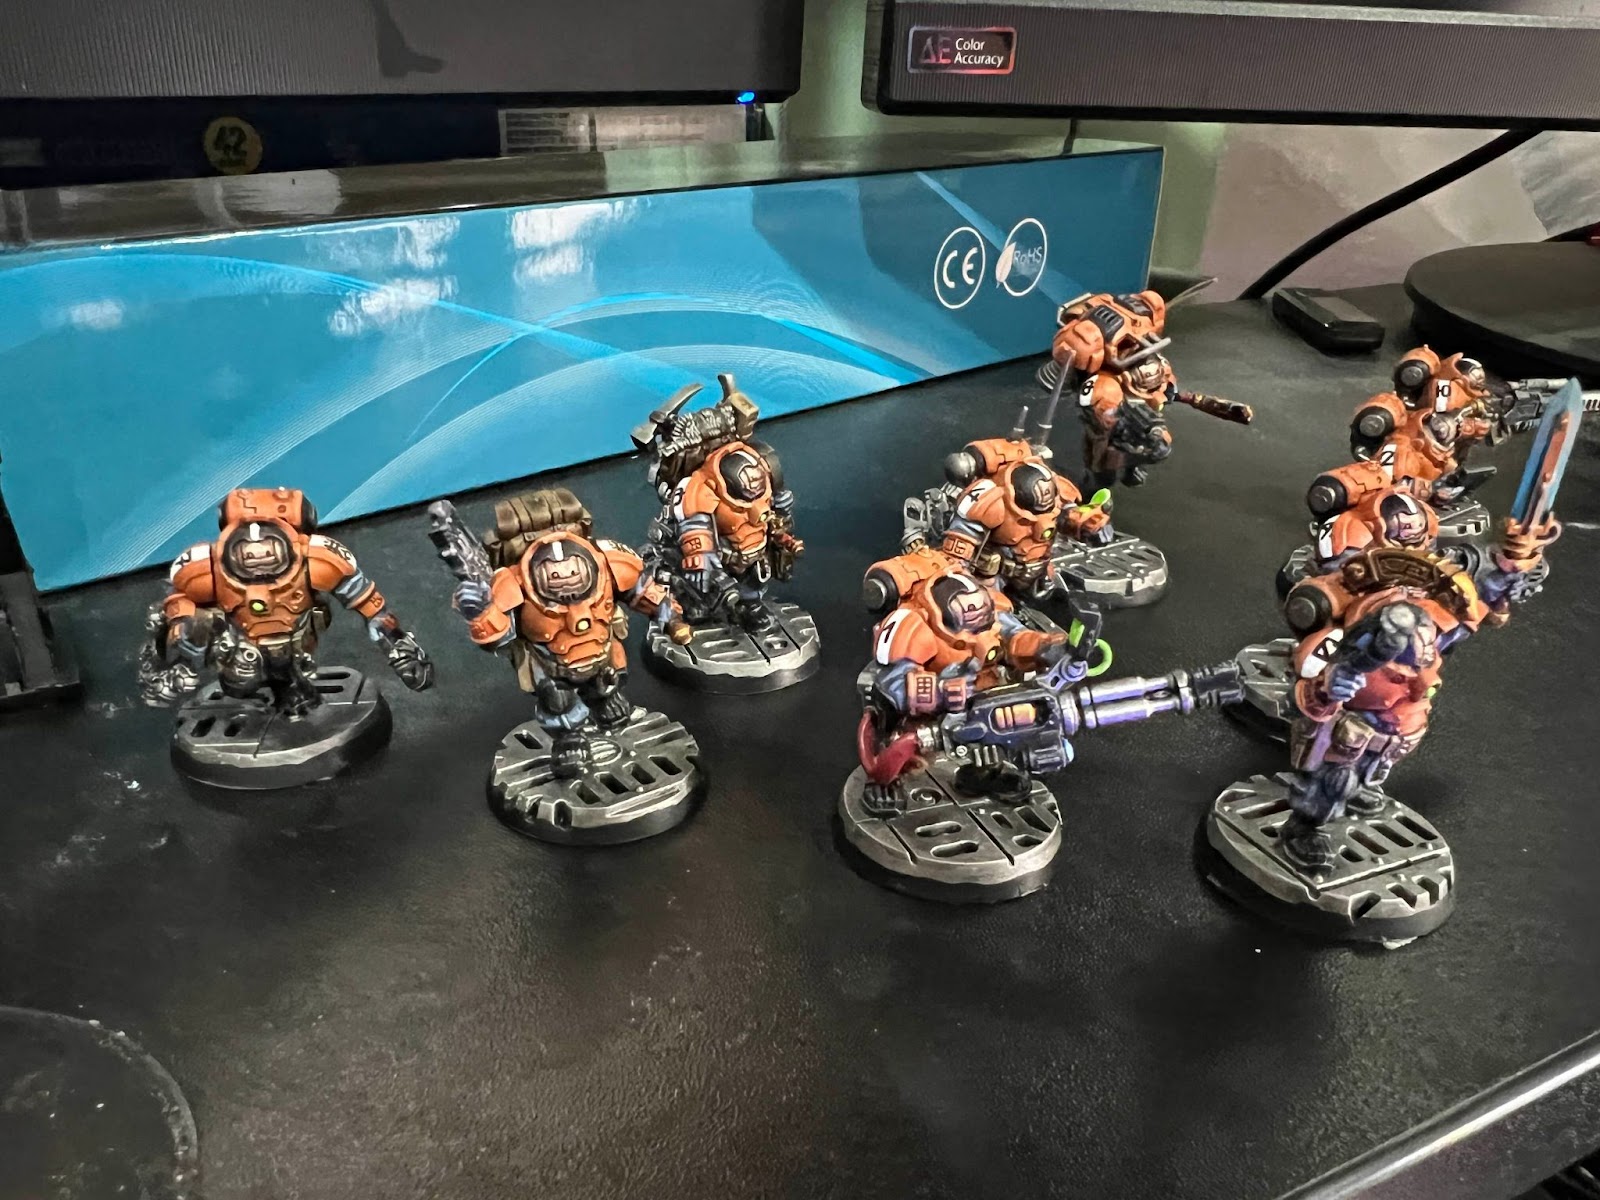
I am glad I added the white stripes and the transfers on the shoulders, as it adds some more interest to the miniatures. One element that did not turn out as well as I would have liked is the face plates – since the plates are smooth, there isn’t as much texture for the highlight to catch, and so the highlight looks sloppy.
I will be taking a week long break, and afterwards, I will be working on my largest army – the Empire! It is truly a huge army, that I have finally finished rebasing for Warhammer: The Old World.
Until then!
