A Tale of Many Warlords- December and a Year In Review

Editor’s Note

I sit here editing and collating the fantastic updates by our diligent warlords, the final ones of the year, on a bullet train heading south from Tokyo. Not the most typical of the locations I’ve been known to work from but a fitting place to tie the bow on this fantastic year of hobbying by both myself and the fantastic warlords that have shared their work with us over the course of the year.

I wanted to take a minute before diving into the incredible work of each of the artists to thank the incredible team here at UCH. Each of these men has inspired me and made me work to be a better hobbyist. I started this series in an effort to get more done over the course of the year, and I have accomplished this in spades. I was thankfully not alone in this, dragging 5 other hapless fools onto the year-long journey that you have read through this year. I am incredibly thankful for their writings, and insight. I hope that we can continue to entertain, and maybe even inspire you into 2025 and beyond!


Austin B.

November Progress

Before I move onto December, I actually have to catch you all up on what I was able to accomplish in November! Not that it was very much, hence in part the lack of a post from me in the last month. But I got some work done on some of the new – and older – Shatterpoint boxed sets. I am hoping to get a bit more done before the next set of Rebel and Empire boxes drop sometime in Q2 2025. And I have a bit more to paint up for an event in February. (Events are a great motivator…)

With all the holiday preparation as well as some business at work, I didn’t get as much done as I had hoped, though finally finishing off the “This is Some Rescue” box was nice, and Lando’s box is actually pretty close to completion as well, with the Wing Guard half-way in progress.

December Progress

Now paradoxically, December ended up being a much more free month for me, despite having yet another holiday to prepare for. While it’s also not as much as I have done in some other months, I did get a good few heroes done for my Middle Earth armies in preparation for the new edition, including the Three Hunters: Aragorn, Legolas, and Gimli. Mounted, even!

Gamling joins them, as does a mounted Rohan banner bearer – his dismount having been painted over two years ago at this point for my footslogging Rohan army (that I showed off in the first ever post, actually!). I was unfortunately unable to get Theoden done as I had hoped to, so he remains unfinished (unprimed, even), as the model did not arrive till after I returned from my holiday celebrations. Expect him in January, alongside some fitting foes!

Atop those, I actually finally finished my Vampire team that I have left lying unfinished since before the start of this year! (Another item I showed off in the first post, as something “to be done!”) I painted them up to participate in a local event, and even walked away with Most Touchdowns! (Again, events are a great motivator…)

This is a bit of a cheat, since 9 of the models had already been completed (the Vargheist and 8 Thralls) last year. As was Wilhelm Chaney, who is here posing for the family photo. But I had to get those 6 Vampires done eventually, and actually base the whole team, and it was finally done! The project and event also finally got me to base Chaney, hence his inclusion in the photo, despite the fact that he’s been fully painted since his release in 2021!

Year in Review

And that’s it! That rounds out the year! Honestly, for what I wanted to do when I started on my posts, I have admittedly failed. My initial task was to get an army done for Warhammer: The Old World, and I have made significantly little progress in that regard. But as a general motivator to paint, I’m fairly happy with what I have been able to accomplish this year. I have abandoned some projects, most notably that Old World army (for the moment…), and I have certainly hopped around a lot in regards to what I am painting (how many times did I say “this is what I’ll be painting moving forward” only to change it the next month, or come back with some Shatterpoint models instead?), but posting for this blog has at least kept me painting, which isn’t quite something I could say about myself in years prior. Why do you think I have so many incomplete projects? I haven’t always posted consistently, either because I’ve felt I haven’t done enough, or because I was just too busy to get a post ready in time, but every month I have at least done something.

But to sum up what I have done this year:

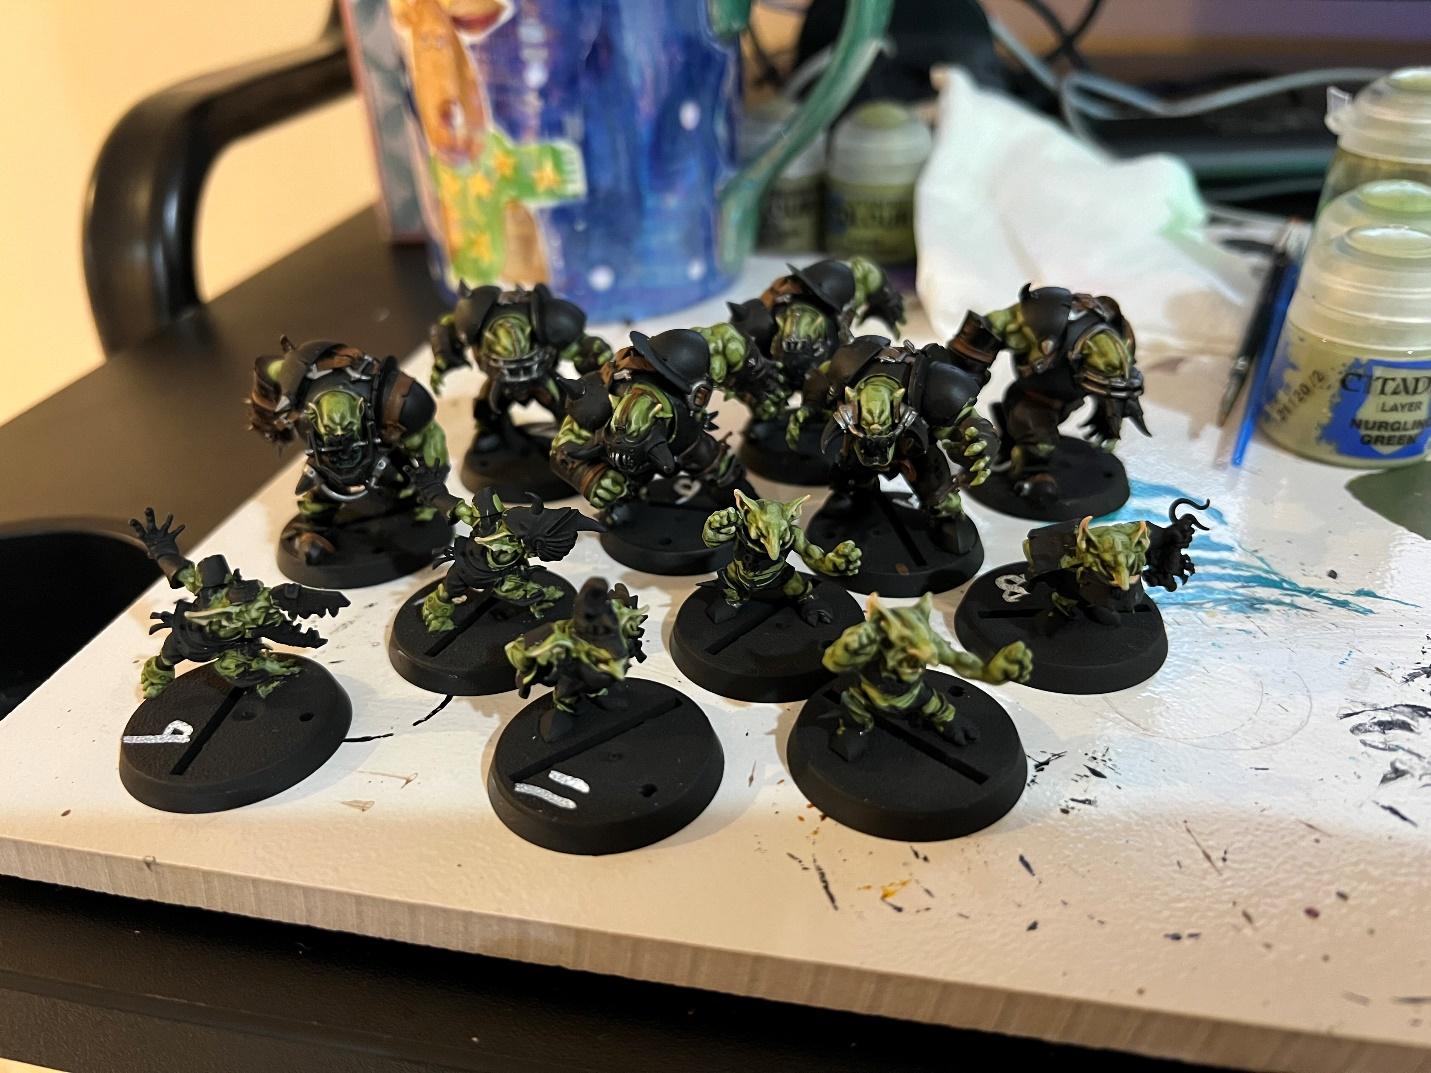
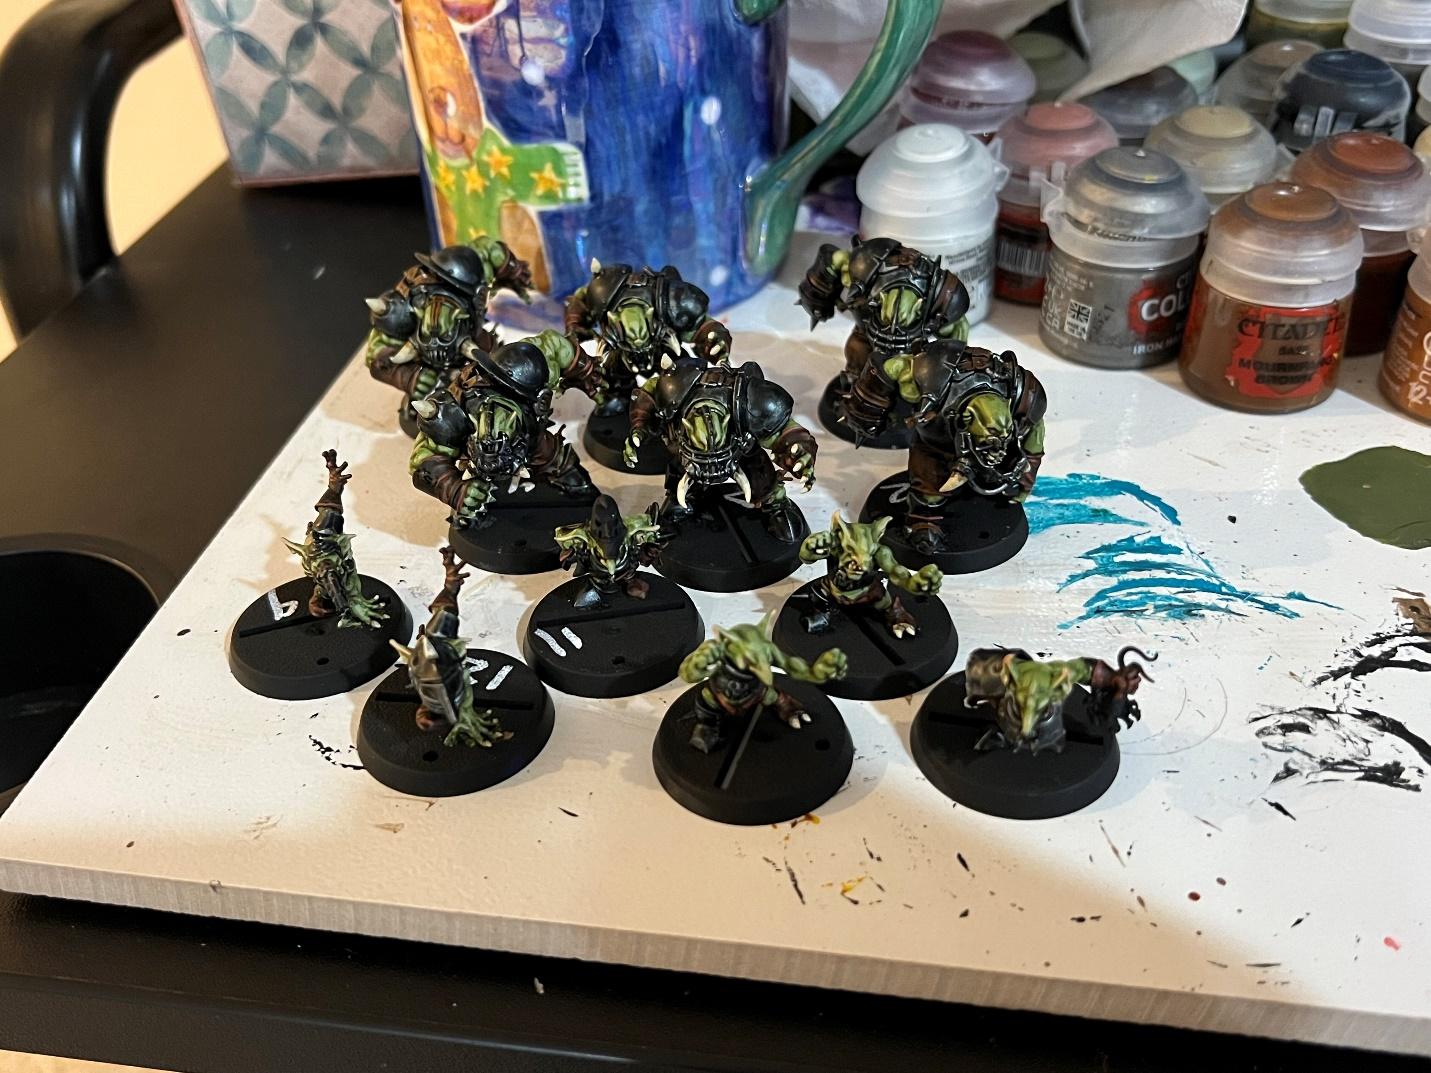
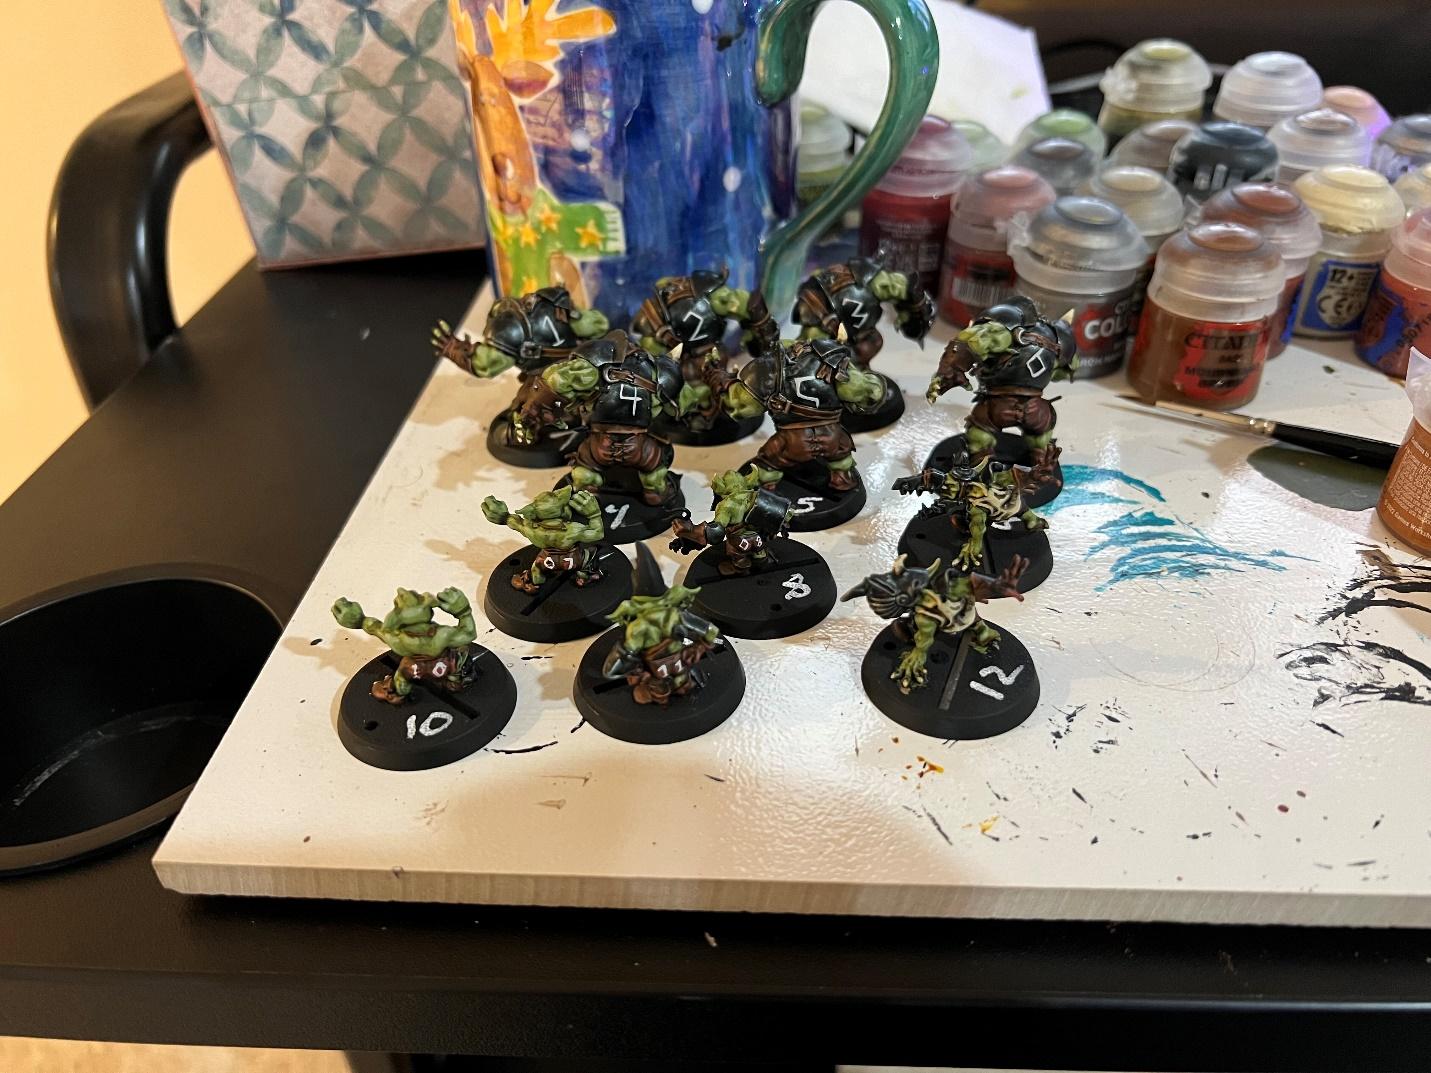
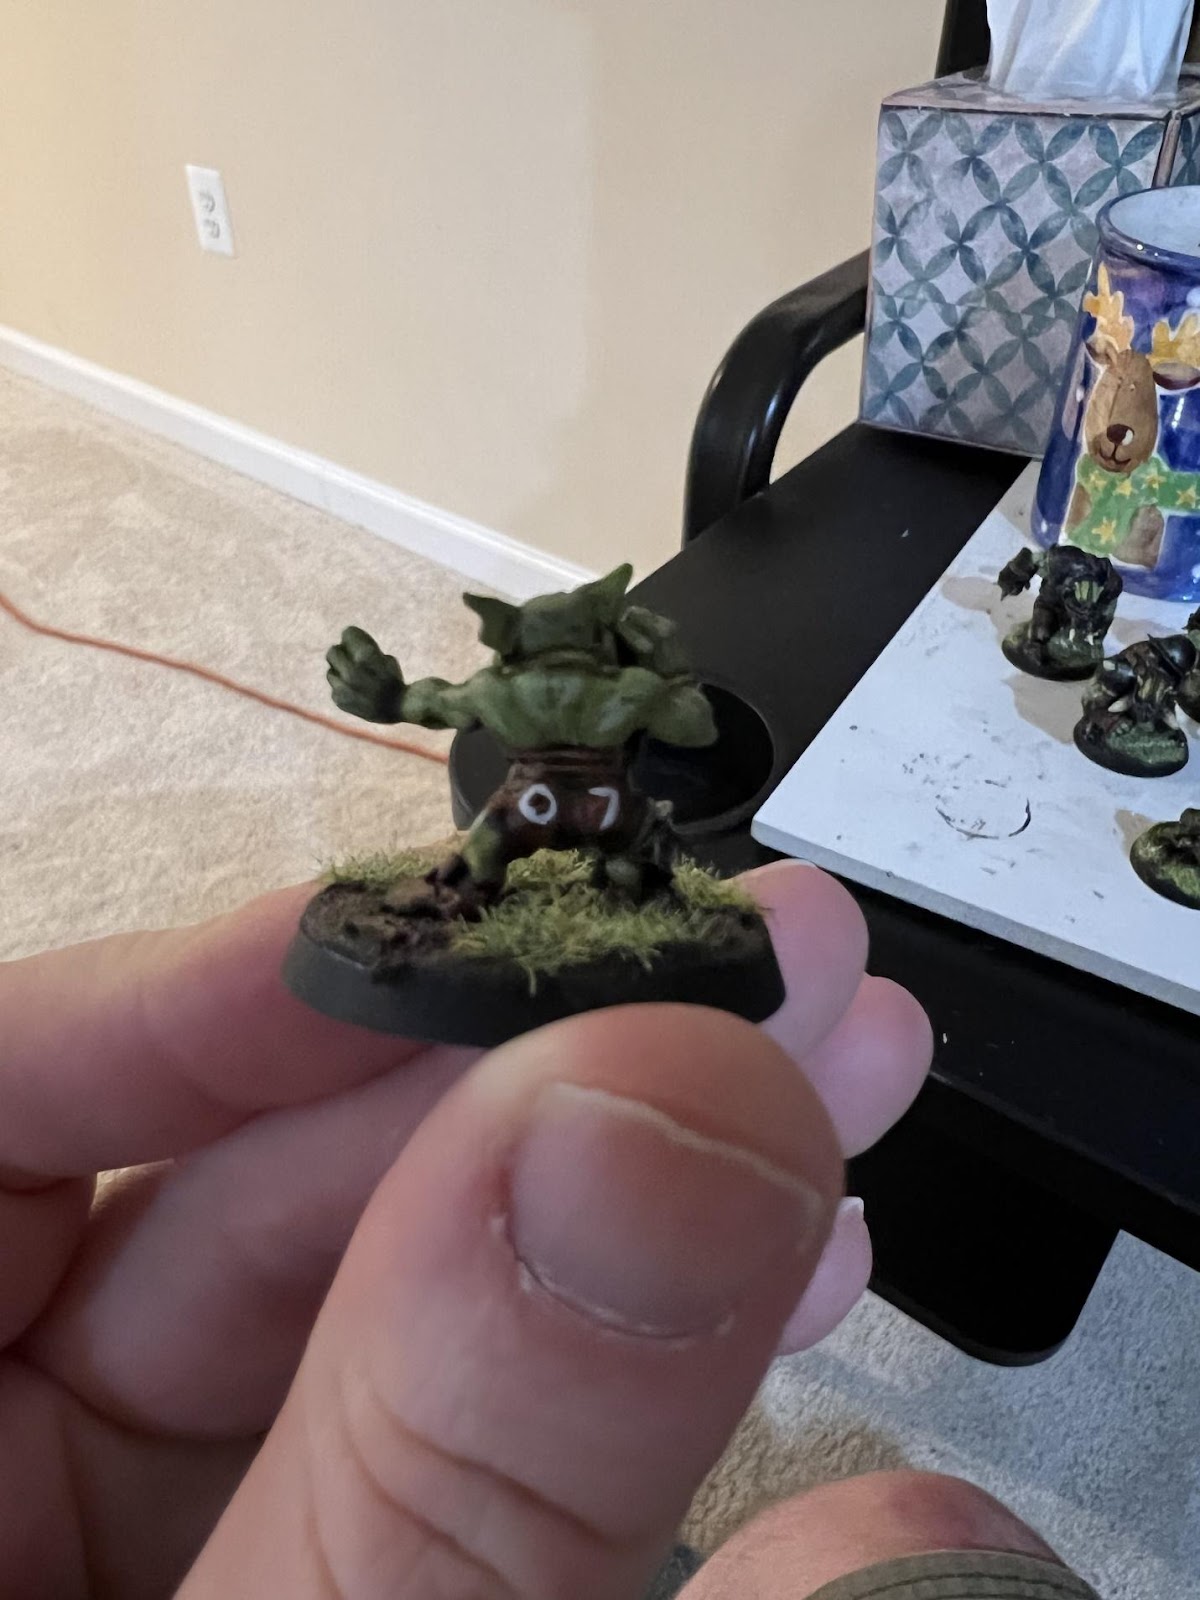
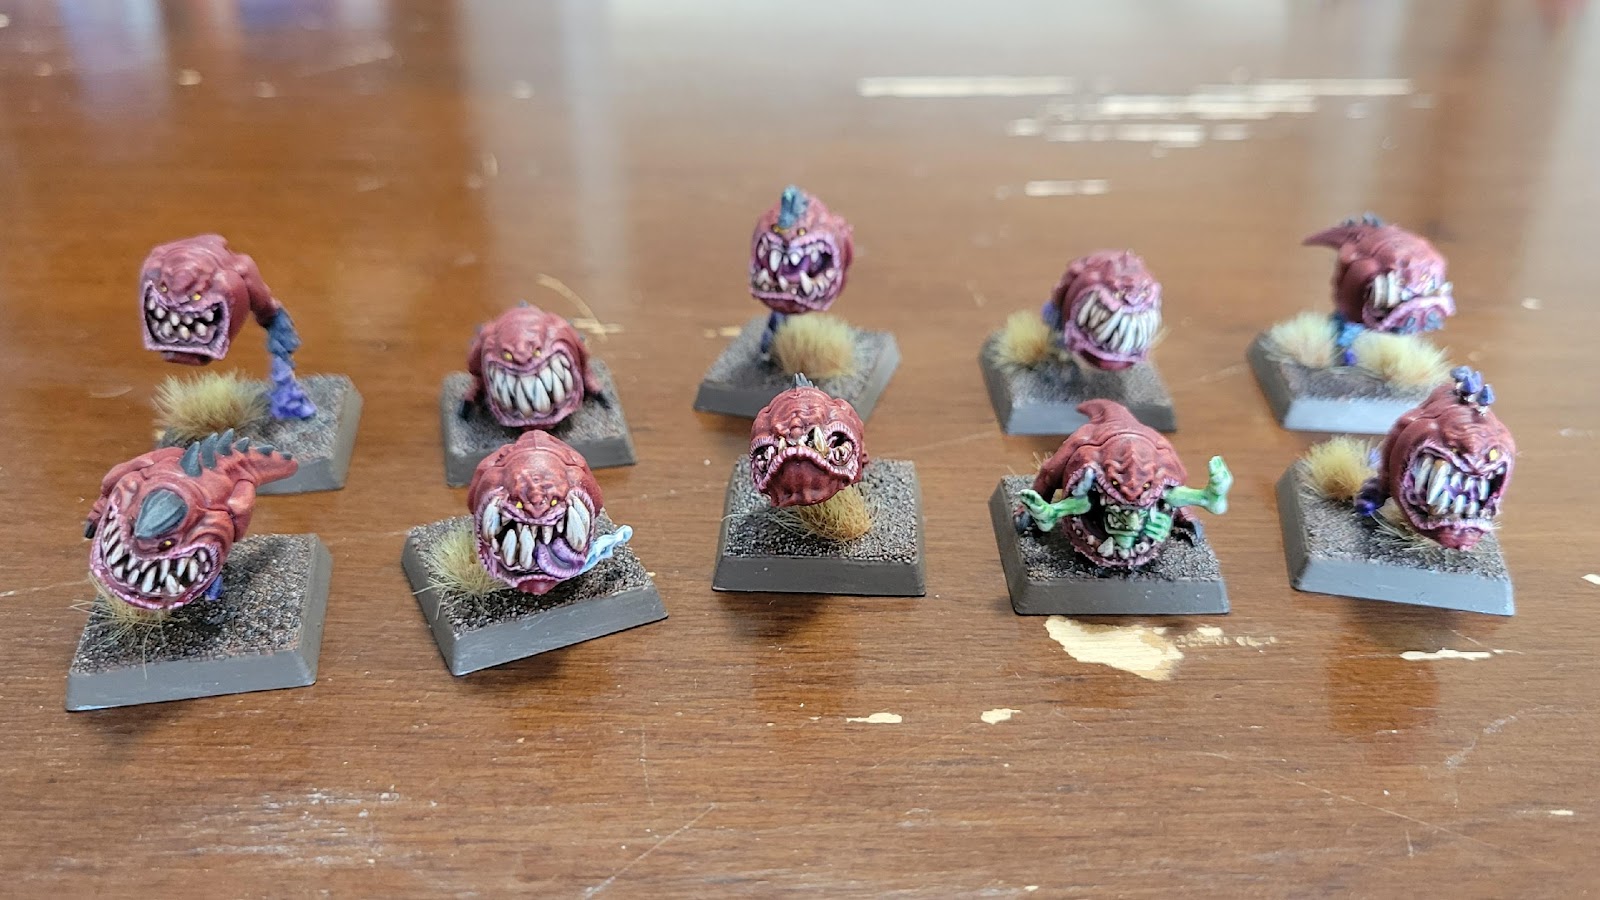
-10 Squigs, 5 Squig Hoppers, and a Big Boss on Squig, all for The Old World (and all that was done for that game…)

-A whole, rather large Bolt Action army in the First Special Service Force, which consisted of 80 infantry, 2 mules, 2 guns, and 4 vehicles and their crew, completed in a month. As well as another tank and a few accessory pieces completed for the British (which I may have not shown off, oh well…)

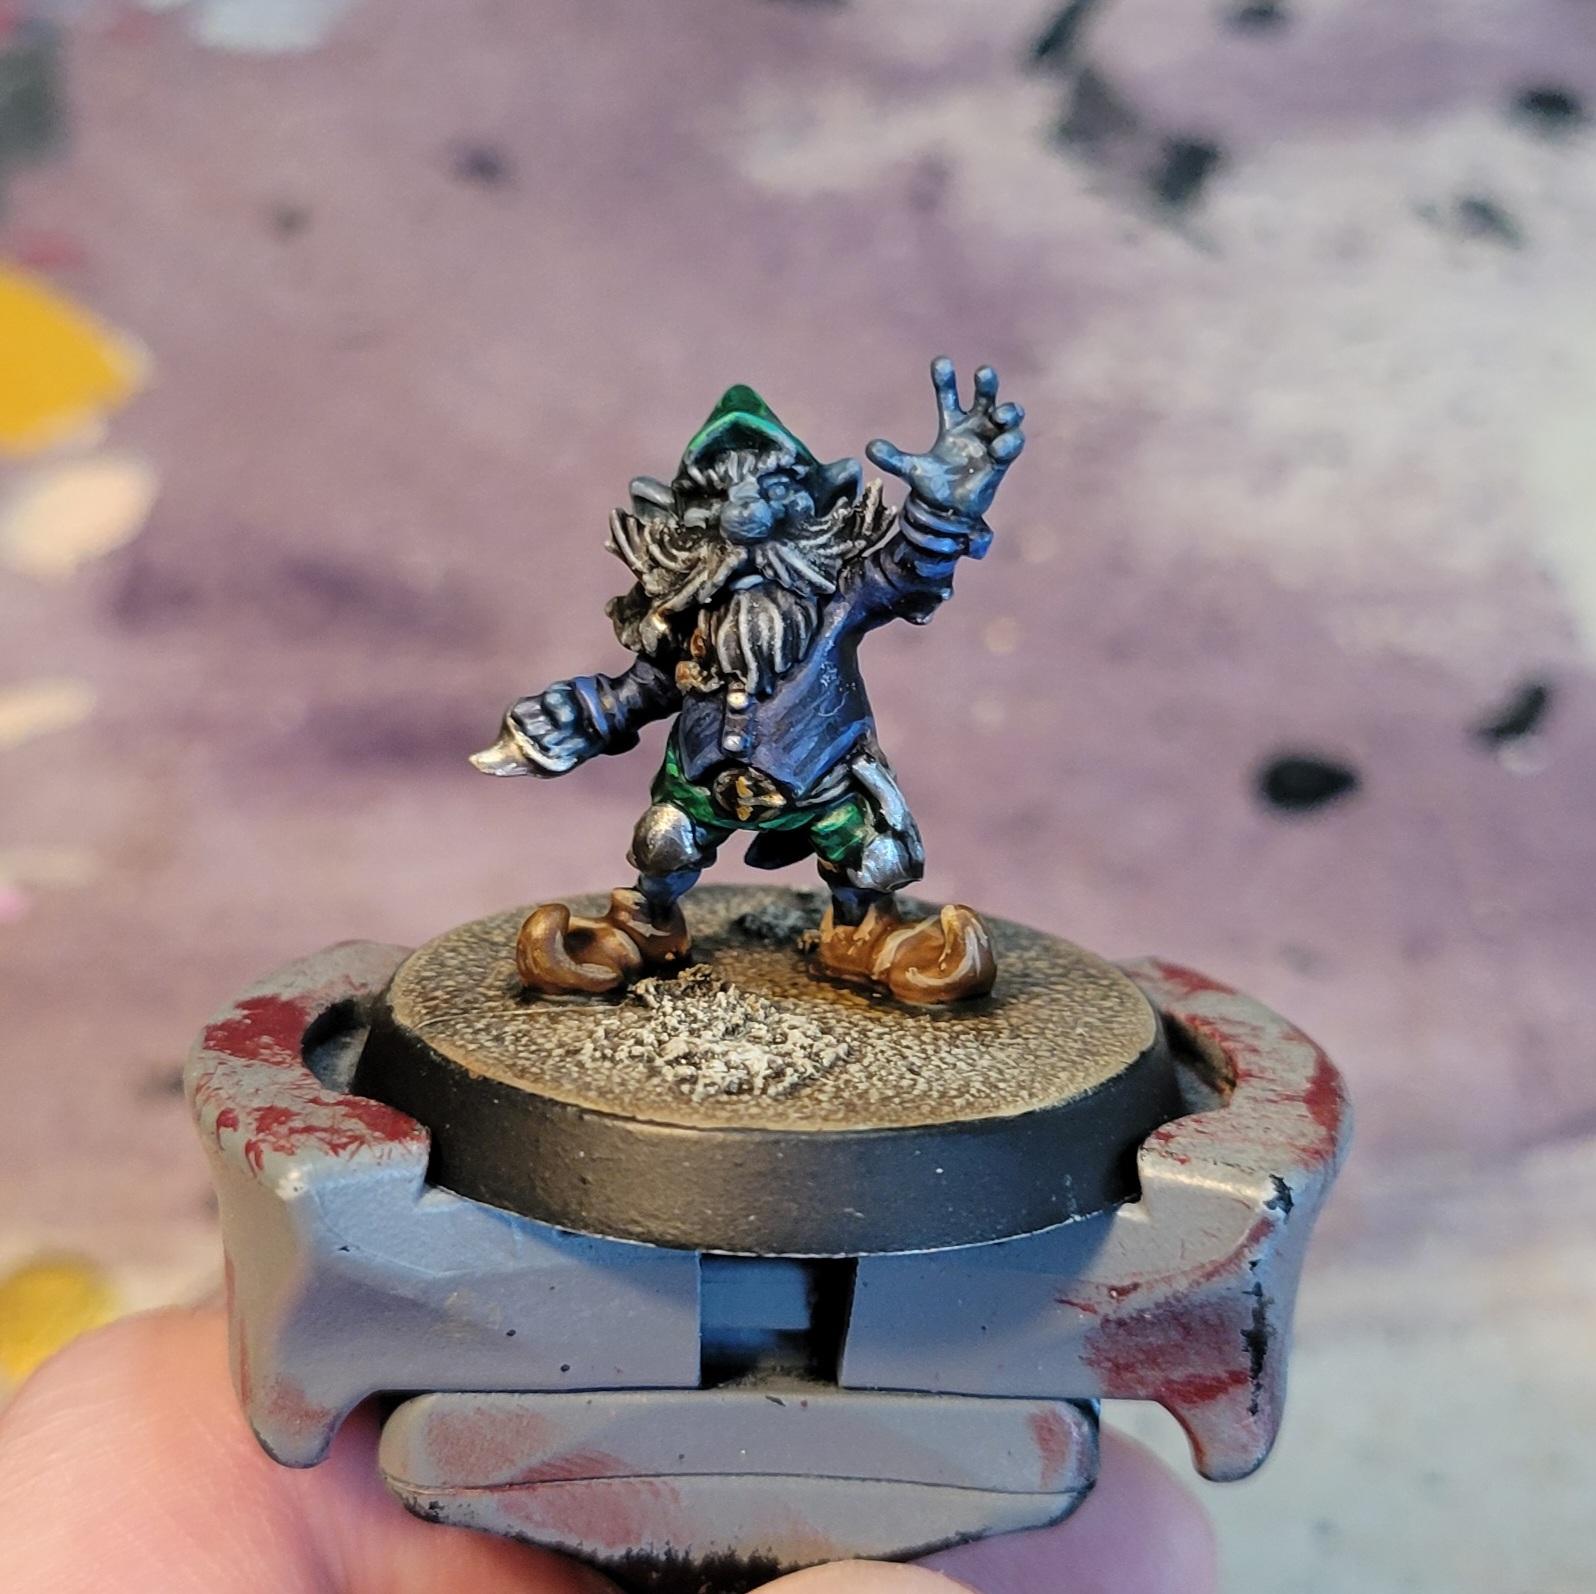
-Three whole Blood Bowl Teams (Shadow College, Gnomes, and Vampires), and a small selection of Star Players and accessory models.

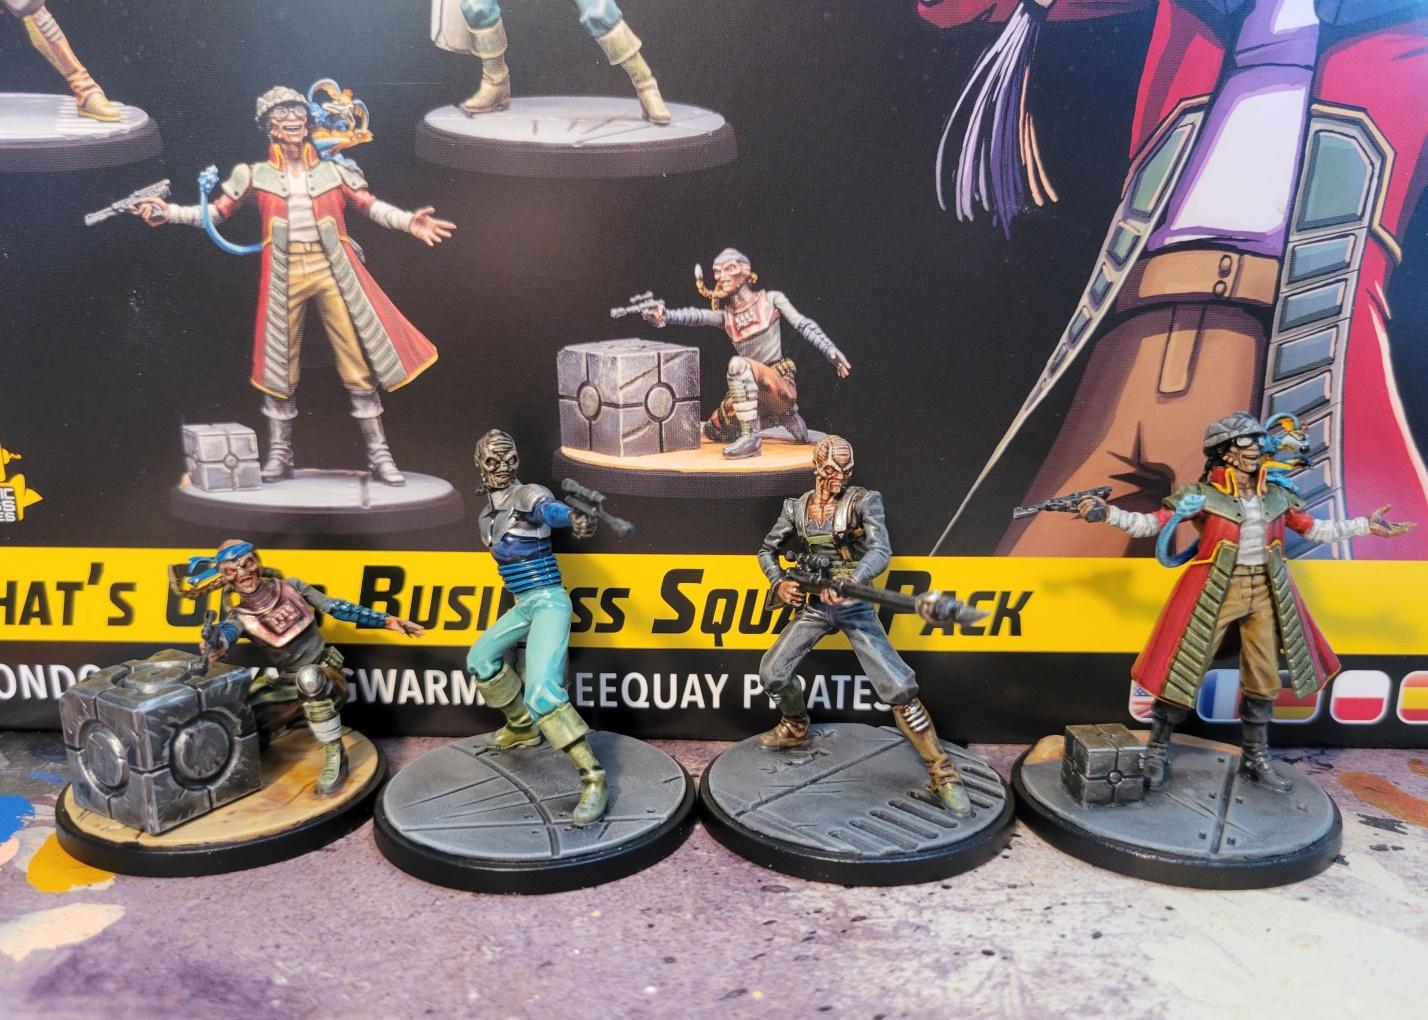
–A staggering 46 models for Star Wars: Shatterpoint, in an eclectic mix between Rebels, Imperials, and some Scoundrels.(Though I still haven’t finished those Ewoks…)

-A small handful of Necromunda models.

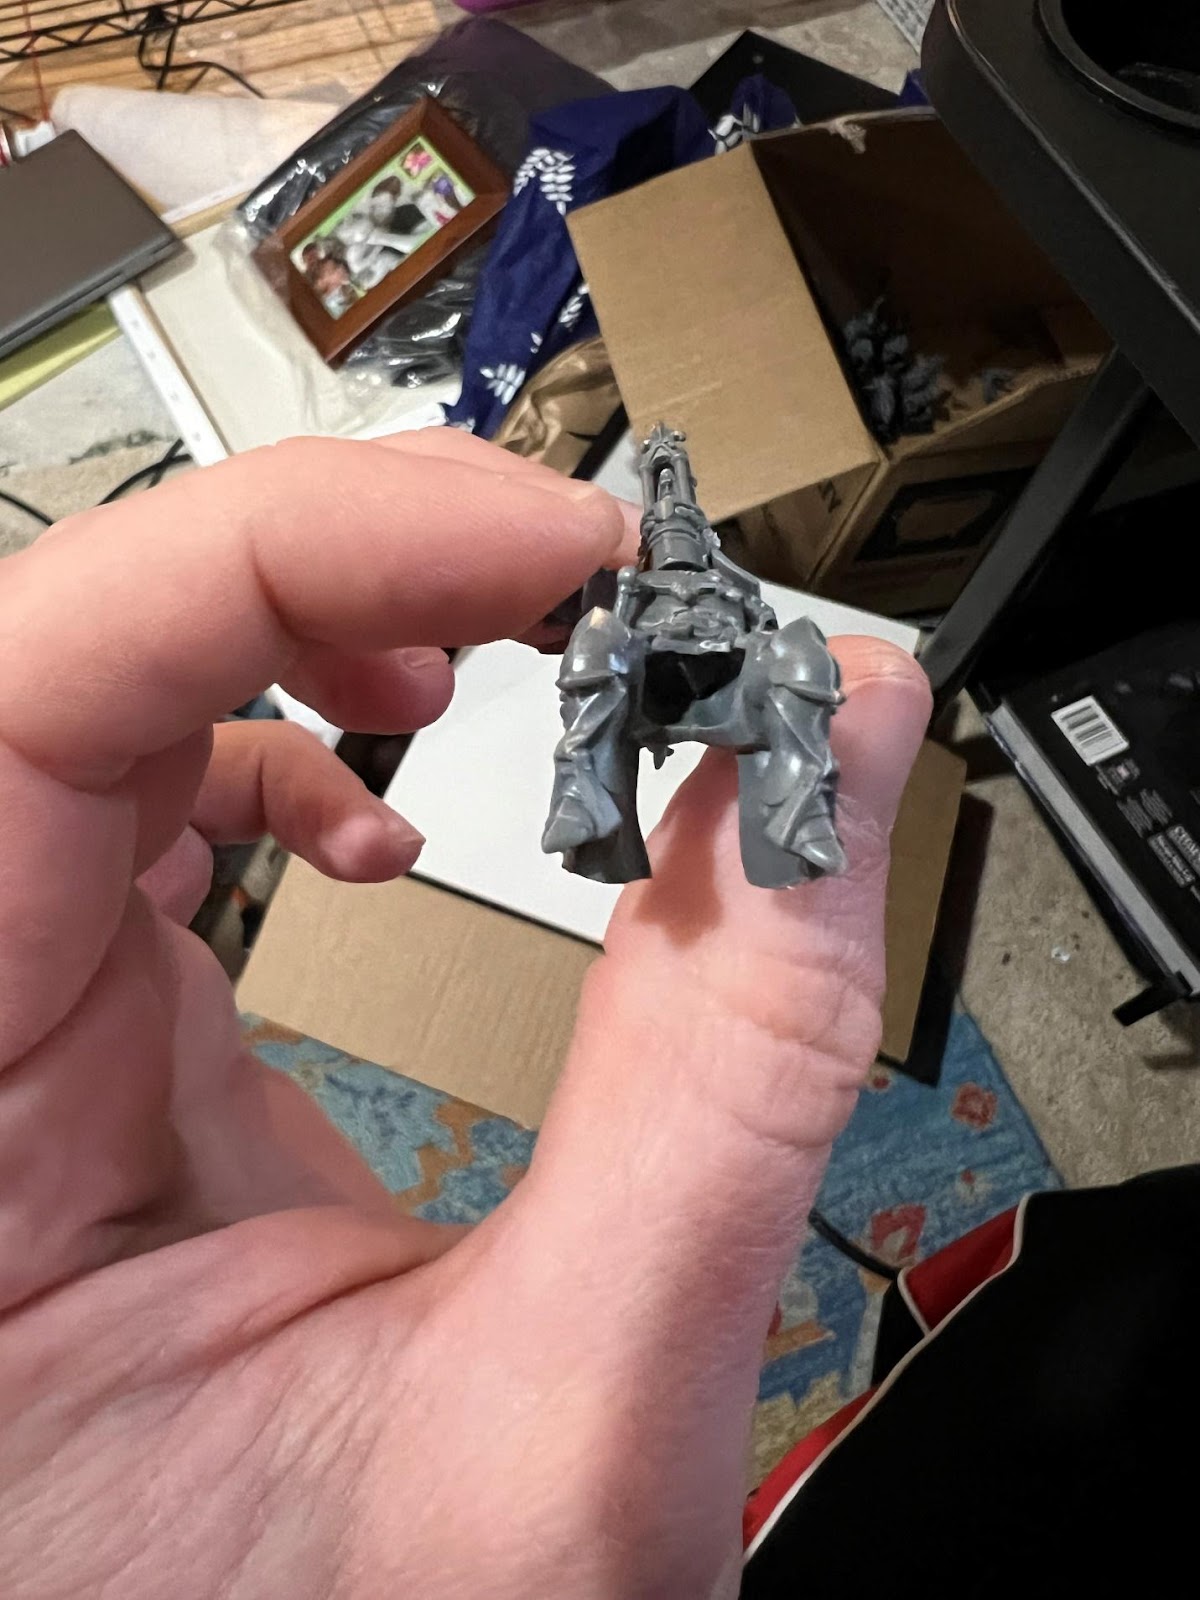
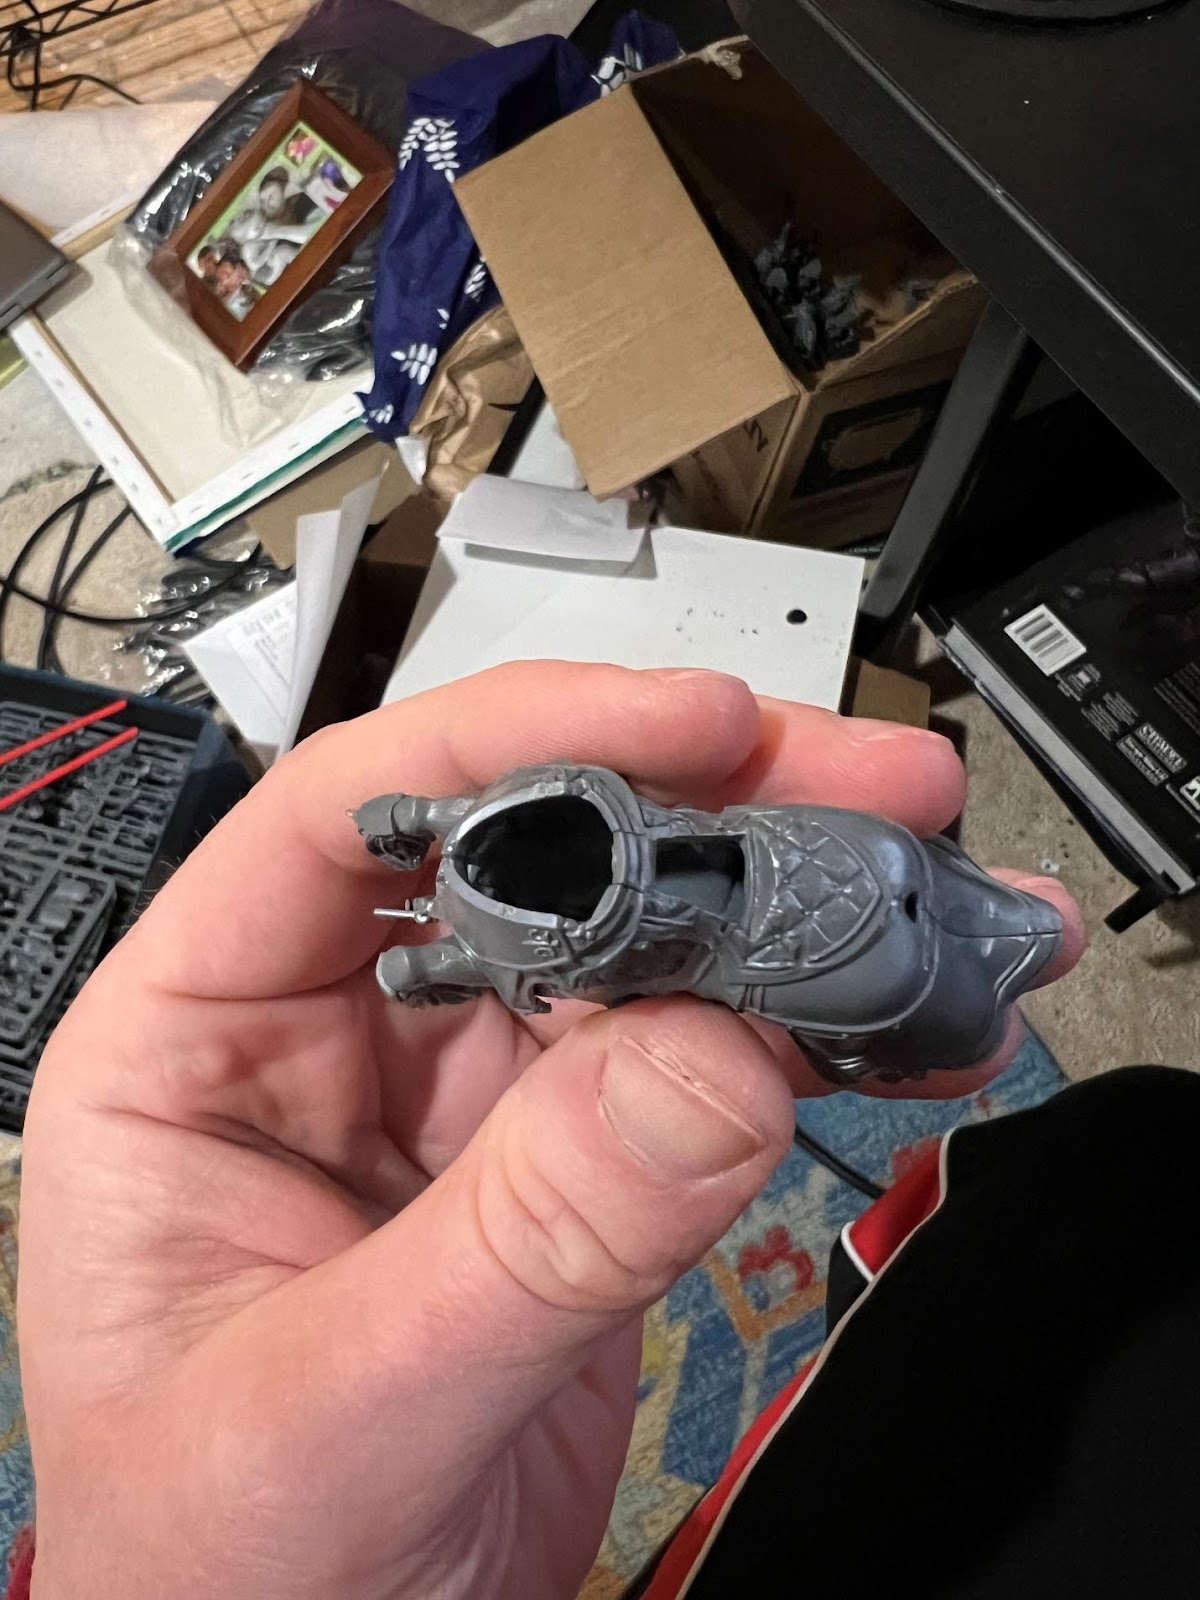
-Two random mechs? Haha!

-48 Landwehr and some Commanders for my Prussians (most of those never made it on these posts either, woops! Maybe when I do another army update… I also have some cavalry in progress, so perhaps they’ll make it in the next posts in January or Feburary!)

-Plus the above 8 models for MESBG!

I have also built those several dozen German infantry and vehicles, also for Bolt Action, but painting has been delayed as I reassess how I plan to actually paint them, unhappy with my few test models thusfar (hence why they haven’ty been shown). That, and the army book coming in late January means the army will be getting some revisions and new additions.

So my hobby progress has been very mixed, jumping around as I usually do.But it’s still fairly impressive. I certainly managed to churn out more in some years prior, when I was less busy (or at least pretending to be), but I am happy with how far along I have come on some projects, such as the Prussians and my ever-growing Shatterpoint collection; very happy with what I’ve completed, in the various Blood Bowl teams, and especially the FSSF; and fairly interested in what I have planned for the new year. Though I won’t spoil too much of that just yet…

As for my favorite model of the year, it was a bit of a three-way tie for me between Lando, Legolas and Gimli on horseback, and Darth Vader, but I have to say that the Darth Vader I painted way back in June remains one of my most impressive models. It was really fun trying to get some subtle differences between all the different blacks and really make the miniature read and pop without looking too dull, and I am very happy with what I was able to achieve with such a reduced color palette. 

I’ll leave you all on that. Happy New Year! Hope to have more for you in the next!


Kevin C.

Dismounted Warriors of Rohan

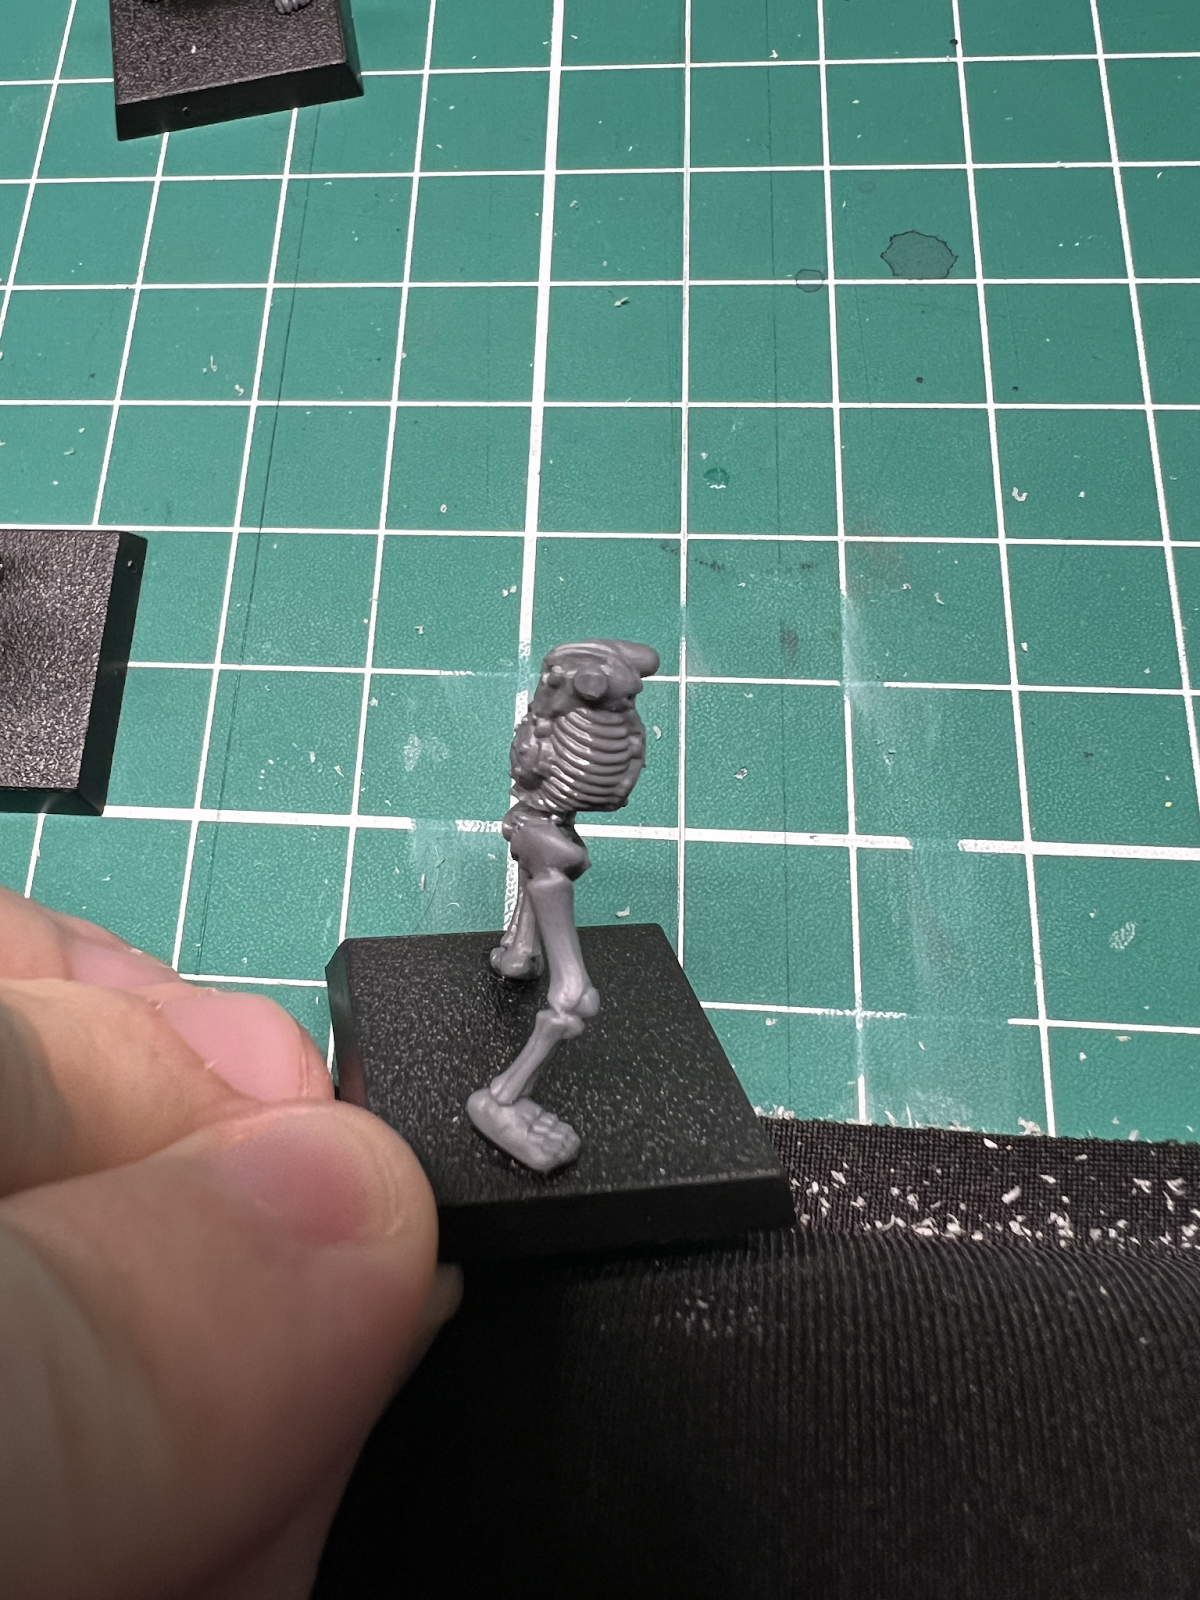
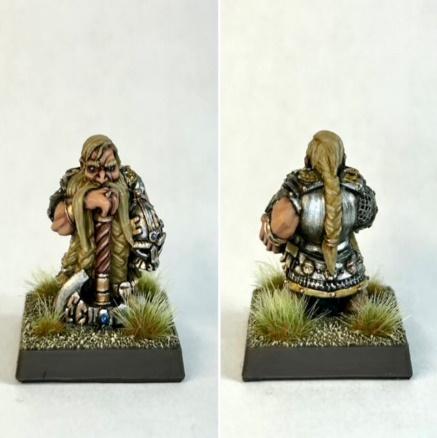
I had a lot of older Rohan miniatures that I purchased from a friend, and I figured I should finish painting them before getting new Rohan miniatures. These miniatures were quite old – one even had a broken spear point – but I was determined to paint them in the same scheme as the riders. While they are not my best work, they will be good pieces to have in a scrap.

Hail Theoden King!

My friend ended up selling me not one, but TWO Theoden sets (so four miniatures total – two with helmets, two without helmets). I decided to do a little experiment in painting tutorials.

In my painting, especially this year, I use a lot of online painting tutorials. My academic conditioning has trained me to be as forthright as possible in citing them. There are two online painters that I have used, and they both happened to have painting tutorials of Theoden – Warhipster with Contrast+ (https://youtu.be/HYLbQpBF1fI?si=kic1rImVIe4m3X0W), and Pete the Wargamer (https://youtu.be/4vVjtCGy9RY?si=ByF2r_g0mJrcmhP7). I’ve used Warhipster for some of my terrain pieces, and I’ve used Pete for some of my earlier Blood Bowl teams. So, I figured I would compare the two and see how I felt about the results.

For the helmeted version, I used Warhipster. Admittedly, I was nervous about the free use of contrast paint all over the place, and it made it hard to control much of the borders between colors. That being said, I really loved how the miniature turned out, especially the steed.

I used Pete the Wargamer for the unhelmeted version of Theoden, which I suspect was made before the advent of contrast paints, as none were used. I was less pleased with this result, and I found it more frustrating to paint in his style. A lot of this frustration was due to hard-to-reach places and difficult effects to accomplish, such as lightening the raised designs of the armor.

All in all, I believe I liked the Warhipster scheme more, and so I used his method for some of the other miniatures I painted this month (more below).

Eowyn and Merry

I only had one set for Eowyn and Merry, so I decided to wait until after the experiment and copy which paint scheme I liked best. Even though Warhipster did not have a video tutorial for this specific miniature, I used his scheme for the horse, and more or less copied the method I used for the regular Riders of Rohan for Eowyn and Merry.

One thing I did change from the film adaptation is that I maintained all heroes’ horses as white. I plan to continue this with Haleth, Hama, and Hera (coming soon!). This is different from the films, which have the heroes on all different color horses, but I want this to be a visual cue for me when playing pieces on the board.

Battle of Edoras

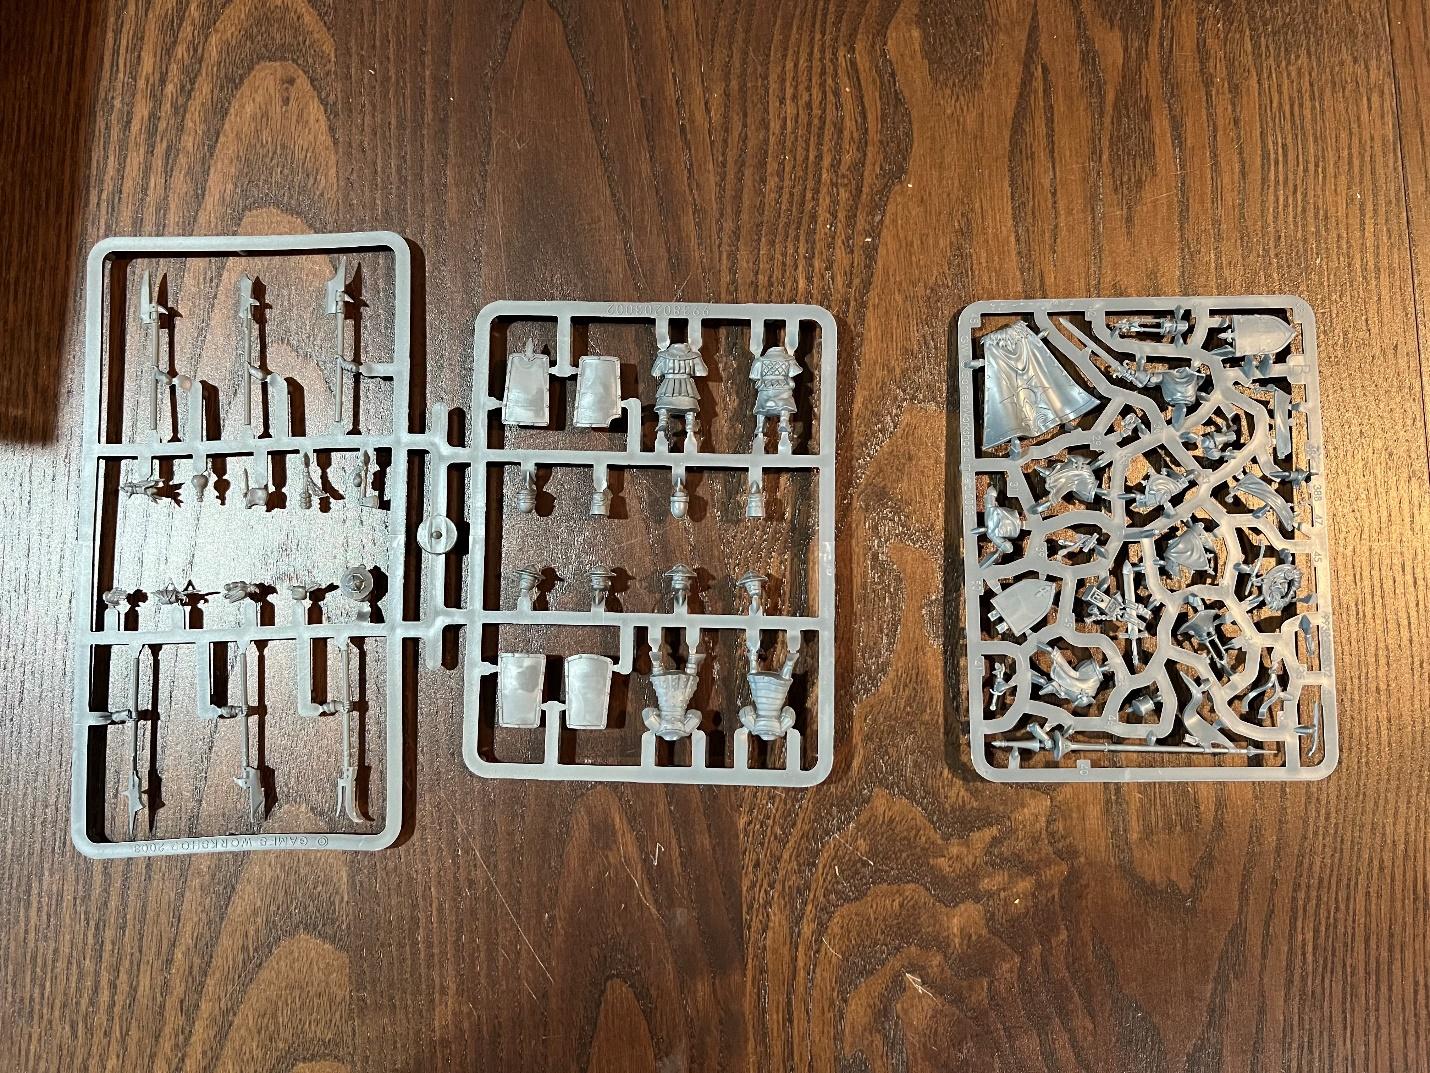
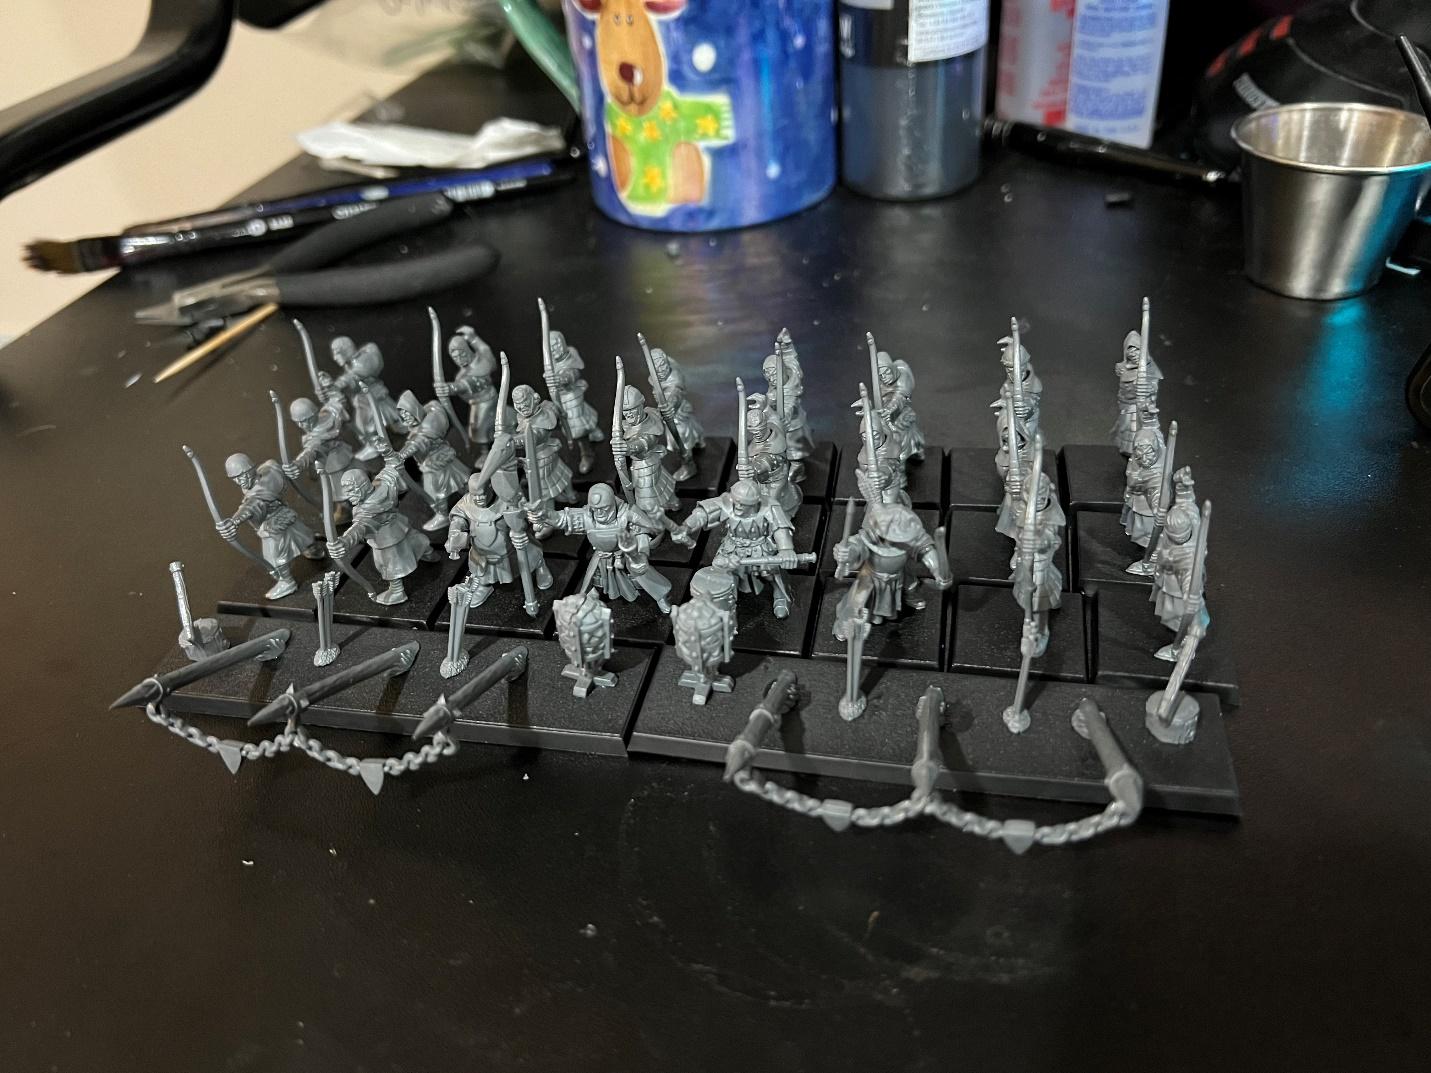
As a “reward” to myself for finishing the whole Rohan army, I was able to pick up a boxed set right when it was released. I had these guys assembled practically hours after receiving them, but it just so happened that we had more than a week of miserable rain, sleet, and otherwise yucky weather, preventing me from priming them.

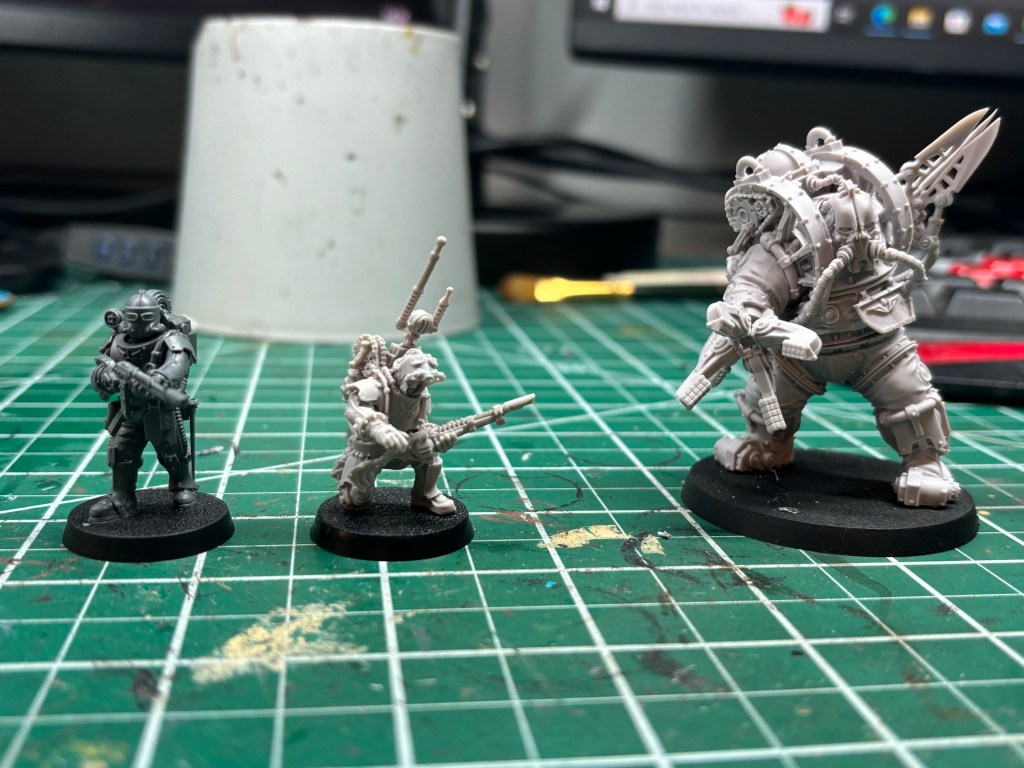
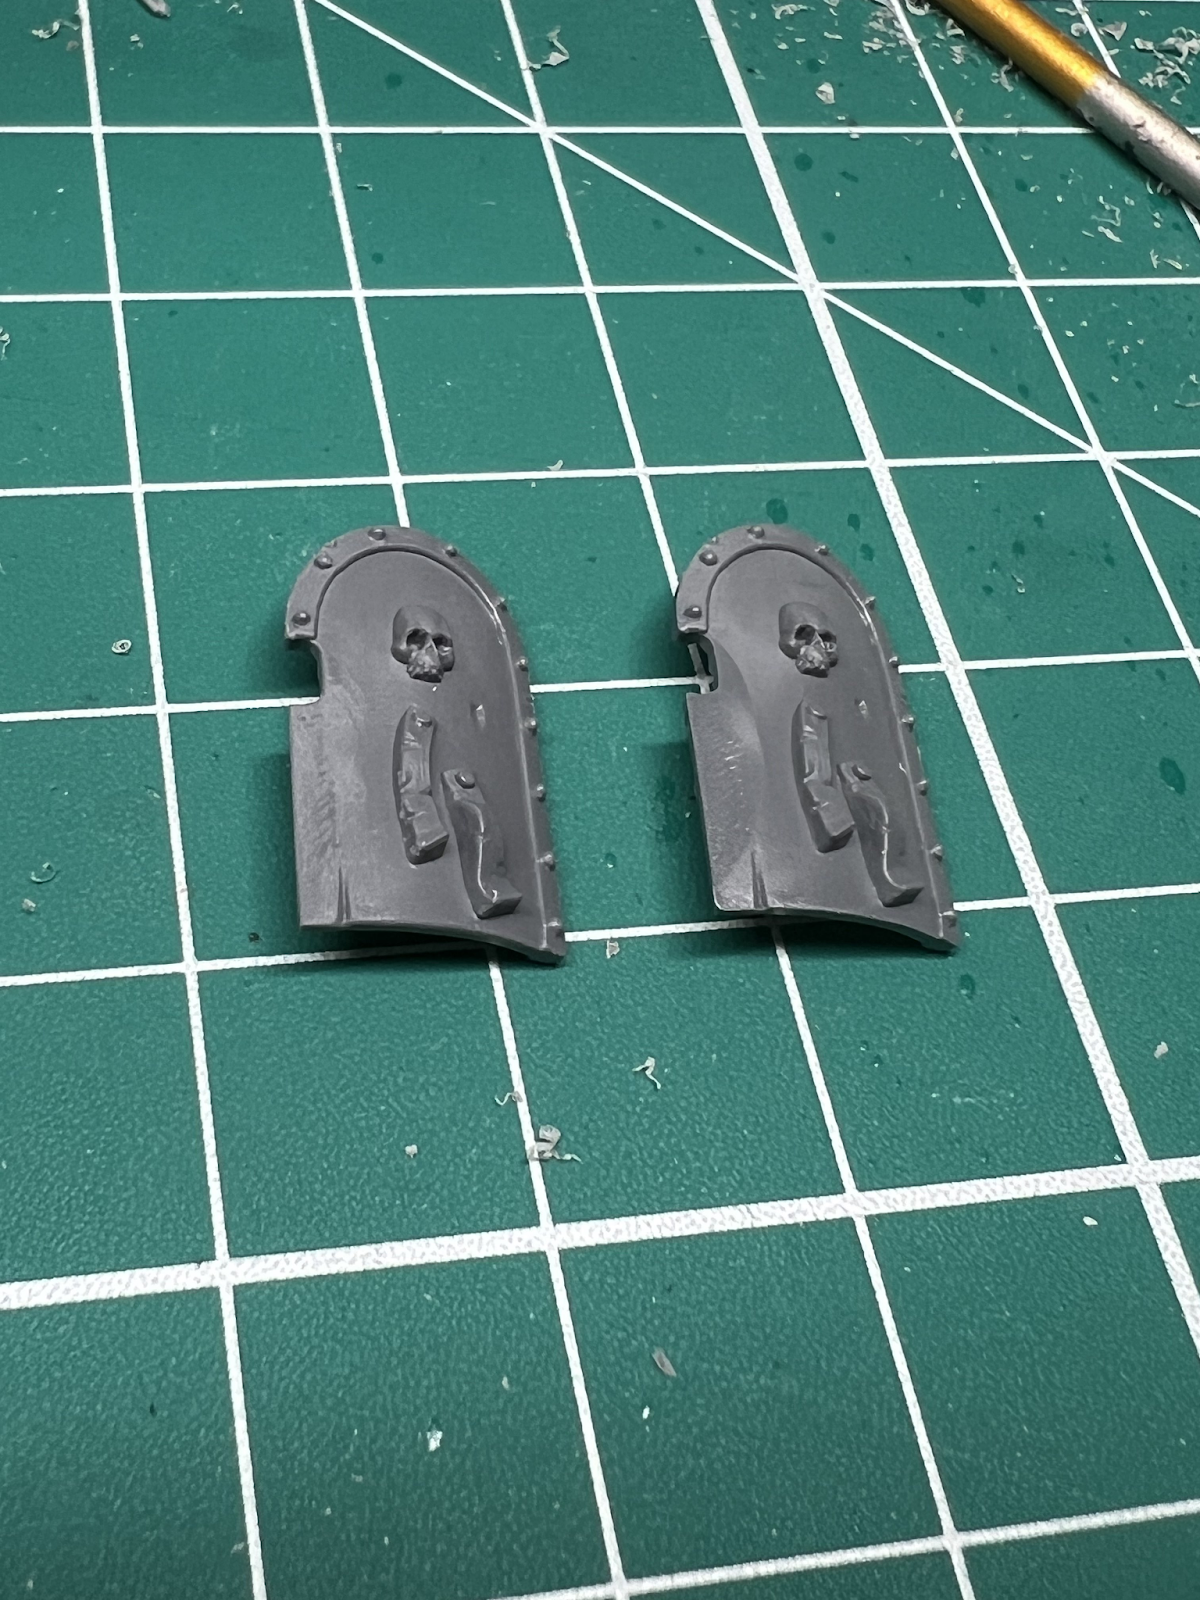
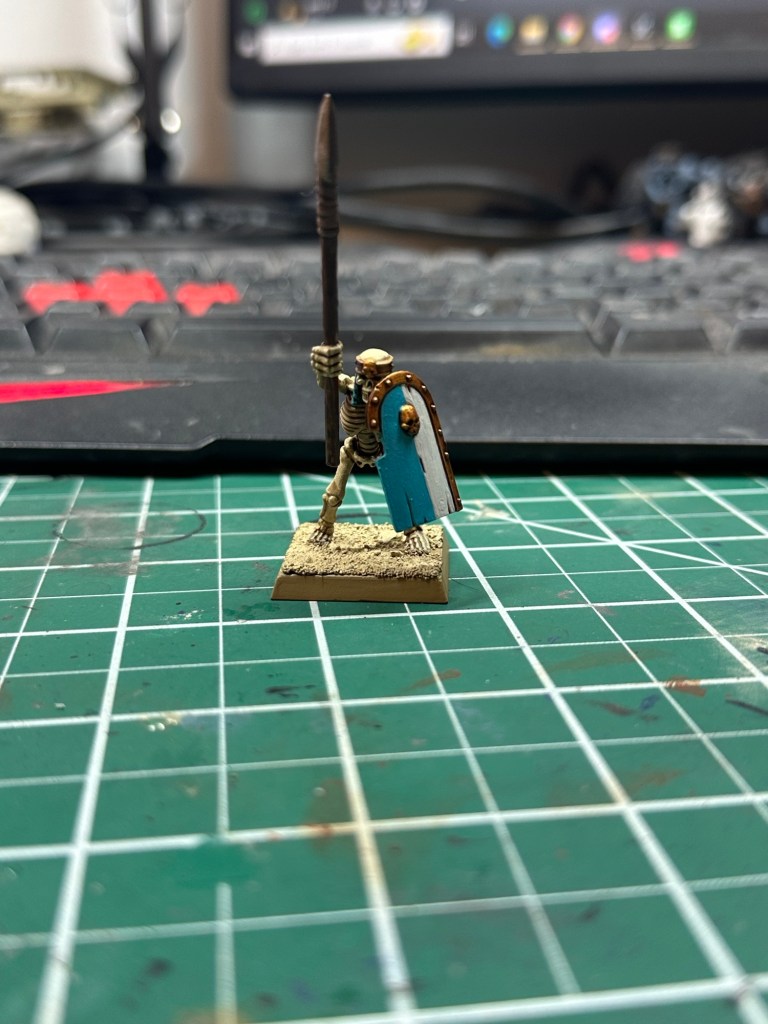
I finally did prime them right before Christmas, and I am excited about painting them next month. As an interesting study, I compared one of the new footmen to one of the old ones that I had just completed.

The new ones are clearly more detailed, and just seem much more interesting in scale and posture. I am sad I didn’t have the time to paint these guys this month, but I am excited about having them finished next month.

Gaunt’s Ghosts

While I wasn’t able to finish my Rohan Warriors in time, I was able to knock something off of my shelf in the meantime – my Gaunt’s Ghosts. I have had these guys on my shelf since June 2021, so it was nice to finally complete something extra for me.

As I discussed earlier, I decided to use the Warhipster video tutorial on how to paint these guys (https://youtu.be/MqviEDV03SU?si=GfGTk256Gzi0KGhO). I admit that I was a little disappointed with how the video was laid out. There was a lot of screen time spent on applying the layer, and not a lot of time explaining how one should paint the deviations from Gaunt and Rawne (the two that got the most screen time).

I still think I did a decent job, but I was hoping they would be fantastic. Instead, they are okay, and I am glad that I have them ready to play.

Now, if I could only use them in an actual Kill Team…

Year in Review

I have done more painting in 2024 than any other year previous, which is quite an accomplishment. I have assembled and painted two full armies, nearly completed a third, and gotten a lot of painting projects off my chest. All in all, I painted over 350 miniatures this year (counting those LI infantry 5-on-a-base as one miniature, by the way). 

  • Assembled and painted the entire Bretonnian Army Box
    • 12 Knights
    • 3 Pegasus Knights and Lord on Pegasus
    • 24 Archers
    • 32 Men at Arms
  • Assembled and painted a huge Legions Imperialis Army
    • Three boxes of Solar Auxilia (12 Sentinels, 12 Ogryns, and 48 Infantry)
    • Three Support Artillery Boxes (36 Rapiers, 36 Tarantulas, and 12 Cyclopses)
    • Baneblades, Malcadors, and Valdors
    • 19 Dracosans
    • 6 Lightnings and two Marauders
  • Assembled, magnetized, and painted Titan Maniple (Warlord, two Reavers, and four Warhounds)
  • Painted four Blood Bowl teams (Norse, Black Orcs, and two Halflings)
  • Painted Kasrkin Kill Team
  • Painted Rohan Host
    • 36 Rohan Riders
    • 12 Rohan Warriors
    • Theoden, Eowyn, and Merry
  • Random Terrain Pieces

That being said, I still have many other projects on my workbench, so my queue for 2025 is already full.

The Best

My favorite miniature that I painted this year was actually one that I never posted. Austin and I went halfsies on some Brutes for Necromunda, and I am really pleased with how mine turned out. Granted, it died on its first campaign game, but that’s how Necromunda rolls. 

The Worst

I have an unending hatred for that stupid Duke on Pegasus model. The paint scheme was eventually okay, but I really hated everything about this model – assembling, priming, painting. Glad it’s done with. 

What’s Next Year

As far as what I have planned for next year, I already have the queue figured out. 

  • Finish painting Battle of Edoras
  • Paint my remaining Necromunda miniatures (Cawdor and GSC) in time for our next campaign
  • Finish painting my old Deathwatch army (had this on my desk since 2016!)
  • Assemble Meduseld

I have a few more projects, but that will last me a while yet. I also got some new drybrushes for Christmas, so I am excited to try these out. 

Until next year!


Jerry S.

Solar Auxilia: No More Lasrifles, Please.

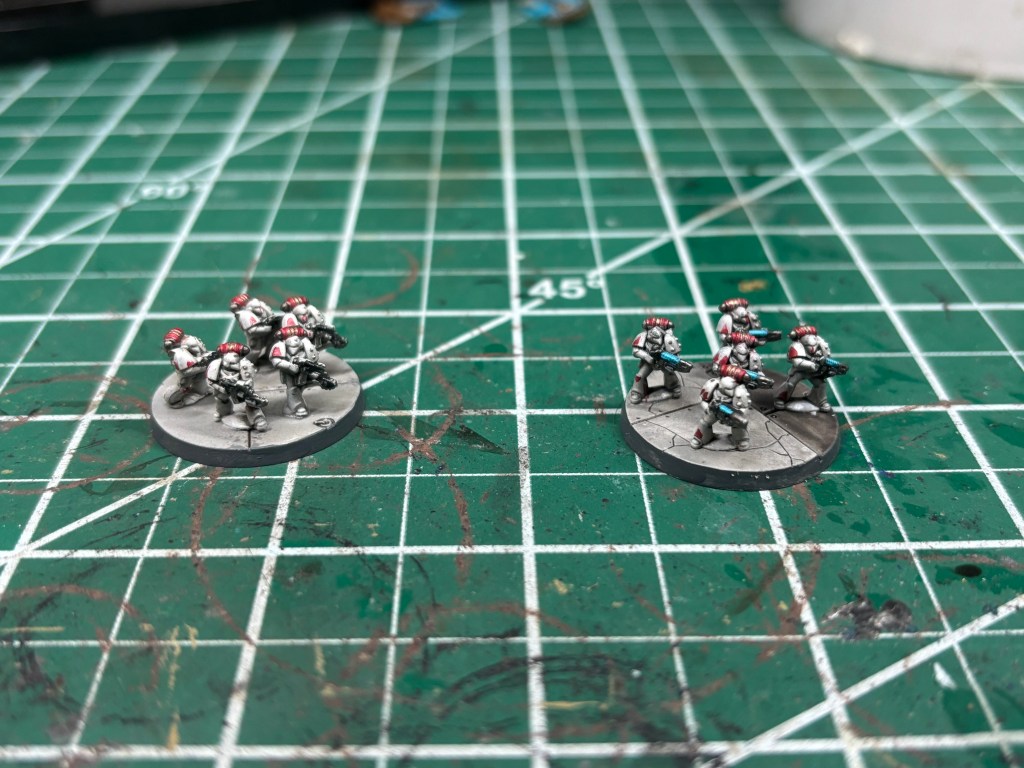
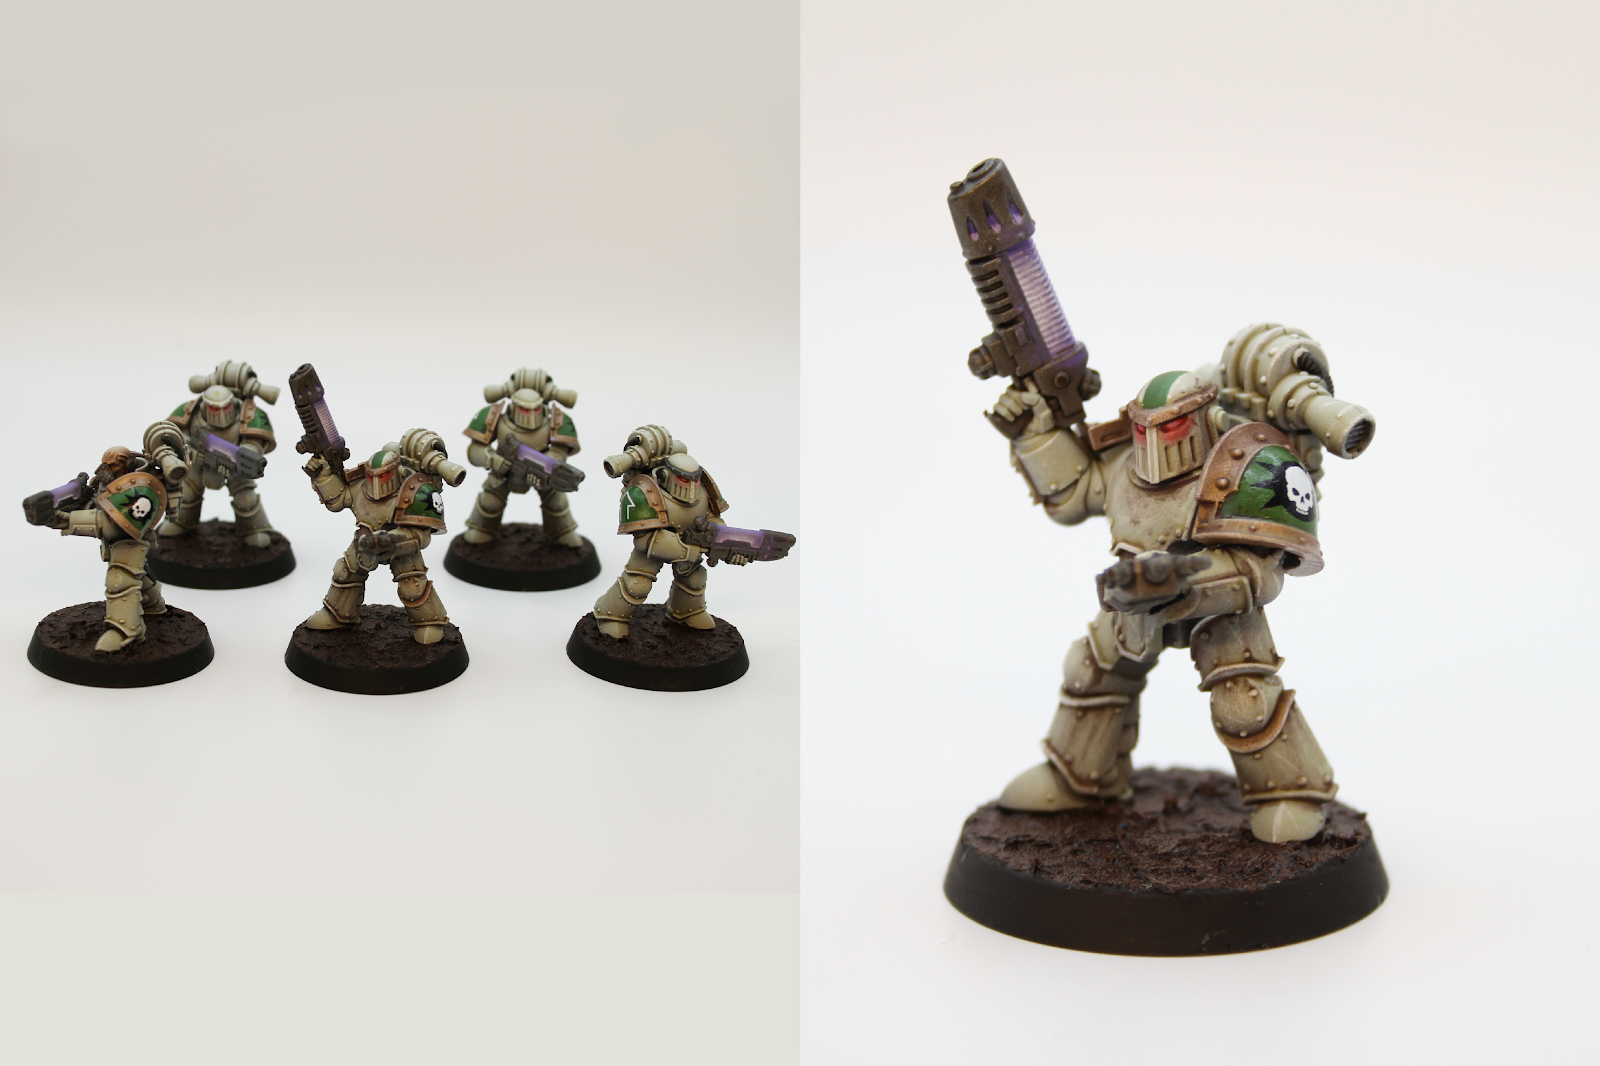
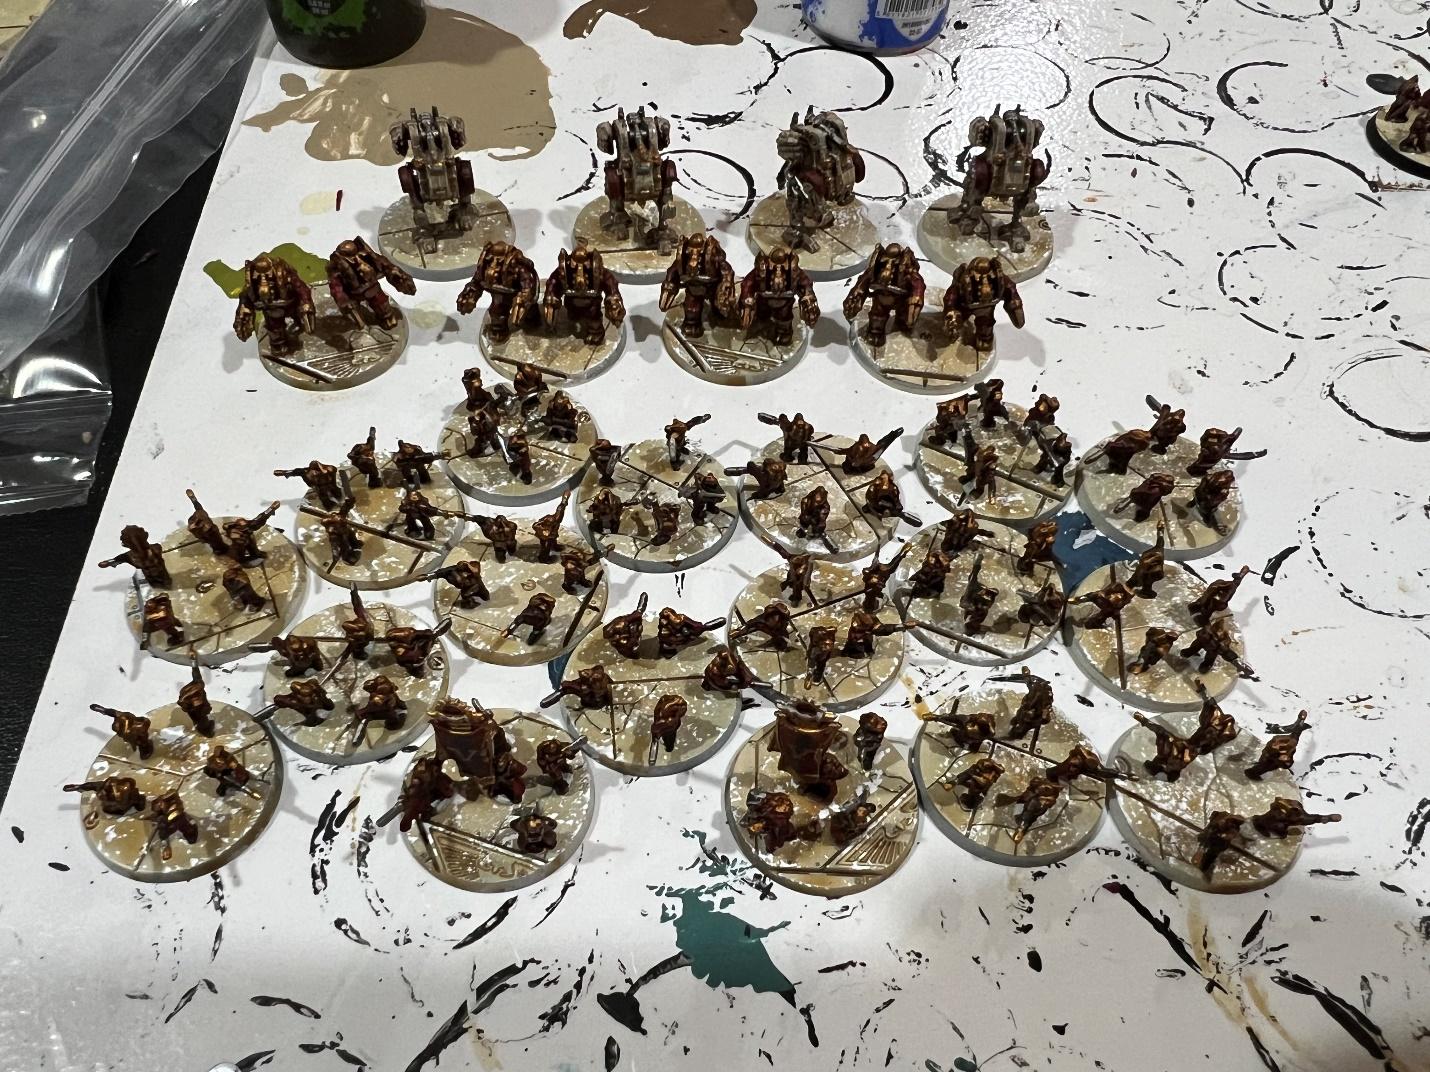
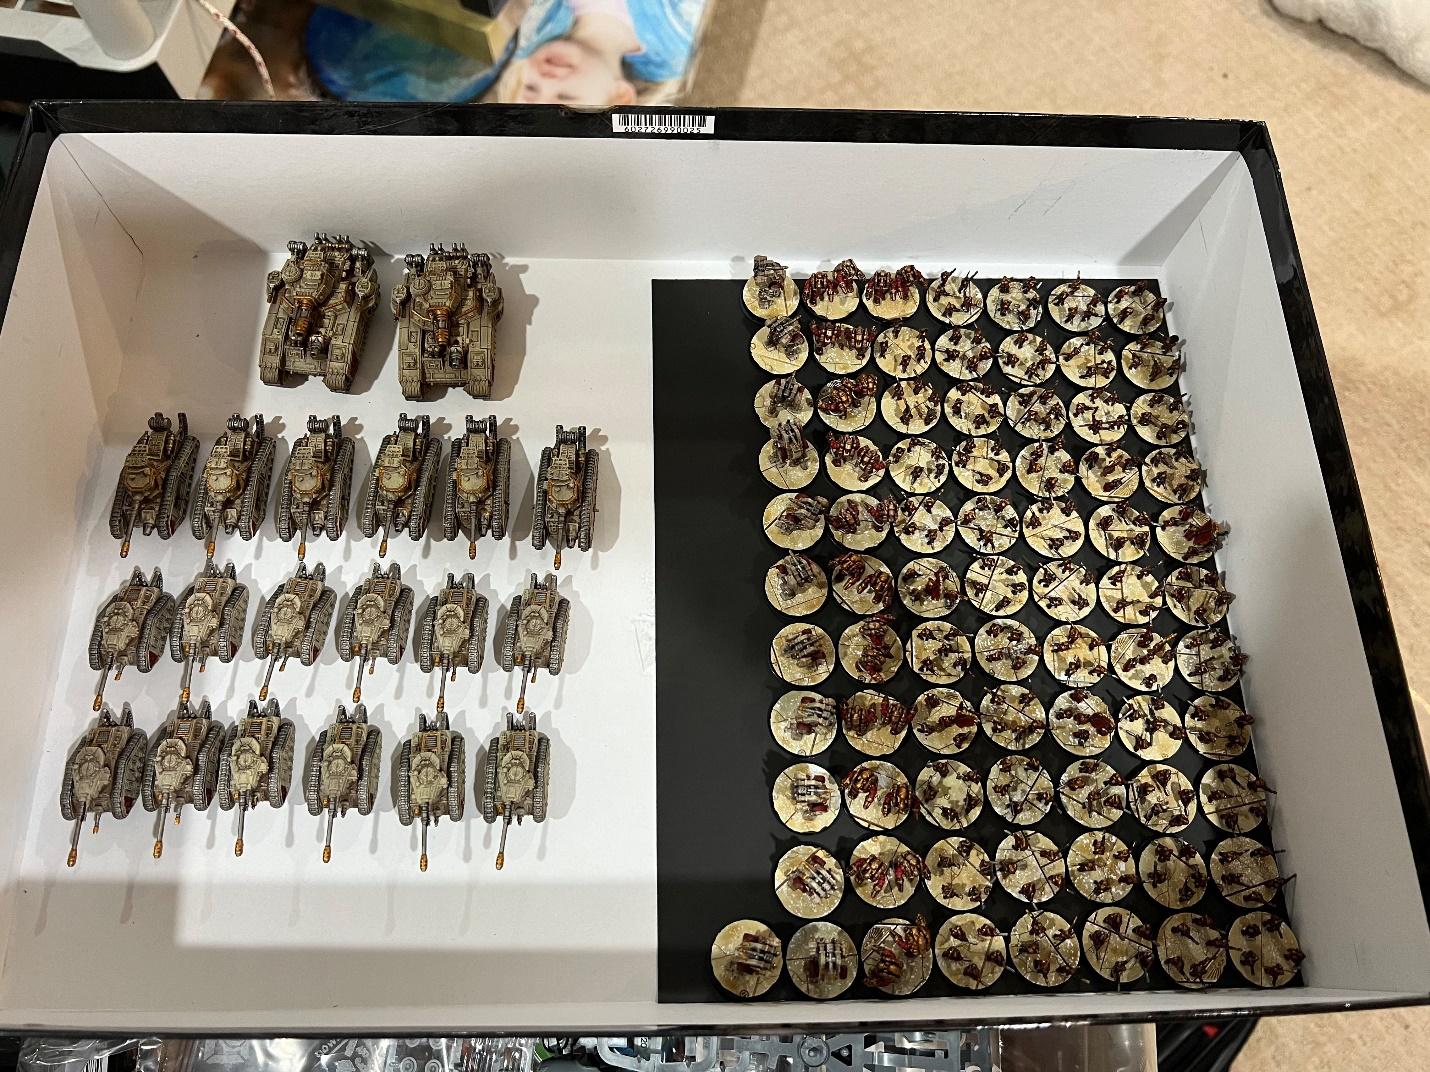
This year has been very exciting for me, the release of plastic Solar Auxilia has been incredible and I have enjoyed every minute of it. From building, to painting, to playing; my hobby journey with Solar Auxilia has been a blast, even if a little longer than I would’ve liked in the end. As you can see here, I was prolific in my Solar Auxilia painting, the total count of infantry clocking in at 115 models in just 8 months, wow! I was able to finish the last 20 infantry this month, something I am very grateful for as I think I am mentally done with this particular scheme for the time being.

I thankfully still love the muted scheme I created for these models, the dark blue coupled with the greys and worn metals of the fatigues and armor plating really lends itself to the so called “dark millennium” and I think really captures the dearth of hope that is to be found on the battle fields of the Horus Heresy.

Bolt Action

I’ve continued the progress on my Bolt Action American force this month, focusing on completing a couple more Weapons teams, a Medium Machine Gun team and a medium anti-tank team that will hopefully help keep my GI’s alive as they navigate the battlefield. I’ve always loved the idea of overwhelming the enemy not in bodies, but in firepower, just as the American Army preferred in WW2 and these last two teams really help accomplish that idea on the tabletop.

Continuing Adventures in Middle Earth

The last of my true hobby progress was again in the realms of Middle earth. I have along with several others, began forming a regular group of MESBG players at a local hobby shop, playing weekly on Mondays and beginning to attend/plan events across the region. 

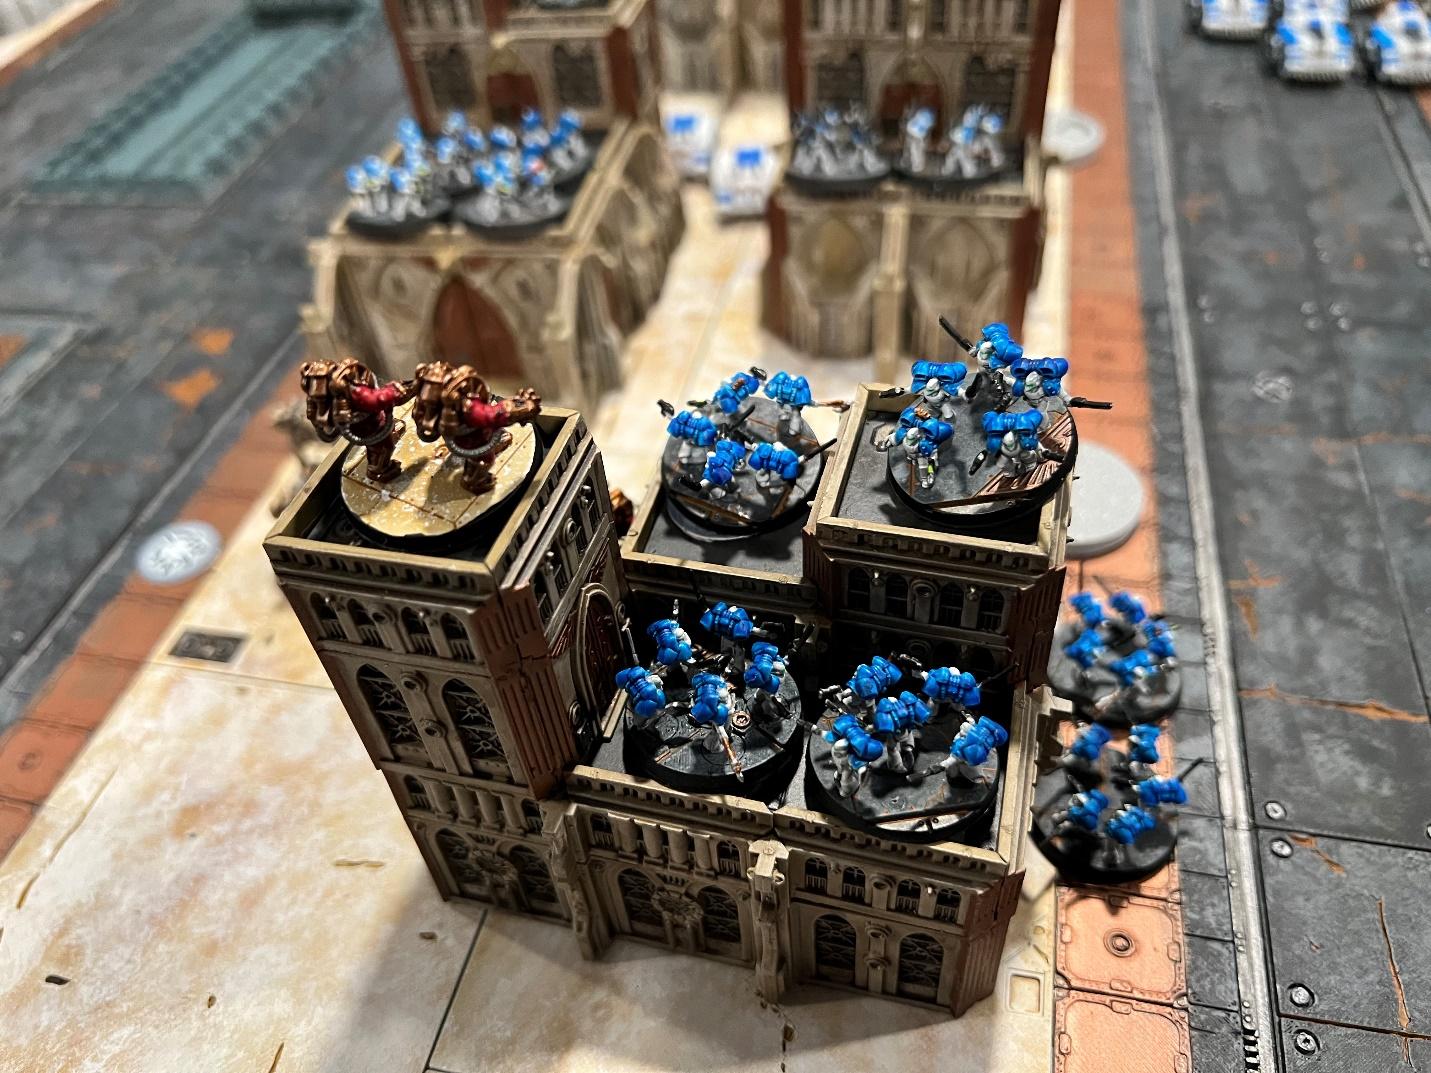
One of those aforementioned events was a Helm’s Deep mega-battle. With 6 people on each side and hundreds of minis on either side, this was a spectacle indeed. It was tremendously fun seeing the many, many models I’ve painted for both Rohan and Isengard featured on the tabletop together. Indeed the Hornburg was manned almost entirely by Rohan models I myself painted! How cool is that!

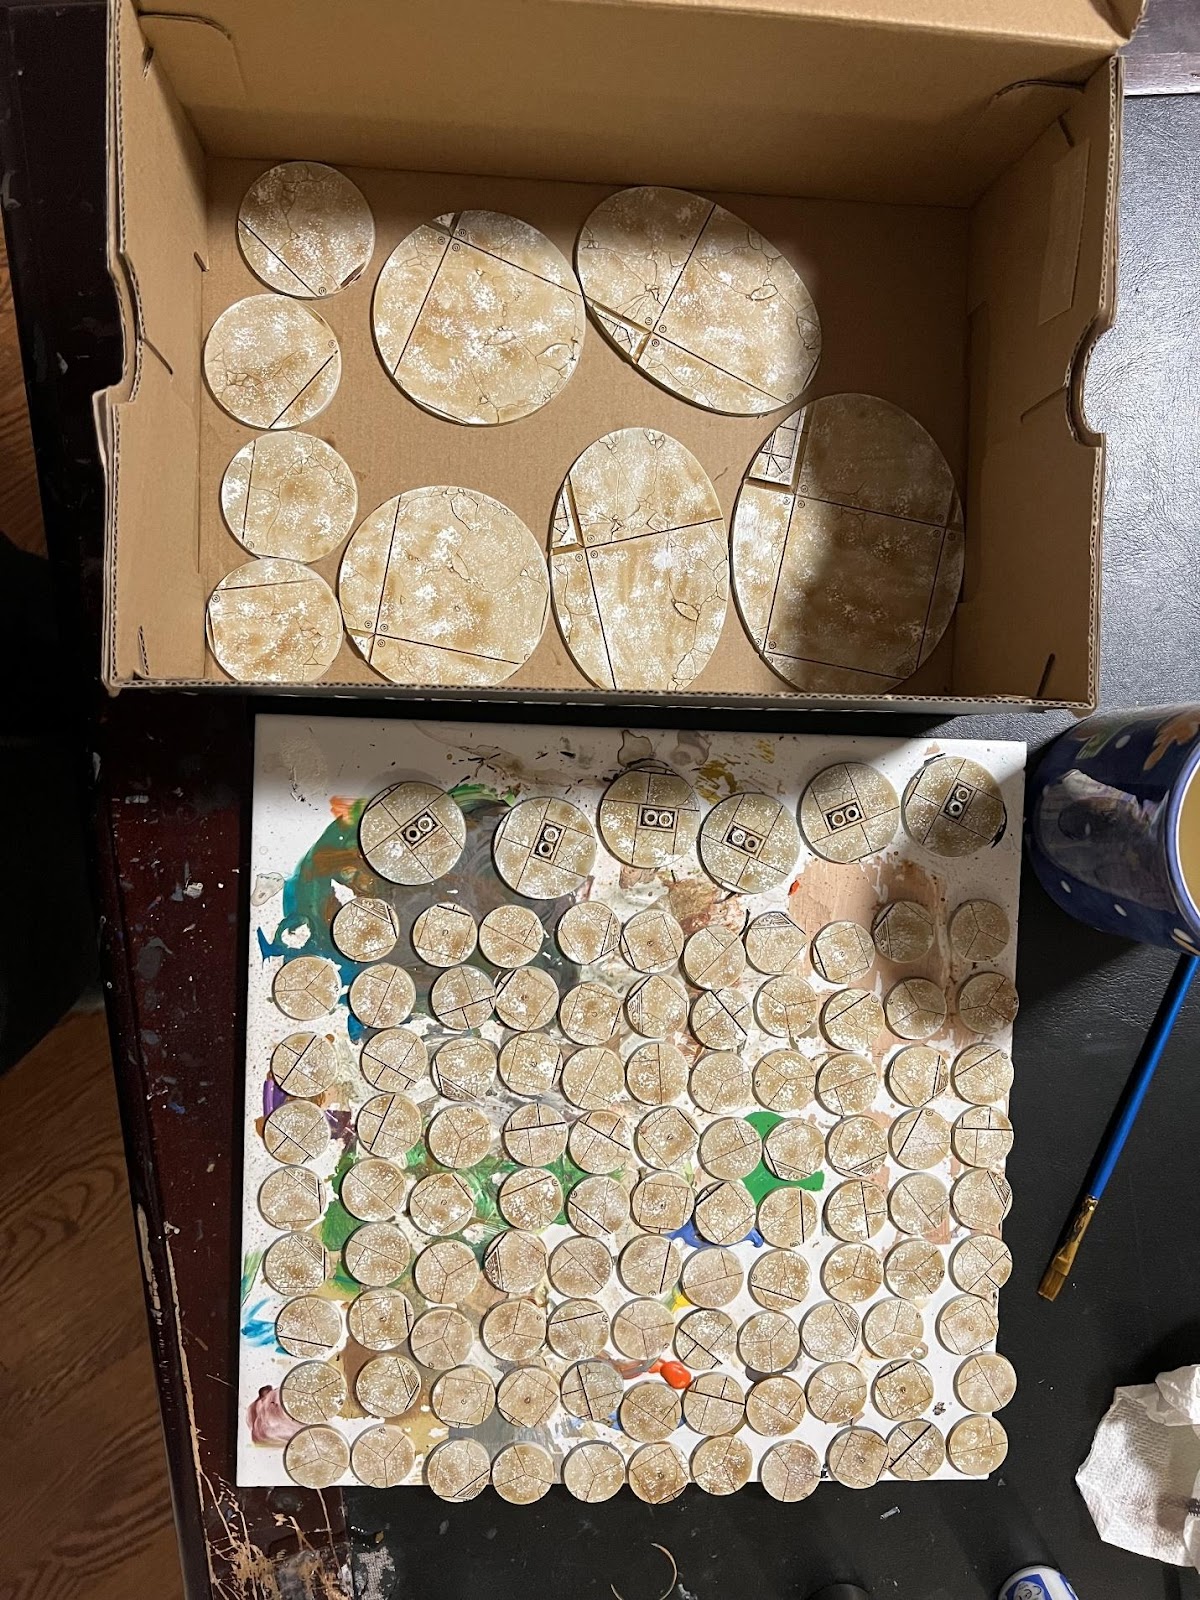
This has been a great experience thus far and I hope that we can keep this progress moving forward into 2025. Speaking of 2025, the first month of 2025 I will be attending a couple events, hoping to bring a force of Gondor using the Reclamation of Osgiliath army in the new edition. I’ve always loved this part of the books and movies and using the Brothers Gondor together is always a fun time. In past editions, I had not used my Gondor in one force, opting to either use the Rangers of Gondor, or the various defenders of Minas Tirith and had based each force differently. This isn’t inherently an issue but I know it would bug me seeing an army on the table using 2 different basing schemes. As such, I set to work rebasing my warriors of Minas Tirith to match their Ranger pals. I gotta say, I love the results too!

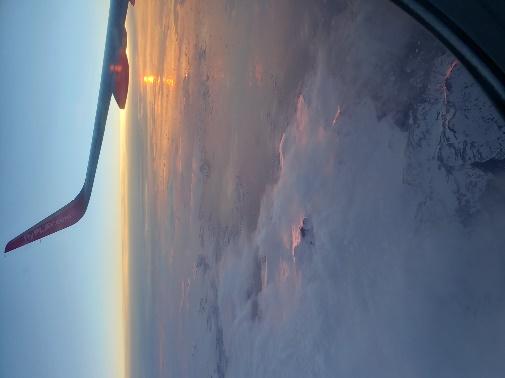
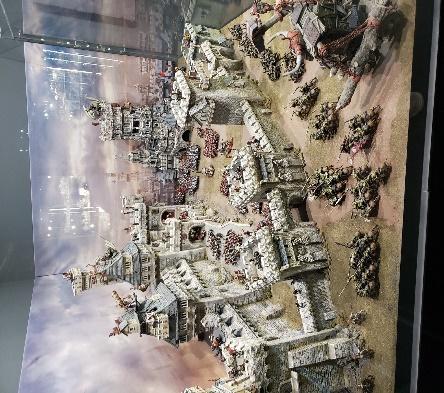
To finish this year off, I spent the last week not at my hobby desk, but traveling around the islands of Japan. That being said, I am still a Warhammer junky through and through and as such, made sure to visit the Warhammer cafe in Tokyo. This is a sweet little spot to stop at in Tokyo, a larger than normal Warhammer store with a variety of incredibly well painted “miniatures” to gawk at while awkwardly trying to explain to your friends the differences between a warlord titan and whatever an “Age of Sigmar” is. Something I undoubtedly failed to do even as my friends tried as hard as they could to understand.

I snagged a couple snapshots of some of my favorite displays which you can see below. This was only a fraction of the total displays and if I ever was able, I would love to play a game and enjoy a coffee in this lovely store. In the meantime, I did snag the delightfully odd “Slaves to darkness” book and a lovely hoody only sold at the Cafe.

Closing thoughts on 2024

The year has flown by, and it was a great one by all accounts! I painted around 400 models this year by my counting:

  • 115 Solar Auxilia
  • 112 Tomb Kings
  • 28 Arnor
  • 42 Bolt Action Americans
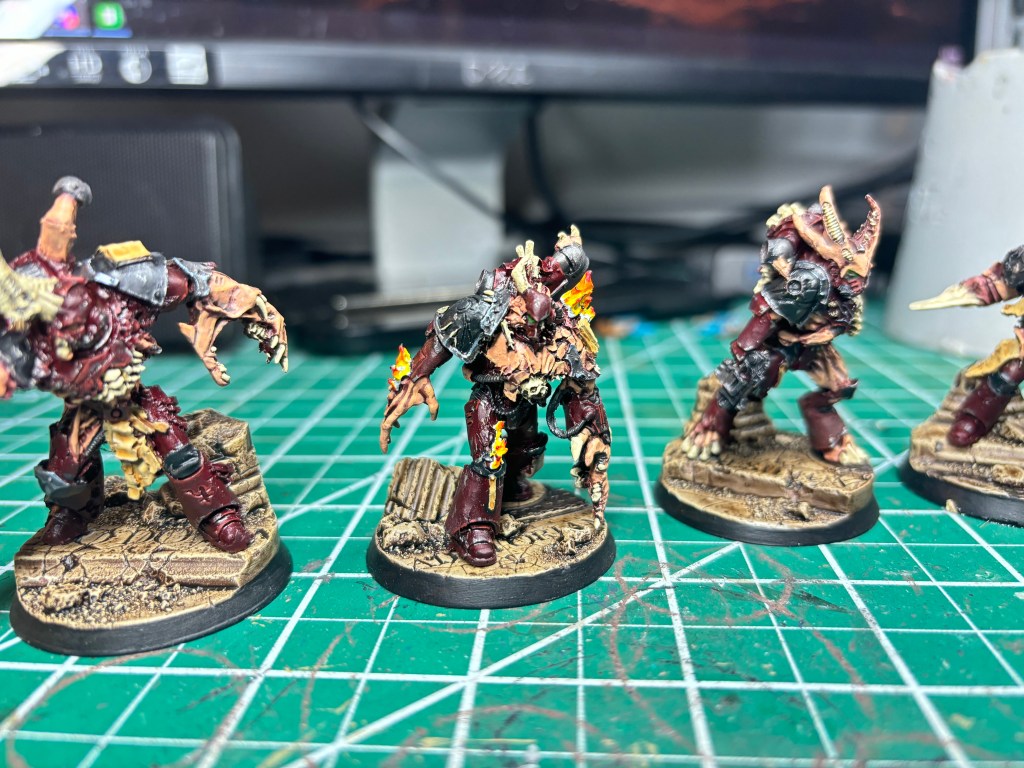
  • 35 Word Bearers
  • A Thunderhawk!
  • A 6×4 Middle Earth board!
  • Various miscellaneous characters and one offs.

An absolutely prolific year by numbers and something I am immensely proud of. Even with this wildly productive year, I still have much to do in 2025 and beyond. I was lucky enough to purchase a friend’s entire 40K and 30k collection this year, a great bargain but unfortunately adding to the backlog nearly as many models as I finished this year! UGH!

My favorite part of this year has been the Thunderhawk pictured below. This was an incredible journey, really challenging myself as a hobbyist. I don’t know how I’ll top it in 2025! (Please don’t ask about the Reaver Titan in my closet)

Enough of 2024 though, it’s 2025 now after all! In 2025, I’ve been thinking of what I want to accomplish, and although this list will undoubtedly change, maybe even in the first couple weeks of the year, It’s always a good idea to to start the year with a plan!

  • Finish my Solar Auxilia army! This should be relatively easy as I’ve only need to paint the tanks still
  • Finish my Tomb Kings Army. Again, this should be an easier task as there is only the various monsters and characters yet to do.
  • Paint MY 40K Deathwatch Army. I’m copying Kevin on this, this project needs to get done this year lol.
  • Tie up the various odds and ends for the various projects I’ve not finished. This is a broad goal, I just want to finish some of the odd characters and squads I’ve picked up over the years for my various armies.
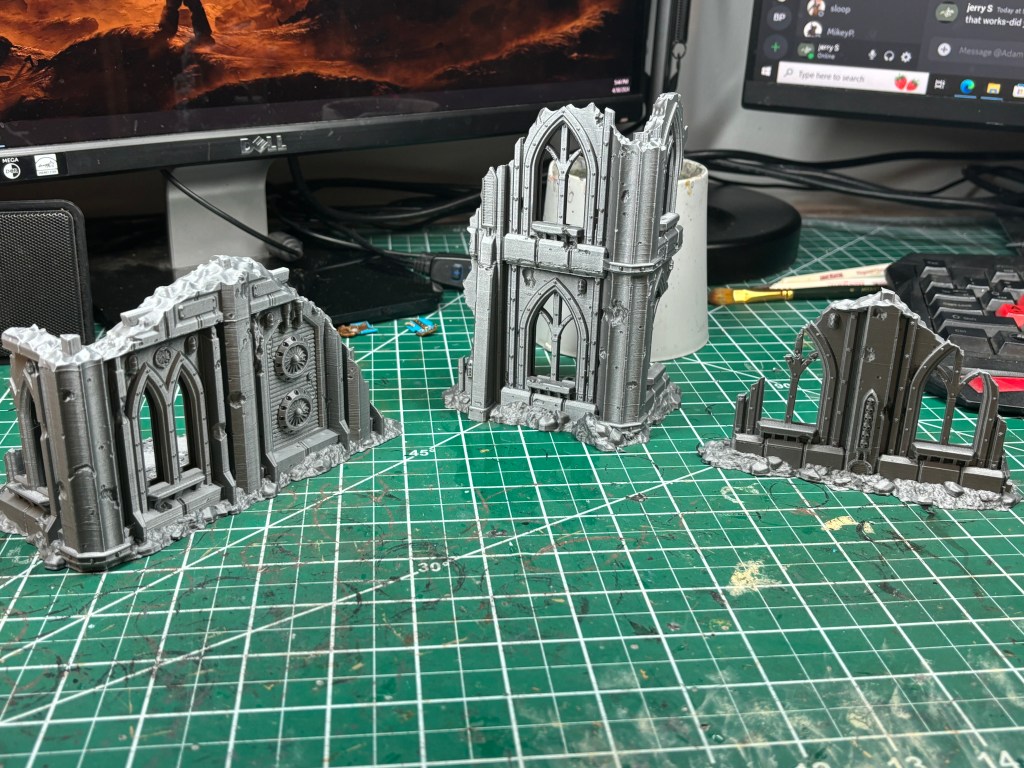
  • Finally finish painting my Zone Mortalis board
  • Build and paint either my Warlord or Reaver titan.
  • Do more character and one-off projects. I’ve been doing a lot of Army painting the past few years and I think it would be rewarding to spend some more time on fewer models, challenging myself in new ways. 
  • Expand the Urban Cowboy Hobbies network. I’ve often thought about starting a YouTube or podcast arm of my media Empire, maybe this is the year to do so!

Until next time!


Michael S

As the year comes to a close, it’s the perfect time to reflect on the progress and joys of hobbying. The last few months have been a busy time for me, balancing a new job and the holidays has left less time for Warhammer. December hobby time for me was mostly 30 minute chunks after work and I was pleasantly surprised with how much I was able to accomplish by adding one or two coats of paint each day. Despite the lack of dedicated time, I was able to paint up and build a few miniatures this month to show off.

December’s Work

My Imperial Fists have taken most of my attention this month. I was able to build a set of terminators and scouts I’ve had on sprue for a while now. I am also about halfway through a squad of Hellblasters (not pictured) bringing the model count up to 15 for the month.

For painting, said Terminators and Scouts received a heavy spray of yellow. 4-5 passes with an Airbrush was the price of a consistent coat of Bronze Brown. Another pass with Golden Yellow brought some color and saturation to the muted yellow-brown basecoat. One final highlight was applied to the most raised surfaces using Light Yellow to push the highlights. 

Once I got the worst of the painting behind me, I went in by brush to apply the rest of the colors. The Terminators took around a week and a half of periodic work. Batch painting for 30 minutes every day made short work of this squad.

The Scouts were a bit different, since I was unsure how I wanted to paint them. In the end I settled for using a mix of colors for fatigues boots and leather. The sergeant came out nicely with pretty minimal effort. My next goal will be getting the rest of the squad to the same spot before moving on.

Year in Review: Finish the Damn Model

2024 has been a great year for me in hobbying! While I still find myself flitting from one project or model to another, I’ve painted more complete units this year than in most years I can remember.

Not counting basing, I’ve managed to fully paint the following units.

  • 5 Imperial Fist Terminators
  • 5 Imperial Fist Sternguard
  • 1 Imperial Fist Apothecary
  • 5 Black Templar Assault Intercessors
  • 5 Black Templar Terminators
  • 1 Black Templar Terminator Captain
  • 5 Death Guard Tactical Marines (25 more of  them just need me to apply some weathering; Missed opportunity to cash in BIG on hours of work.)
  • 5 Death Guard Terminators
  • 1 Imperial Guard Sentinel
  • 20 Tomb Kings Skeletons
  • 1 Lumineth Light of Eltharion

Furthermore I’ve built the following models, but haven’t had the chance to paint them fully.

  • Imperial Fist Command Squad
  • Imperial Fist Impulsor
  • 5 Imperial Fist Intercessors
  • 5 Imperial Fist Hellblasters
  • 1 Black Templar Marshal
  • 20 Imperial Guardsman
  • Imperial Guard Command Squad
  • 2 Imperial Guard Heavy Weapons Teams
  • 5 Kitbashed Fire Dragons
  • 20 Tomb Kings Skeletons
  • 36 Tomb Kings Skeleton Archers
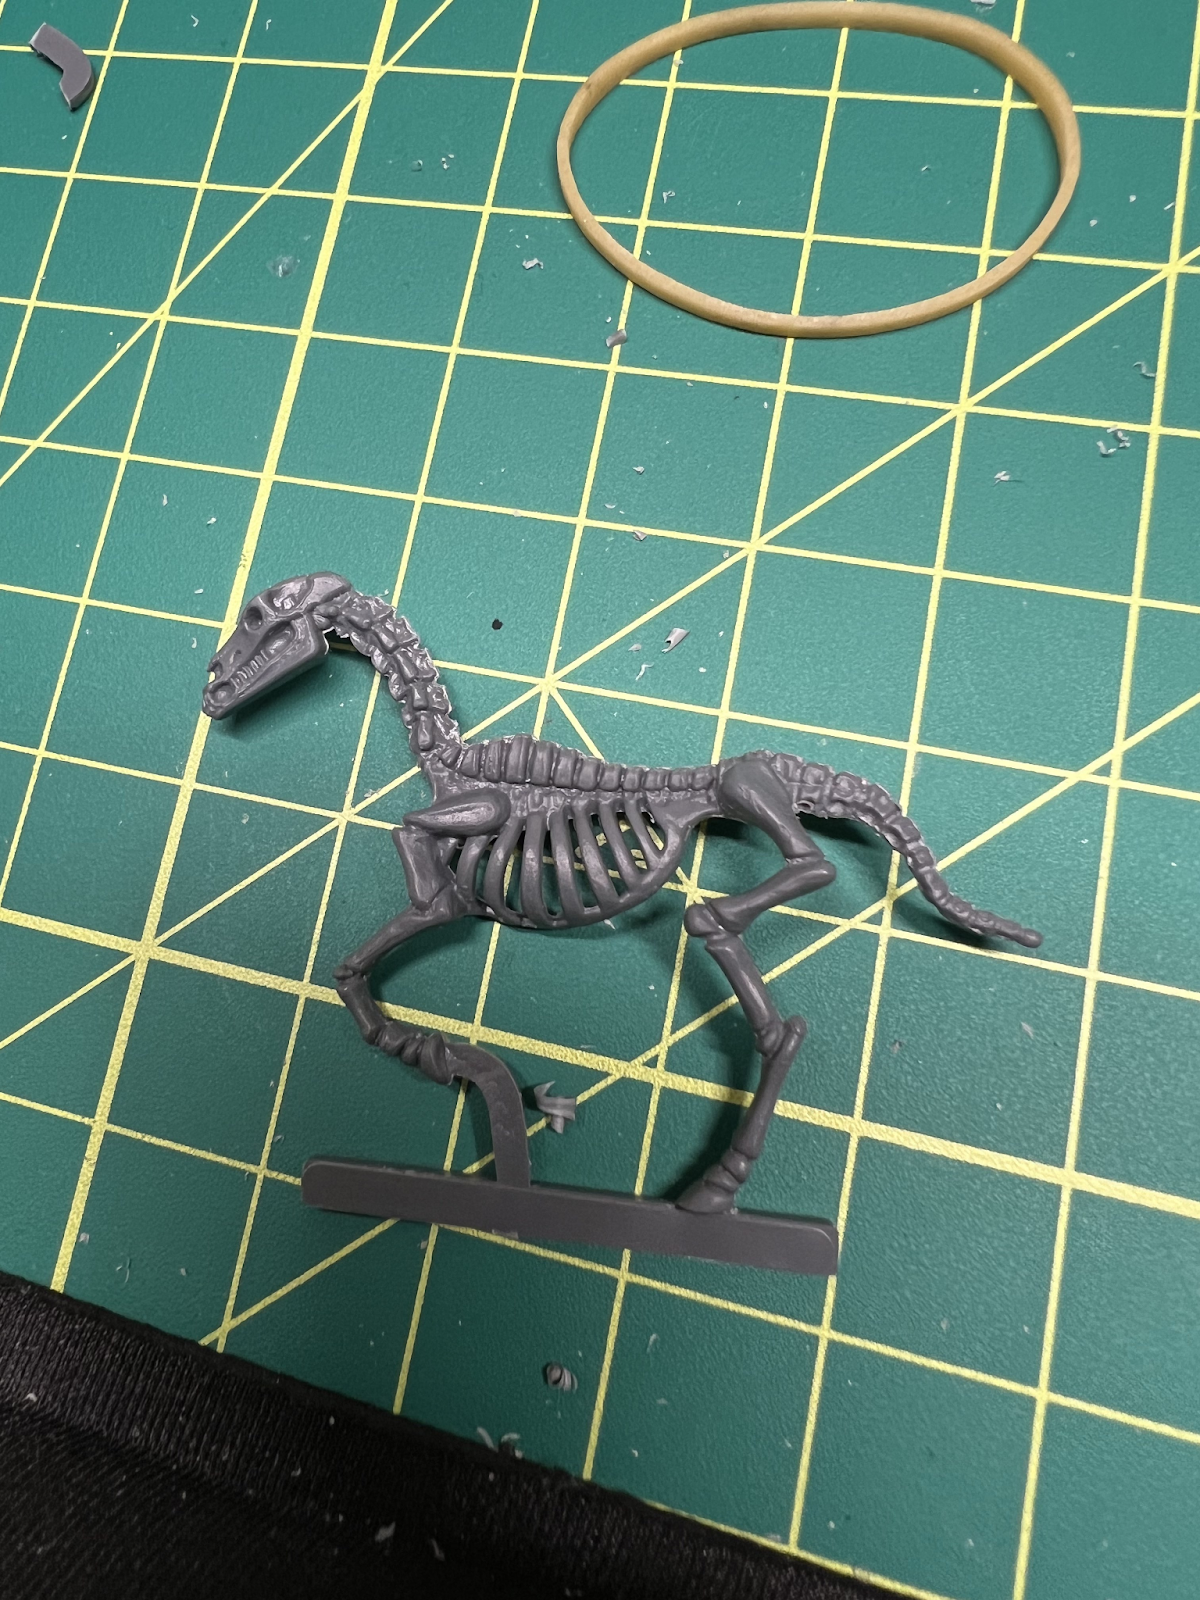
  • 16 Tomb Kings Skeleton Horses
  • 1 Tomb King Necrolith Bone Dragon

While the list of unpainted models is still long, I’ve been way more engaged with the hobby this year and am looking forward to 2025! I can safely say this is the most productive hobby year I’ve had in a long time if not my entire history playing Warhammer. My goal moving forward is to just finish the damn model!

2024 Superlatives

A final article of the year wouldn’t be complete without a visual review of some of my work and things that stuck out in my mind. I’ve got a few superlatives to award…

Favorite Single Model:

My Imperial Fists Apothecary turned out so much better than I expected white armor to. This was one of my first forays back into oil washes in some time, and I loved the fact. The armor looks crisp but still has definition from the recess shading. I was most proud of the tabard, including a nice helix symbol and freehand outline that looks believable. A first for me in painting cloth!

Favorite Unit:

The first unit of skeletons I painted were a ton of fun! The old style kits brought back a ton of nostalgia from my entrance into the hobby and painting these was a breeze with speedpaints. I loved how the colors came together and am looking forward to getting the rest of them ready to paint in 2025.

Least Favorite Model(s):

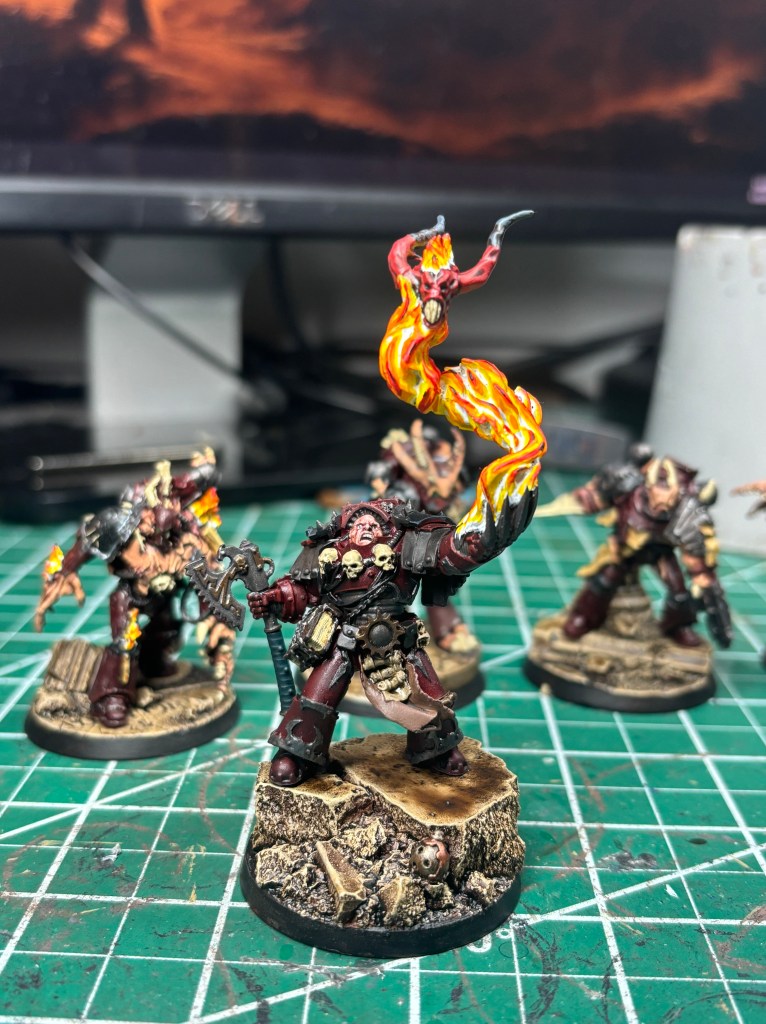
After converting these characters up for my Death Guard force, I was really excited to get them painted up in white and green. After starting to paint them, my enthusiasm really dropped away as I felt they didn’t quite look the way I had hoped. My captain simply converted from Narik Dreygur I found is below. The model just hasn’t captured me the way it did once I started painting. 

I haven’t totally given up on these three yet. I do eventually plan to get back around to these knowing a complete paint job will go a long way toward making them look a bit less “meh”.

Favorite Base:

This sentinel almost overtook the Apothecary for favorite model, but really the base is what I fell in love with. I put quite a bit of work into building some believable rubble and liquid pigments really helped tie everything together and up the soot and grime needed to sell the effect.

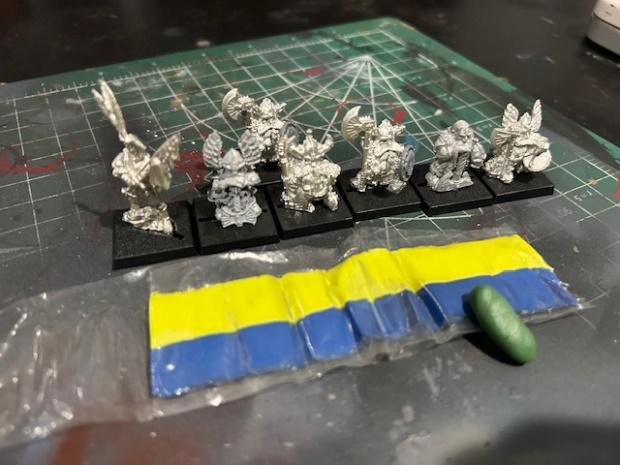
Most Painful Legends Casualty:

These Iron Golems (and 2 units of Untamed Beasts) took me lots of time and work to get looking spiffy in bare steel and the blood of their foes. Despite looking their best, an unfortunately timed retirement via Warhammer Legends meant they never got to see the tabletop with the rest of my Chaos Warriors. Time to start playing Warcry?

Least Fun Model to Build:

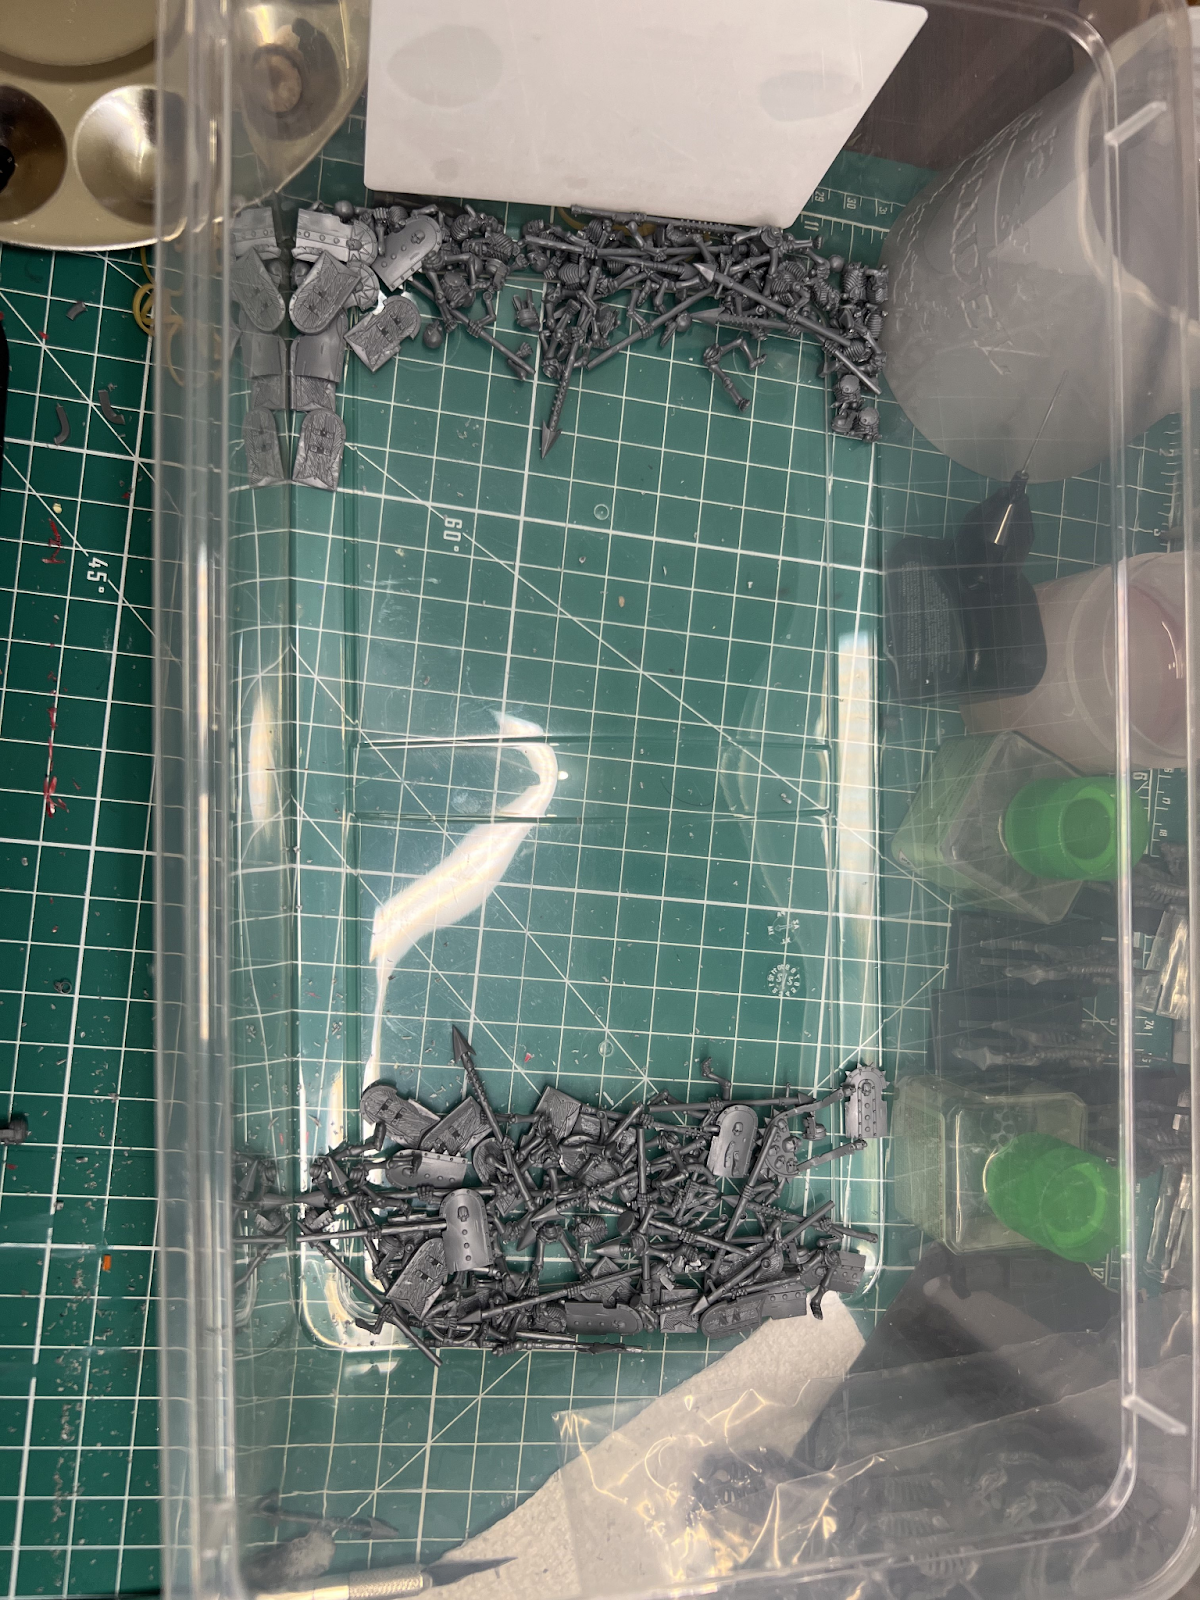
It’s a tie between the Skeleton Horsemen from my Tomb Kings and the old Chaos Knights I picked up early this year. Both of these have a lot in common: old models, mould lines, cavalry bases, mould lines, poorly fitted parts, did I mention mould lines?

Upon finishing both of these units, I had to take a sizable break from the hobby to retain my sanity. Enough said.

Favorite Model That Mysteriously Remains Unpainted Despite How Much I Like It:

In contrast to the other Death Guard characters, this captain doesn’t make me disappointed. I still love the conversions and use of a spare Eliminator helmet to give him a hood befitting any good officer of the 14th, but he still remains mostly unpainted.

I blame the result of the other characters I put together, and my frustration with metallics at the time of painting. Instead of powering through, I just left him to sit forever incomplete. I am starting 2025 by pushing him to the top of my priority queue. Hopefully I’ll be able to share a fully completed photo next month!

Looking Forward

In 2025 I am looking forward to another great year of hobbying. My goal is to continue to make progress towards fully completing projects and models instead of leaving them 80% complete for an eternity

A stretch goal would be to have my display cabinet only displaying completed miniatures… Maybe I’ll surprise myself?

IF I can complete that, I also want to branch out in media creation for the hobby and at some point create video tutorials for painting and other aspects of miniature painting. Who knows what the future may hold.

Cheers and happy holidays!


Joe R.

Well, you might have noticed it’s been a few months since I last participated. I fell off the wagon, got back on the wagon, fell off again, brought some paints on holiday, and here we are.

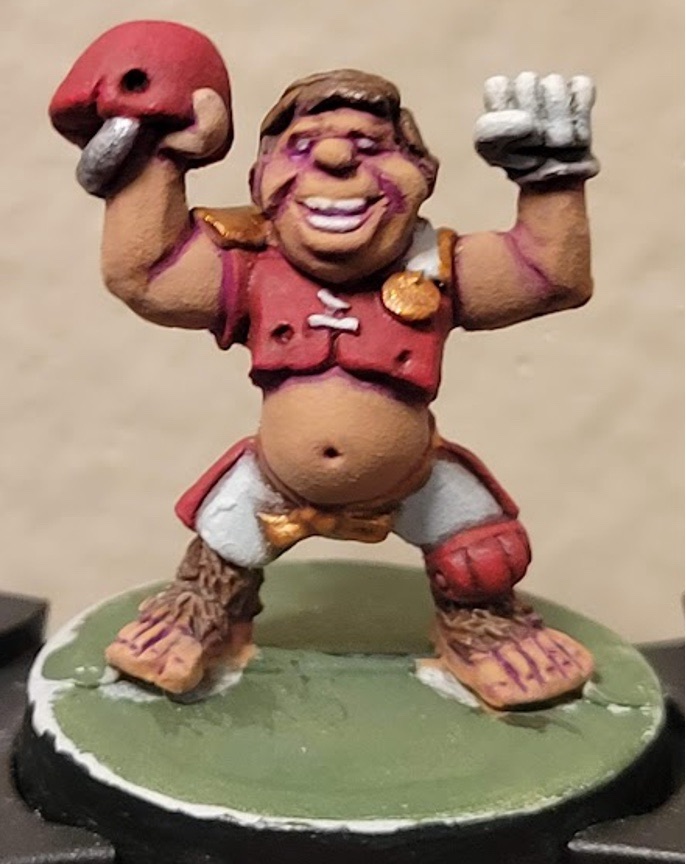
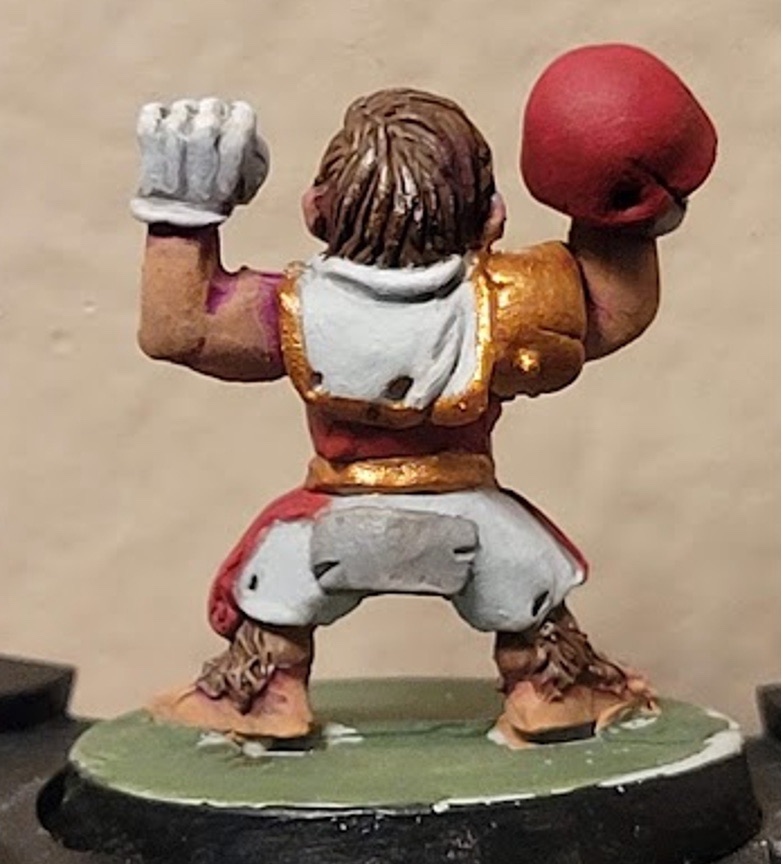
Blood Bowl – The Half-Shell Universe All Stars – Lizardman Team

This project changed dramatically. I got VERY tired of cleaning and assembling the metal models from Greebo (FYI, Greebo has since switched to resin which is much nicer). So, I decided to switch over to a set of 3D printed lizardmen models from BruteFun. It was faster to 1) download the files, 2) arrange and slice the files, 3) print the files, 4) remove the supports/clean the models, and 5) prime the models than it was to assemble a single metal model. I had hoped to finish these in time for Chaos Cup in November, but that did not happen. My friend Neil let me borrow his excellently painted Beach Shark team instead.

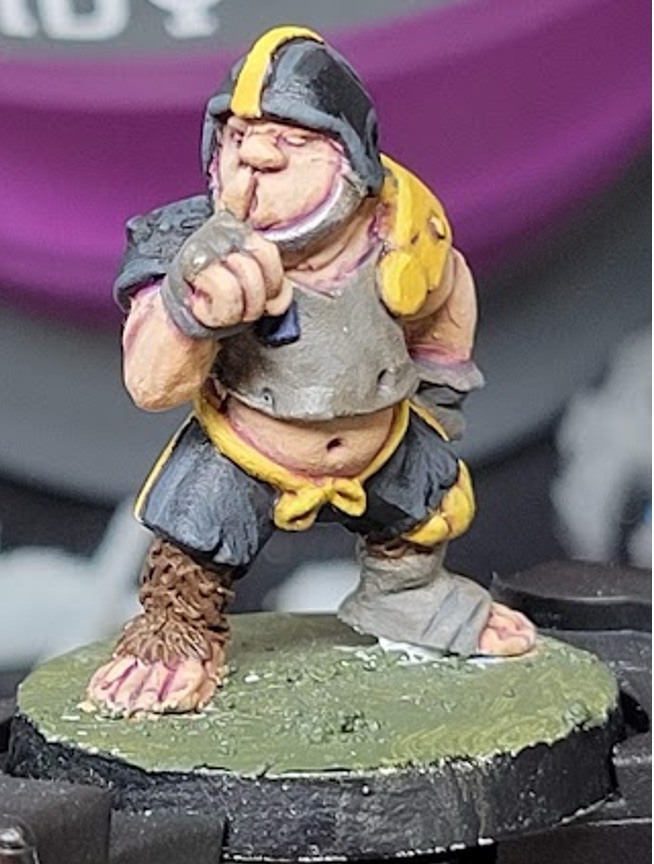
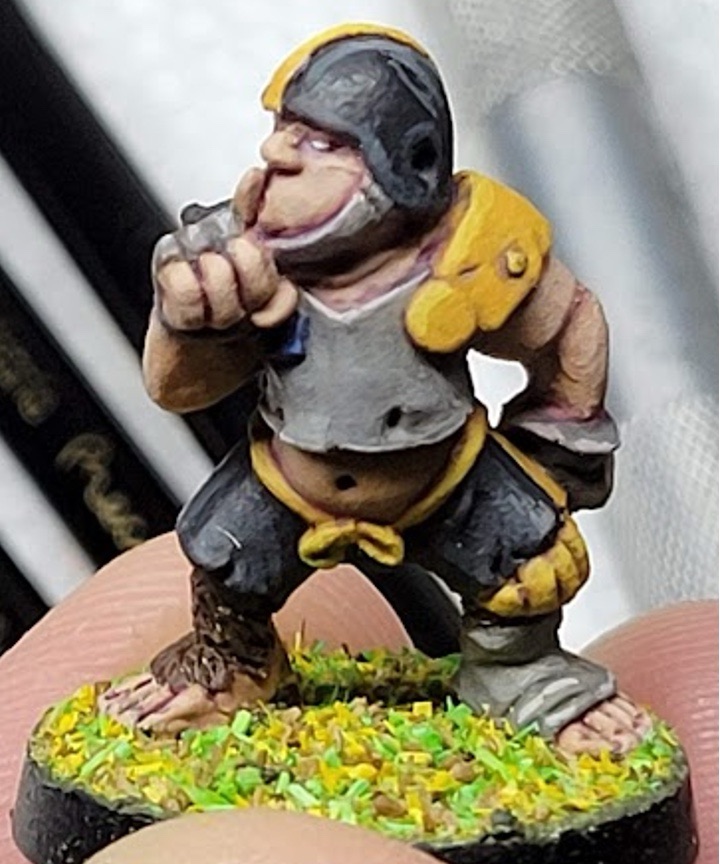
These are still very much on my TO DO list, but I do have a huge highlight from this work. I tried my first ever comic book style miniature! I had tried comic style late last year on some Necromunda bases, which worked out okay, but this was a whole model! 

I follow Thunderbrush on Patreon, who releases guides on comic book style miniature painting. I still have a long way to go, but I was REALLY pleased with how this turned out.

Pathfinder – Keller Feelgood, NG Cleric of the Endless Road

I started painting this model while I was back in grad school (pre-2015). The model was used as one of my many Pathfinder Society miniatures when I was playing 2-3 times a week. He wasn’t one of my favorites, but the name Keller was cemented along-side his affiliation with Desna (the goddess of dreams in the setting).

This year I was asked to join a Pathfinder campaign in progress by a colleague I met in Kansas City. Turns out she was in DC now! I was a little apprehensive. My gaming group in North Carolina was really exceptional, and I was intimidated to find my place in another group. Thankfully, this has turned out to be a really wonderful group. I decided to revive Keller in Pathfinder 2nd Edition. Keller became a cleric of the Endless Road (a pantheon which includes Desna) with the edict to travel, explore, learn, and help. This incarnation also became an herbalist and brewer, striving to find new ingredients to improve his brews.

Since joining, I’ve worked on this model a couple of times. Each time he moves a little closer to being something I’m proud of. He’s also great for experimentation, since I’m really the only one who cares how he ends up looking on the table. Everyone else is using pre-painted D&D miniatures, so he already feels a little special.

Necromunda – The Junktown Jesters – Escher

I decided to take my paints with me for the holiday. It was a bit of a bust, BUT I did end up working on two additional models for my Batman villain themed Escher. 

These are still a work in progress, but I think you can see my progress as a painter reflected in the model on the left. She represents Punchline, a relatively new Batman villain. I got this all done in… 2 hours? And that included playing around with some highlighting. The other one, if you can’t guess, is Mr. Freeze inspired. The skin needs some work still, but I’m fairly pleased with the “bones” of this model. I’ll even try doing some actual plasma effect (probably with dry brushing) and see what happens!

What A Cowboy/Dracula’s America

I got really into western miniatures this year. I don’t know why exactly, but my friend Neil is ALSO into western miniatures. We played a game of What A Cowboy and have  aspirations to try Dracula’s America, Dead Man’s Hand, and Dead by Lead in the New Year.

I picked up a batch of metal lawmen from Dead Man’s Hand and was kindly gifted some Wargames Foundry western miniatures for X-Mas. I think this is going to be my next project. 

I have already cleaned up the Dead Man’s Hand miniatures (including some shotgun repair work). I really DO NOT LIKE that these miniatures come attached to a mini metal base. So I took a 3D printed base file and messed around with it in TinkerCAD to remove a section. I then put the miniature in and applied Stucco to fill the rest of the hole. Not bad eh? Now I just need to do this for… 25 other western minis. I will still apply some basing materials over this Stucco base.

I also 3D printed a ton of western miniatures. I test printed several to get them in scale with the traditional models. I think it worked out alright. I’ll be mixing and matching as I get things ready to play a mini campaign with Neil. Or maybe all the Warlords will decide westerns are cool and clammer to join in on the fun.

Some Light Reading

I finished off this year by doing some light reading.

Both of these books came highly recommended to help advance novice painters. They have both been exceptional for completely different reasons. I will need to read Figopedia again to truly retain the knowledge it contains, but I walked away understanding significantly more about light and color theory. Tommie Soule does a great job of walking step-by-step through lots of things I’ve ignored over the past several years of painting. He also does a great job encouraging you to play, not stress.

A Year in Review.

Even though I missed participating in the last few months, 2024 has probably been one of the most successful hobby years I’ve ever had. Let’s recall what got accomplished this year.

  • I arbitrated my first ever Necromunda campaign and played in another!
  • Joined a Pathfinder Campaign! And ran a 3-session Super Hero adventure
  • 6 Escher styled after various Batman Villains
  • Necromunda bases for said Escher
  • Dipped my toe into Comic Book Style
  • 1 Chaos Chosen Ogre painted almost entirely through glazing
  • 1 Blood Bowl Dwarf Team
  • 1 Blood Bowl Chaos Dwarf Team
  • 1 repainted Blood Bowl Halfling Team
  • Assembled several MDF kits for Necromunda
  • Assembled Ork Kommandos for Kill Team
  • Assembled Angels of Death for Kill Team
  • Assembled Hernkyn Yaegirs for Kill Team + Necromunda

When you look at what the other Warlords have done, this list seems pretty paltry. However, this is probably the most engaged I’ve been with my hobby since moving to Virginia 5 years ago. Much of that comes down to the wonderful community of gamers I’ve surrounded myself with. It’s been wonderful to hang out here, with the other Warlords, and grow into a fledgling painter.

The Good

My two favorite projects this year were the Chaos Chosen Ogre and the Halfling Team. The Ogre is the only model I “finished” all year, meaning I varnished him with no intent to ever adjust him again. I wasn’t able to get the Halfling Treemen where I wanted them, but those Halflings popped during that whole tournament. It didn’t hurt that I went undefeated either! 😀

I’ve also gotten much better at playing while I paint. When I just decide to work on a model and try something new (instead of rushing towards a deadline) I end up really enjoying myself. My skills have definitely improved because of this.

The Bad

I still struggle to find time to finish my models. I’m able to basecoat fairly well and provide some interest around the model, but I rarely have time to highlight a model to the point I call it finished. Out of all those dwarves I painted for Blood Bowl, I think 2 are actually done. That doesn’t even include their bases (see below)! 

Thankfully, I’ve come a long way with regards to highlighting. I used to be scared to even attempt. Now I’m willing to do it and just see what happens and learn along the way.

The Ugly

I am bad at working on bases! Those two or three Necromunda bases are the best I’ve ever done. I am barely finishing the models, let alone spending any time on the bases. However, I have started keeping my models separate from the bases so that I can more easily access hard to reach spots on the model. That’s some progress right?

Next Year!

Another Necromunda campaign is in the works. Hopefully it’ll be done in Mid-January. I might even share it here if Jerry lets me! And with that, I want to thank all the other Warlords for their support over the year and for letting me bask in their greatness.

Special thanks to Jerry for being so enthusiastic about my participation and always working to keep us all on task!

Happy New Year!


Mike P.
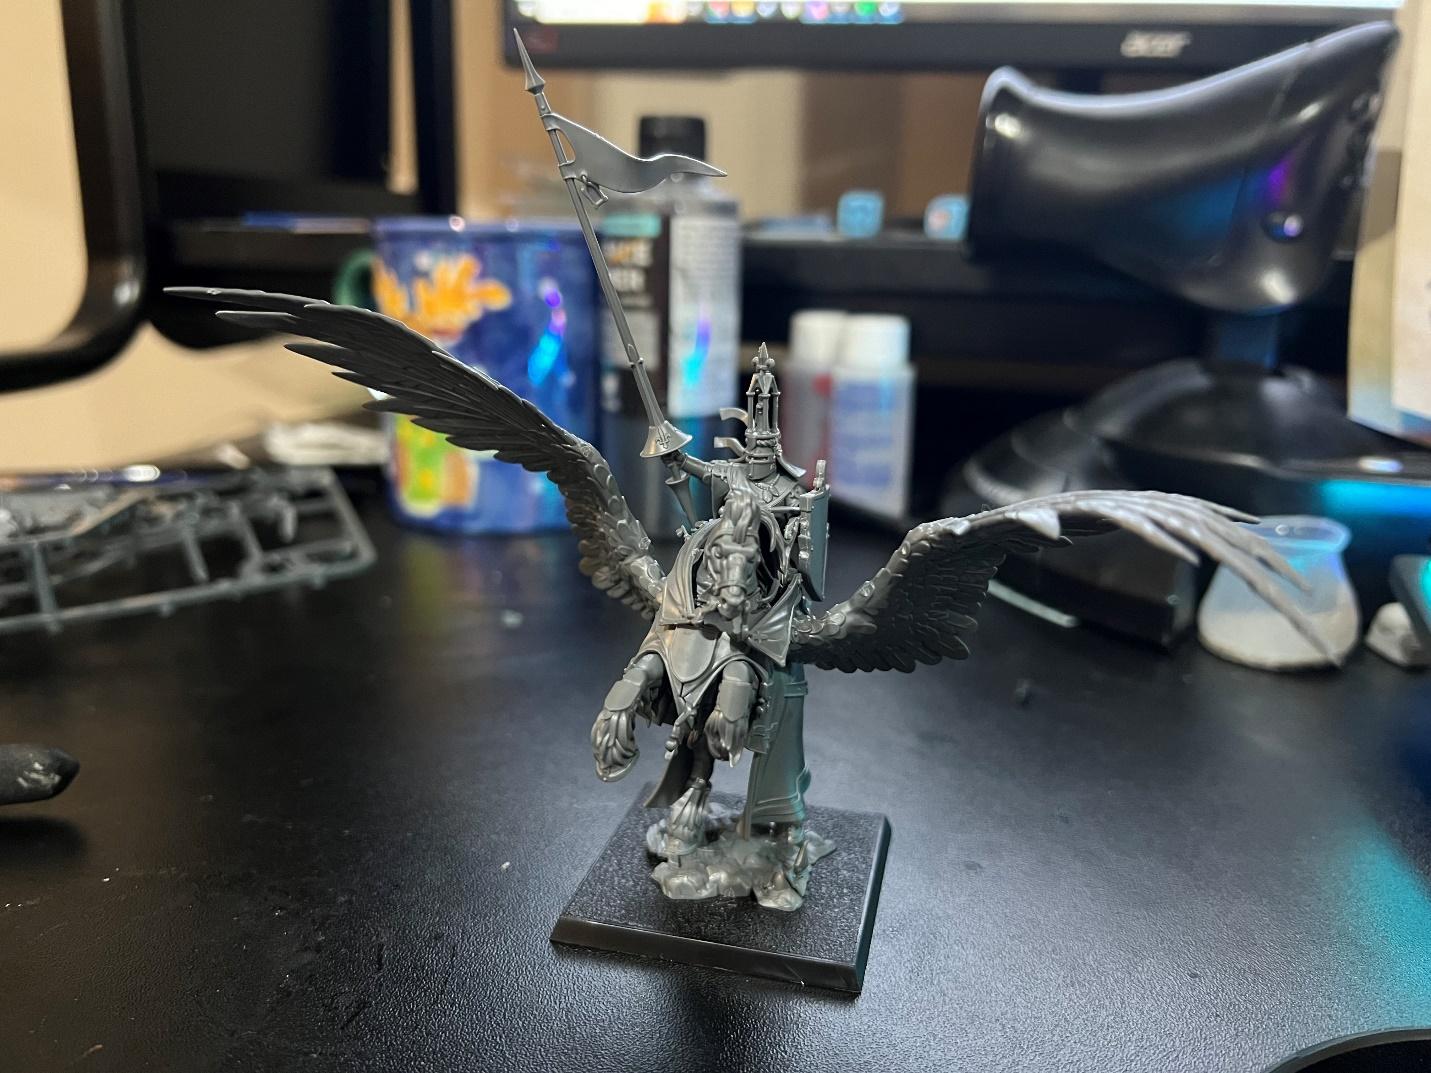
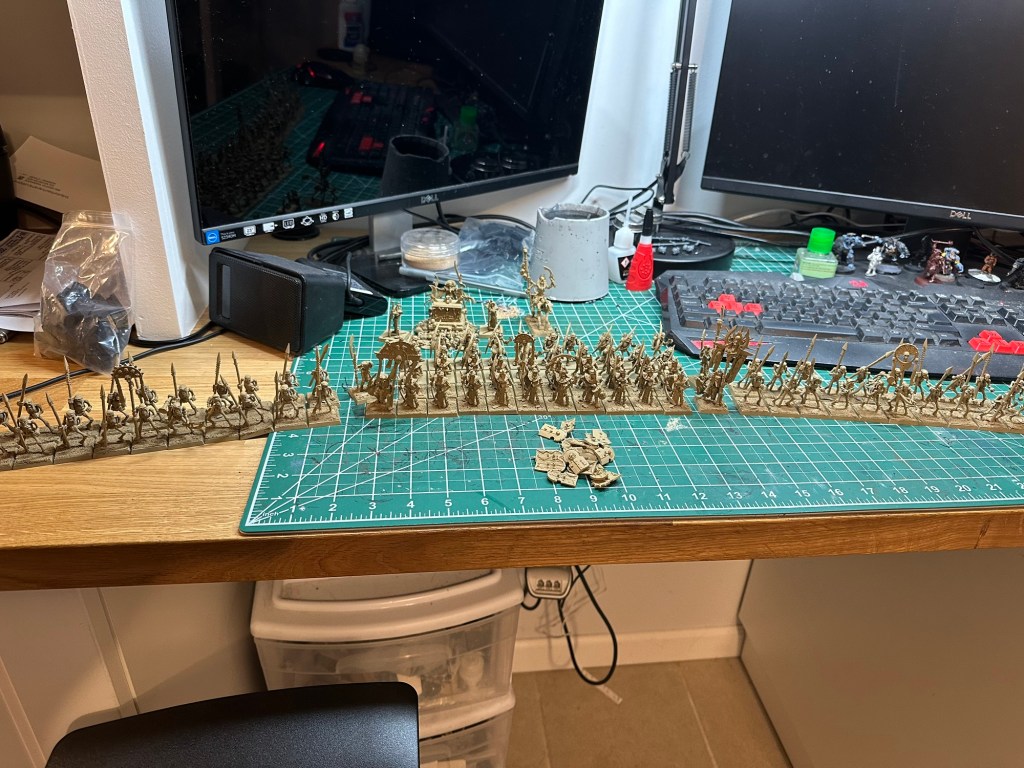
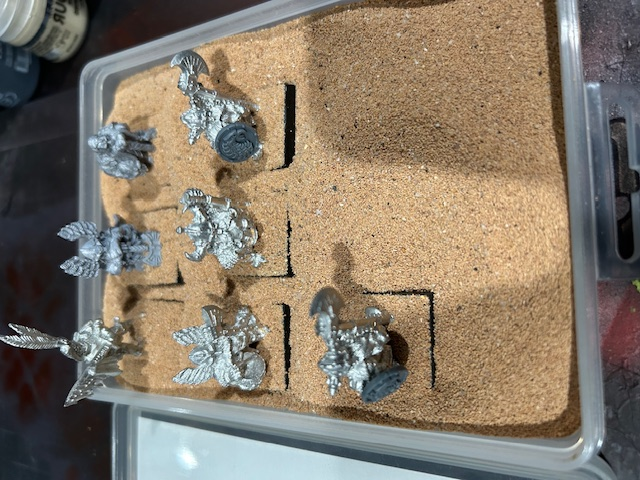
Painting My Empire Army for Adepticon: 12 Weeks, 102 Models, and a Dream

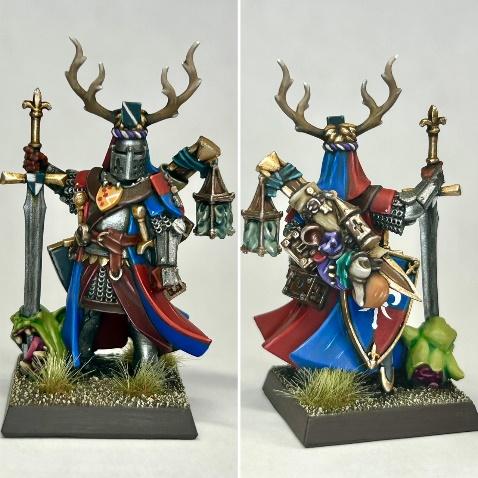
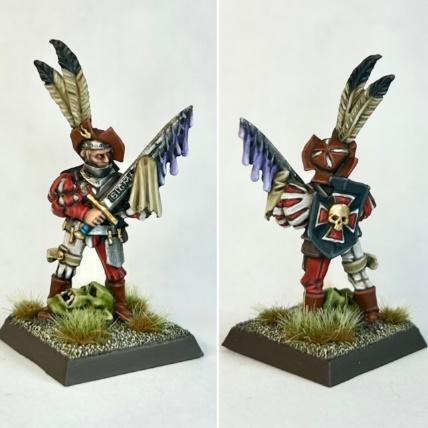
With 12 weeks left until Adepticon, I’m staring down a monumental challenge: painting 102 Empire models to complete my army. Thankfully, my general on griffon is already done, and he’s looking fantastic—he’s the centerpiece of the force, and I’m using him as the visual anchor for the rest of the army. Now, it’s all about getting the rest of the troops ready in time for the big event.

Week-by-Week Strategy

I’ve broken this project into manageable chunks: about 9 models per week. It’s still ambitious, but it’s doable if I stick to a plan. My approach is to focus on one unit or type of model at a time. Here’s how I’m structuring it:

1. Core Troops First: I’m starting with the infantry. They’re the backbone of the Empire, and getting those blocks of state troops painted will give me a sense of progress early on. I’m batch painting them, working in groups of 10 to 15 models to keep the momentum going.

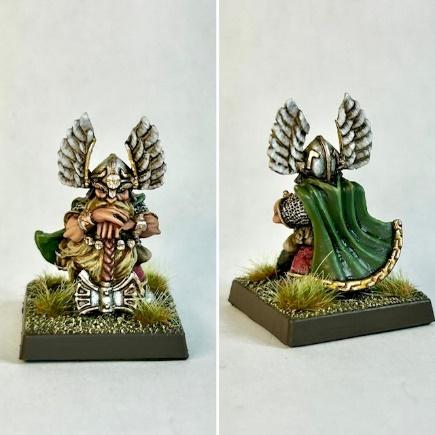
2. Special Units and Heroes: Once the bulk of the infantry is done, I’ll move on to the knights, artillery, and their crews. These models have a bit more detail, so I plan to give them some extra attention. After that, I’ll tackle the heroes and other supporting characters, which will be fun because they let me experiment with more intricate techniques.

3. Final Touches: The last few weeks will be all about basing, finishing details, and making sure everything looks cohesive.

Staying Consistent

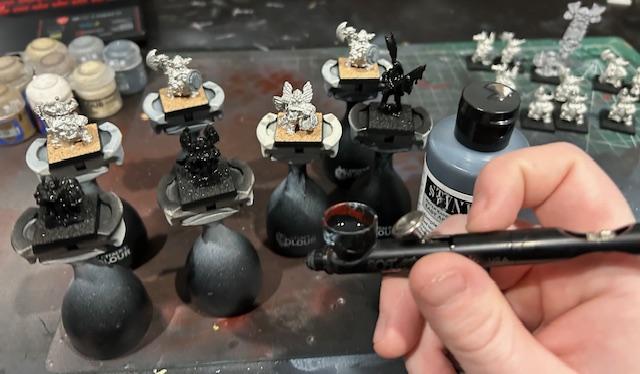
My general on griffon has set the standard for my army’s color scheme: rich reds, deep blues, and gold accents inspired by Altdorf. I’ve painted a couple of test models for the infantry to make sure the scheme translates well across the army. The key is to keep things consistent while still adding variety with unit markings, banners, and other small details.

Weekly Workflow

Here’s what a typical week looks like for me:

• Monday-Wednesday: Prime and base coat the models. I’m keeping it simple with a black primer and working up from there.

• Thursday-Friday: Apply washes and highlights. This is where the models really start to come to life.

• Saturday-Sunday: Focus on the details—faces, weapon hilts, feathers, and any other bits that make the models pop.

The Challenge and the Fun

It’s easy to feel overwhelmed looking at the sheer number of models left to paint, but breaking it down into smaller goals keeps me motivated. I also remind myself why I’m doing this: to field an incredible-looking army at Adepticon. Seeing the blocks of troops come together and imagining them charging into battle makes the effort worth it.

Looking Ahead

I know the last few weeks will be intense, but I’m already planning for that final push. Once the army is done, I’ll add some finishing touches—like weathering and flocking the bases—to tie everything together. If I have time, I’d love to create a display board to really show off the army.

There’s a lot of work ahead, but I’m enjoying the process. Every painted model is a step closer to the goal, and I can’t wait to see my Empire army in action at Adepticon.

A Tale of Many Warlords- November

Another month done, I can’t believe we’re already through November, how the year has flown by…. But even as the days get shorter, our diligent hobbyists keep working. While this month’s article is a shorter one, I think you’ll be impressed by the work completed nonetheless!

Kevin C.

On to my third act for the year… my Rohirrim, which I have had sitting on my shelf for about a year. They aren’t the worst offender in my queue; I still haven’t finished my pre-Primaris Deathwatch, which have sat unfinished since 2016. Even still, with the new edition of Lord of the Rings coming down the pike, and all of my Necromunda buddies having played it and enjoyed it, I figured I should get in on the action. And I refuse to play with unpainted miniatures, so…

Riders of Rohan

My main source for instruction on painting the Riders was the Duncan Rhodes tutorial. He does a great job with setting the stage for one method of painting the Rohan riders, that I then used to experiment with in variations in later iterations. For most of the elements on the rider, he uses a base, wash, rebase, highlight method, and I replicated that method. 

For the cloak and the shield edges, I used Castellan Green, Agrax Earthshade, Castellan Green, and highlight of Loren Green. 

The red cloth underneath was Khorne Red, Agrax Earthshade, Khorne Red, and Wazdakka Red.

The trousers, sleeves, and helmet were Doombull Brown, Agrax Earthshade (noting a pattern here?), Doombull Brown, and Skrag Brown. The contrast between these last two coats was a bit too stark, but seeing as how the bits were small, I think I was able to get away with it.

At this point, I should note that, since most everything was a wash of Agrax Earthshade, I obviously started with a base on everything, washed almost everything (except the face and hair) and then brought them back up to base color, and then did the edge highlight. The rebasing and highlight got rid of much of the shine from the wash, but if you don’t rebase your models after the wash, you will definitely need to Matte Varnish them, or else they will have a weird shine to them, like so.

The white emblem on the shields, I went with a consistent Rakarth Flesh, Agrax Earthshade, Rakarth Flesh, and highlight of Pallid Wych Flesh. This proved pretty difficult near the end, as there is not a truly defined edge to the emblem, so many of the later emblems became sloppy.

The metals were Iron Hands Steel and Retributor Armor, both washed with Agrax Earthshade, and highlighted with Stormhost Silver and Liberator Gold respectively. I decided not to go with Chrome on these miniatures. While I love Chrome, and it makes everything pop, I felt as though it would’ve taken away from the more earthy tones of the Rohirrim. Maybe if/when I do Minas Tirith…

Finally, the skin (what little can be seen) was Bugman’s Glow, Reikland Fleshshade, Cadian Fleshtone, and Kislev Fleshtone. The hair was Zandri Dust, Seraphim Sepia, then Ushabti Bone. While I usually try to do multiple fleshtones and hair colors with other miniatures, I felt that there was enough variation in the miniatures that I kept them all blond and pale-skinned. Rohan is not necessarily known for being a diverse cosmopolitan place.

The horses I based in Mournfang Brown, and then washed in Agrax Earthshade. I then brought up the highlights from Mournfang, to 50/50 Mournfang and Skrag Brown, and finally an edge highlight of Skrag Brown. While Duncan does a wash for the mane and tail, I decided to use a Contrast of Wyldwood, to get a darker, richer contrast (no pun intended) across the mount.

The socks on the hooves were an interesting project, and one I’ve never done. I started with a 50/50 mix of Skrag Brown and Rakarth Flesh, then a highlight of Rakarth Flesh, and finally an “edge” highlight (mostly at the ankle) of Pallid Wych Flesh. I think the socks turned out great, and I replicated them across the entire set.

At this point, I should note that these were much harder to paint than I’ve done for a while, as unlike most of the 40K/Fantasy stuff I’ve been painting recently, these are true scale. I’ve painted true scale before, namely Infinity, but I find that I often have to give up on painting detail on the faces. Thankfully, most the of the faces here are taken up by either helmet or beard, but it is something that annoys me.

More Riders of Rohan

Now that I had my first set of 12 finished, I continued on to my next set of 24. Absolutely no variation in the posture of the miniatures, so I had to settle on varying something else. So I chose different horse colors…

For many of these recipes, I used the painting tutorial that I found here:

I didn’t do black or white horses, for separate reasons. I plan to keep white horses for my heroes – Theoden, Eowyn, Hama, and Haleth. And I don’t like doing black horses as they tend to look too dark and monochromatic on the field. So, for the basic riders, I went with dark brown, tan, grey, and spotted.

I also didn’t want painted horses (much to my wife’s chagrin, as she owns a painted horse), namely because that screams Mustang to me, which is an American breed. Rohan, being based on Anglo-Saxon England, didn’t seem like a natural fit for painted horses. 

The paint recipes, while they ended up working, didn’t work quite as well as Duncan Rhodes’ methods. Some of the color transitions, especially with the lighter colored horses, were too stark for my tastes. Still, they diversified the colors of the army, so I’m pleased with how they turned out.

Final Result

Well, I’ve been told by Austin that 36 Riders of Rohan is more than a Rohan player will ever need. For a Bretonnian player, 36 cavalry seems a bit small, but I will take his word for that.

Not quite Pelennor Fields level of cavalry (I’d need 5,964 more horses for that, apparently), but this will get me through a few games.

Next month, I plan to paint my Warriors of Rohan (dismounted) and the heroes I have currently, Theoden, Eowyn, and Merry. Finally, the boxed set should arrive in the middle of the month, so it is possible that I can get those miniatures assembled and painted before the end of the year is out, thus completing THREE armies in one year.

Jerry S.

Kevin’s progress this month a tough act to follow wow! I’m incredibly impressed by his conviction and ability to finish the projects he starts!

On my side, I had a pretty prolific month myself! Even with a week away due to the Thanksgiving holiday, I was still able to finish almost 50 models!

In the true wargaming tradition, Instead of finishing either of the 3 projects I’m currently working on (Solar Auxilia, Tomb Kings, or Arnor/Angmar for Middle Earth SPG) I started a brand new one at the end of September. As I hinted at last month, that new project was a reinforced platoon of American GI’s in winter clothing from Warlord Games for their brand new Bolt Action 3.0!

A little background on that, I grew up watching old war movies with my dad, The Great Escape, Von Ryan’s Express, A Bridge Too Far, the list goes on and on. I always loved these movies, the overexaggerated good guys and bad guys, corny action scenes, these movies hold a very special place in my heart.

I’ve always had my eye on Bolt Action, the game really pulls on those Hollywood WW2 themes from the old movies and the models are all overexaggerated and cartoony, just the way I like them. I’ve actually started 3 Bolt Action armies over the years, picking up Germans, Soviets, and Americans in the past, picking them up and then putting them down and selling them one by one. This time was different though, the new ruleset provided a great jumping off point and the absolutely awesome American Winter Infantry kit that came out in September was the perfect opportunity to jump into the game once more!

And Jump in I did! I picked up the new Battle of the Bulge starter set, a Sherman tank, another 30 infantrymen, and a whole plethora of support weapons. This gave me a sold 70 infantry as well as 2 vehicles to support them

This month, I managed paint the 30 infantry I had assembled in October, as well as a few of the weapons team I picked up. While I haven’t finished the basing on all of the models (darn you Amazon and your slow snow deliveries) I was able to lock down exactly how I wanted to base these guys. A sparse snow covering with some foliage and grass poking out of the snow. This gave the bases the look of a snow covered forest floor, perfect for any battlefield in the Winter of 1944/45 or for the snow-covered alpine peaks of Italy.

With this batch done, I got cracking on assembling the second wave of infantry, their heavier support weapons and then the much needed vehicle support!

Returning to the Old World

Switching back to one of the projects that y’all have seen quite a bit of this year, I dusted off my Old World army of 2024 and finished the last 10 Skeletons from the Tomb Kings Battalion I bought to begin the year!

I still love painting these Skeletons, even after finishing over 100 total this year so far! This last block of 10 is the last group of Skeleton Warriors/Archers I need for the 2000 Point Tomb King army I’ve been working on this year and as you can see below, the completed Skeletons look a formidable sight on the battlefield.

Now that the basic infantry is done, I can finally start the fun stuff. I’ve got a whole group of Stalkers, Scorpions, and Ushabti to get painted up and ready to defend the lands of Khemri! I guess I should even paint up one of those “Tomb Kings” that everybody has been talking about…Even the undead need a leader after all.

Before we move onto the last batch of models I worked on this week, I couldn’t let you leave before showing you the fearsome Necrosphinx I finished constructing this month.

News from the Kingdom of Arnor

Some of you readers may know this already but I got my start in wargaming way back in the early naughts with the release of the Lord of the Rings Strategy Battlegame. This game has always been my bread and butter, and while I took a break for a a year or so, the announcement of the new edition has brought me fully back.

I’ve been working on a middle earth gaming board the past few months, and an nice Arnor army to battle on it as you’ll see in the past few articles. I was able to continue this progress this month with a force of 6 Arnor Knights and a captain to lead them.

I wasn’t able to finish these brave defenders of Arnor this month but I imagine I’ll finish these in the first week of this month. Ready in time for the new Edition on 12/14!

Speaking of both next month and the new edition, I’ve got some huge plans for next year to go along with the new edition! I don’t have much in the way of details quite yet but I hope to share some more information next month!

A Tale of Many Warlords- July

  1. Mike P.
  2. Jerry S.
  3. Kevin C.
  4. Joe R.

Mike P.

My Journey of Painting Empire and Hobbit Miniatures

Over the past few months, I’ve been diving into the world of painting miniatures for Warhammer: The Old World and the Middle-Earth Strategy Battle Game, focusing on Empire and Hobbit models. This journey has been both challenging and rewarding, allowing me to combine my love for gaming with creative expression.

Painting the Empire

The Empire has always fascinated me with its blend of medieval aesthetics and vibrant color schemes. Painting these miniatures was an exciting project, and I wanted to capture the essence of these noble warriors through the following techniques:

-Classic Colors and Detailing: I started with the Empire’s signature reds and whites, using these bold colors to paint the uniforms and shields. To add realism, I incorporated metallic paints and experimented with techniques to achieve a metallic sheen on their armor.

-Intricate Heraldry: One of the most enjoyable parts was painting the intricate heraldry and banners. I used fine brushes to add tiny details to the crests, which required patience but significantly enhanced the models’ appearance.

– **Bases and Terrain:** To complement the miniatures, I crafted bases that mirrored the landscapes of the Empire. I added textures like cobblestones and grass tufts to create a sense of battle-worn terrain, making the models look like they were standing in the midst of a skirmish.

Painting Hobbits

Painting Hobbit miniatures for the **Middle-Earth Strategy Battle Game** was an entirely different experience. Hobbits are characterized by their simplicity and charm, which I aimed to capture in my painting.

-Earthy Tones and Subtle Shading: I used earthy colors like browns, greens, and muted reds to paint their clothing, ensuring the tones were warm and inviting. For shading, I employed washes to add depth to their small cloaks and tunics, highlighting the folds and creases.

Community and Learning Resources

Throughout this journey, I’ve leaned heavily on the painting community for inspiration and advice. YouTube tutorials from channels like “Warhammer TV” provided step-by-step guides that helped refine my skills. Social media platforms like Instagram offered a space to share my progress and gather feedback from fellow enthusiasts, while local hobby workshops and competitions fueled my passion by connecting me with like-minded individuals.

Conclusion

Focusing on Empire and Hobbit miniatures has been a delightful artistic adventure. Whether it’s the disciplined soldiers of the Empire or the endearing Hobbits of the Shire, each miniature tells a story, and painting them has deepened my connection to these fascinating worlds. As I continue to hone my techniques, I look forward to exploring even more characters and bringing them to life with my own artistic touch.

Jerry S.

Wow July was a fun month. The oppressive heat of the southern summer, and a quick bout with Covid put a pin in my outdoor activities and forced me to spend most of my free time indoors. I aimed to take maximum advantage of my situation by painting as much as possible!

Painting in the Age of Darkness

With NOVA looming in the near future, my #1 priority this month has been getting my Thunderhawk ready for the tabletop. Every NOVA, myself and a couple friends play in the Horus Heresy megabattle that is hosted on Saturday evening. Its typically the only chance we have to bring out our truly titanic(pun intended) warmachines and this year Mike P. and I are hoping to reveal our super heavy fliers to the world. To do that though, I need to finish painting mine!

I made some great progress on the massive bird, airbrushing all of the blue and white panels then tackling the majority of the metallics with the brush.

I’m not 100% happy with the way the paneling as turned out. I was hoping there would be a little more visual interest but I have yet to shade and highlight so that will hopefully help. stay tuned and if everything goes right, I will have a completed thunderhawk ready for the next update!

The thunderhawk has been just eating my painting time this month but I managed to step away for a couple hours and painted up the new Hibou Khan that was released earlier this summer.

I am very pleased with how this model turned out. As many of you know, white is a famously difficult color to get right and I went back and forth for months on how I would be painting my White Scars. The process I settled on seems to be exactly what I was hoping for as it allows me to paint a crisp white and then dirty it down. This really sells the effect of a polished white armor that has been well used.

One more step in the Old World

Moving away from Horus Heresy, I was also able to paint yet another block of skeletons for my tomb kings. This time they are equipped with bows instead of spears though! Very exciting. I’ve got 1 last block of 10 skeleton archers to paint before the year closes but I hope to paint some of the more esoteric units that the Tomb Kings can call upon in the next couple months.

A Return to Middle Earth

To close the month out, I want to share a special teaser for a project that I’m hoping to work on as the year ends.

I’ve always loved the kingdoms of men in The Lord of The Rings, the men of Gondor especially. The recent slow drip of reveals from games workshop has fully awoken something inside of me and I had the uncontrollable urge to paint some Middle Earth models ahead of the Fall of Arnor book coming later this year.

I have some really big plans for this book, my 3d printer is running and the long neglected Arnor models in my cupboard are stirring…. But this may be for a later update. For now, here is a test model for my soon to be Army of Arnor.

Kevin C.

Well, gonna brag here a bit… I was very productive this month. I am well on my way to having at least two armies fully completed by the end of the year (possibly even three – more on that later). These are armies that did not even have a single miniature painted or assembled a year ago.

But first, Blood Bowl.

(My Very Own) Halfling Blood Bowl Team

Last month, I painted up someone else’s Halfling Blood Bowl Team. I was unsure how the paint scheme was going to look, but I ended up being quite pleased with it, so I copied it for myself.

I decided to put them on smaller bases, being wee men. I’m not sure if I like the decision to be honest, as the flock static grass I use for most of my Blood Bowl teams seems a bit crowded on these bases where they didn’t on the larger bases. Something to keep in mind for some of the smaller bases in the future.

You can really see the grass crowding with my MVP for this team… the bloodthirsty Akhorne. Still, I’m glad I have this miniature finished.

Dracosans to Complete My Solar Auxilia

So, Dracosans were released by GW a few weeks ago, but I already had printed off 19 third-party miniatures, so I figured I’d paint those guys up rather than needing to buy more kits. I think the third-party miniatures ended up working great, as long as I keep them right side up.

The printer did not do a very good job with the bottom side of the tanks, however, so I gave almost no attention to the bottom. They proved very difficult to paint, so I didn’t even bother. Still, better than the Rogal Dorn coming in without a bottom plate (que ribbing Jerry…)

And, with the Dracosans done, that completes this stage of my Legions Imperialis Army. I do plan on painting up my Titans later this year, but here are my Vostroyans in all their glory.

I will be bringing a portion of these guys to NOVA, so we will see how they do.

Bretonnian Archers

My final task of this month was to complete my Bretonnian Archers. This was the first time I painted peasants for the Bretonnian army, so I wanted to make sure they were plenty dirty, muddy, and rustic.

A lot of paint schemes I have seen online, including the video tutorial I watched by Duncan Rhodes, have the peasants wearing the livery of the army. However, I wanted to keep these guys in a consistent color of browns, greys, and greens – colors that were absent from my knights. I am hopeful that the Archers (and eventually the Men at Arms) will be so contrasted with the knights that the difference in status will be apparent on the table top.

It looks like I will finish my Men at Arms next month, and thus the entirety of my Bretonnian starter set before NOVA. Granted, I am not bringing them to NOVA (yet) but I will be delighted to finish such a goal that I set out for myself.

I have even finished all of the shields, which I painted separately. I believe painting them separate from the bodies is the only way to go, and I’m glad I had that foresight. I knew I wanted to colors of old Couronne (red and blue quartered), but I am unsure whether I will add a sigil to the heraldry.

I will take a full army picture when the Men at Arms are complete. Until then, take care!

Joe R.

Here we are again! I had initially thought my contributions would be fairly limited this month, but I had forgotten some non-painting activities that surely count!


Five Parsecs from Home – Prep
5PFH is a solo sci-fi wargame campaign experience written by Nordic Weasel Games and produced by Modiphius. It’s miniature agnostic and I have a ton of sci-fi minis! However, I started my own campaign roughly a year ago and have done very little to advance the story. I had no terrain! So, after a year of collecting and printing terrain I’m finally ready to get things rolling again. I’ve assigned minis to each member of my tramp freighter crew and plan to begin running adventures and painting the miniatures in the coming months. Thanks Necromunda for giving me everything I could ever hope for to play in a sci-fi world!

Like all good science fiction there are a suite of alien races. Titan Forge Games released STL files specifically for 5PFH which includes some of these aliens. I printed myself an Engineer (a race in this particular setting) to represent my own Engineer, E’Loo. However, I didn’t like their model for the war-like race called the K’Erin. Lots of folks use 40K Orks for this, but I wanted to use Eldar instead. I had received a box of Corsair Voidscarred at NOVA Open one year, but never built them. I also have the Striking Scorpions from the Kill Team: Salvation box. This leads to my next project…


Kill Team –Corsair Voidscarred
I finally assembled these models! Talk about a task. This was maybe the most complicated set of GW models I’ve ever worked on. I’m used to Necromunda and Blood Bowl where you basically get duplicates of the same sprue. The Corsairs come with 3 unique sprues that are not organized in any fashion (as far as I could tell). It was something like 160 pieces.


I chose to make the following agents: Voidscarred Felarch (magnetized with a neuro disruptor or shuriken rifle), Voidscarred Gunner w/ blaster, Voidscarred Heavy Gunner w/ wraithcannon, Voidscarred Starstorm Duellist, Voidscarred Kurnite Hunter, Voidscarred Shade Runner, Voidscarred Kurnathi, Voidscarred Fate Dealer, Voidscarred Way Seeker, and Voidscarred Soul Weaver. This was mostly chosen as “rule of cool”, but I did find some recommendations online. I have so many bits left over that I might purchase some additional bodies on Ebay and make a couple standard warriors as substitutions (as someone else suggested). Aside from being the toughest models I’ve assembled (so far), I also took care to smooth out sprue connection points and remove mold lines. This is new for me. I traditionally feel victorious having assembled the models. I don’t usually take the time to make them look good.

I selected the Voidscarred Kurnathi to be Ki Starvoid, my K’Erin. I printed out some additional industrial bases which I will paint in a Necromunda style (as seen in my first article). I’ll get Ki primed in the next week or so and blue tac him to his base until I’m ready to paint him in earnest.

Blood Bowl – The Wynnstaadt Warriors I – Dwarf Team
I continued to work on my Dwarf team this month. I’ve been playing games with them in my local Blood Bowl league while also trying to paint them. They were cast by a 3rd party Blood Bowl provider a ways back and I started noticing a few problems. I won’t go into heavy detail but kept having pieces fall off in the middle of my games. Some of these pieces, like the helmet wings shown below, has been an ongoing thorn in my side. So, I decided to try and pin them.

This was a pain in the ass. I had read recently to avoid using paper clips (my go to at this point) and try something softer. One suggestion was to use solder. I really liked using solder because it was much easier to clean at the end due to its softness. However, I’ve purchased some aluminum wire for future efforts.


I absolutely destroyed these helmet wings. As you can see, I’ve had to use green stuff to clean up spots where the drill removed entire parts of the wing. However, when painted, you can’t really tell the difference. Hopefully, the wings won’t be falling off anytime soon. HOWEVER, I dropped one of the blitzers while trying to drill his helmet for the pin. His hand popped off and ended up getting pretty mashed out of shape. As did his helmet. So, I decided I was done with these models and went in search of a new Dwarf team.

Blood Bowl – The Wynnstaadt Warriors II – Dwarf Team
I had purchased the metal team above because 1) no one I knew had those models and 2)I liked the aesthetic. At the time, EVERYONE had the GW 3rd edition Blood Bowl team. I own the current GW Dwarf team, but again, everyone is using it. I wanted something different. I searched through a few teams until I decided on Torchlight Miniatures Sewer Guard. These dwarves have a very constable-esque vibe that I thought would be pleasant to paint. The positionals have a very steam-punk vibe, which I liked less, but oh well. It was cool.


I printed a few test models and realized these Dwarves were HUGE. They rivaled my Chaos Chosen Blockers! So, I shrunk them down to 90% and decided to try a new resin I’d been saving: Siraya Tech FAST Smokey Black. I usually use ST FAST Grey, which is a great resin but the pigment separates from the resin over time. If I don’t print for a couple of days, I end up spending a bunch of time resuspending the pigment. Smokey Black is clear resin with a dye added. Dyes are soluble in their medium, meaning they don’t separate. I can leave this resin sitting and it’s ready to go whenever I’m ready. It also looks incredibly cool! I think I’ll be sticking with this moving forward.

The models are still big, but more in line with the GW dwarves (~33 mm from foot to head). They definitely warrant 32mm bases. I primed a few and went about blocking my scheme on a test model. You can see the test model below.

I originally had more gold sprinkled about the model (specifically on the helm), but my wife convinced me to keep the gold for the fabrics and use silver for any metal. I tried it out and agreed (though I kept the center of the belt gold because… reasons?). This also marks one of the first times I’ve tried to paint a model without attaching it to a base. As you can see, he’s just blue tac’d. It was amazing to pick the model up and get to some of those hard-to-reach places! Again, this will probably be standard moving forward. I worked on the test model for another couple hours and ended roughly here.

I was generally pretty pleased. Some of the green highlights were too bright, so I took my midtone and glazed them back down. I think it helped, but I didn’t capture a picture of it.
I’ve since started blocking another Dwarf. The hope is to have 12 models done by the Atlantic Coast Charity Cup. It might be a challenge, but I’m going to try my best!

A Tale of Many Warlords- April

Jerry S.

Howdy All! I’m taking lead this month and I gotta admit I’m pretty happy with my progress this month. This has been a pretty exciting month on my hobby desk. I continued my roll with my Tomb Kings and was able to get a good amount of progress on a couple Horus Heresy projects.

Tomb Kings

To start, I’ve continued making steady progress on my Tomb Kings with another block of 20 skeletons painted in the teal white scheme that I showed off in February. This is my 3rd 20 skeleton block completed and they make quite the sight all lined up. These 3 blocks of bones will be the main bulk of my Tomb Kings army for the time being.

While I still have 20 skeleton archers to paint, I will be taking a small break from painting the rank and file this month to paint up some of the more fun models in the Tomb Kings lineup. Below is a work in progress shot of a casket of souls I was working on as our April deadline arrived. I am very much looking forward to seeing this model completed, as well as one of the more Colossal models in the range.

The Horus Heresy

Turning our attention to the 31st millennium- I made some great progress on a squad of 5 Gal Vorbak and a Terminator Captain for my Word Bearers force that I will be using at the NOVA Open’s Zone Mortalis event in September.

This was my first time painting a fire effect and while the transitions could be a little smoother, I am thrilled with the finished product.

Solar Auxilia

I’ve been waffling back and forth on what army I wanted to bring to my NOVA doubles event and this month’s release gave me my answer. Anybody who knows me, knows that my first love in warhammer is the humble guardsman. The release of Solar Auxilia in plastic, has given me the incredible opportunity to work on an army that I’ve always loved, albeit from afar. I have acquired a few of the resin models from the always generous Mike P. and along with my headfirst dive into the new plastics, I will soon be able to put a 3000 point (unpainted) army on the field.

Needless to say, I’ve gone fully off the deep end on this release as this isn’t even half of the pile of Solar Auxilia models I have in my backlog now.

I think its safe to say that for the rest of the year, our loyal readers can expect to see a constant stream of finished Solar Auxilia models to join the already steady stream of Tomb Kings.

To finish up this month, I have a couple pictures of my first painted epic White Scars, alongside some 3d printed terrain that will be used as an Armies on Parade board for the NOVA open.

Oh and this landing pad….I wonder what will be calling this home…..


Kevin C.

Sadly, in contrast to last month where I had two Bretonnian units done, this month I have … none. With several deliverables at work, as well as a family trip down to Texas to see the eclipse in the middle of the month, my hobby time was severely curtailed. But, I was able to see a total solar eclipse for the first time, albeit through the clouds. So, this was cool…

I’ve also started hitting a groove where I watch my friends (and wife) play Helldivers 2 during the evenings, defending managed democracy, while I paint. It’s an enjoyable distraction, and I get to keep up with the gossip.

Legions Imperialis

So, I have a butt-ton of LI stuff to still paint:

  • Three Support Boxes (thank you Austin for needling me into buying a third)
  • Two Malcador Infernuses (Infernii?)
  • Two Valdor Tanks
  • Six Lightning Fighters
  • Two Marauder Bombers
  • Four Warhound Titans
  • Two Reaver Titans

I am very, very slowly making my way through the list. I decided to get the bases done, all in one go, with the technique shown on the Games Workshop Youtube channel video here (https://youtu.be/6MB5hLu9dlw).

  • Wraithbone primer
  • Seraphim Sepia Wash
  • Stipple brush with White Scar

This provides a nice contrast to my red & gold Vostroyans – it’s lighter in color, but still from the warm side of the palette, so it brings the force together.

After these were complete, I got super lazy and primed all of the platforms in the Support box Leadbelcher, and painted a few details on them after I got back from Texas. They are not great, but they are done, which has a quality all of its own.

Blood Bowl Black Orcs

These were not mine, but friends of the blog, who are Very Serious Blood Bowl Players™, needed a team done by May 3. I told them I could help them out, since I’ve painted Black Orcs before, which was a bit ambitious of me, considering my workload this month.

For Orc skin, I generally like doing lighter green skin, since that tends to make them pop on the table more. I really like Duncan Rhodes’ recipe that he uses for his Goff Boy in this video (https://youtu.be/EHxvAN7haMs). It’s not Blood Bowl, but it works well for most orcs, and it’s scalable – meaning, if I want to add extra details, it’s definitely doable.

  • Orruk Flesh Base
  • Athonian Camoshade Wash
  • Orruk Flesh first highlight
  • Nurgling Green second highlight
  • Kislev Flesh on select areas – lips, eartips, nosetips, scar tissue

Because they are supposed to be Black Orcs, I based the armor all in Leadbelcher and then covered it in Black Contrast – very easy dark armor there that you can then build upon with Stormhost Silver highlight. For the leather pants and belts, I used two different recipes for brown that I also use for my Bretonnians.

  • Rhinox Hide 🡪 Doombull Brown 🡪 Tuskgor Fur for the pants (I use this for the leather bits on Bretonnians)
  • Mournfang Brown 🡪 Skrag Brown for the belts

Because, as noted before, the owners of these Black Orcs are Very Serious Blood Bowl Players™, they needed these minis to have numbers for League Play. For the orcs, this isn’t a problem, but there is not a lot of armor for the goblins. So, I decided to put the numbers on their butts.

Finally, I decided to try out Technical Paints, using more or less the same recipe I plan to use for the movement trays for my Bretonnians, as shown in this video (https://youtu.be/k7tUuwJgZAs). Stirland Mud, Agrax Earthshade, and Gorthor Brown, along with healthy heaping of grass flock. To make it more football-like, I added white lines to the grass, using a coffee stirrer.

Supporting My Bretonnians

So, I was not able to paint any Bretonnian miniatures, but that doesn’t mean I did not paint anything for The Old World. A few months ago, I bought some movement trays from Litko, when they had just released Lance Formation shaped movement trays. I finally got time to glue them together and paint them accordingly. I also magnetized both the Knight bases and the movement trays, for easier transport. Hopefully this will make transporting them so much easier than packing them individually – I will not be doing that again.

That is all for me. I am hopeful that next month I will have the remainder of my knights completed. Until then!


Austin B.

April Advancements

Much like some of the others, this month has been a busy time for me, particularly with work. But still, I was able to get a bit of hobbying done in what little free time I had, though not quite as much as I had hoped. Between the lack of time and my constant jumping between projects, I don’t have as much to show as some of the others here – though with a few things in stages on the painting table, the next month might prove more productive! Still, it wasn’t a meaningless month, and I’ve still made great progress on miniatures for my newest obsession: Star Wars Shatterpoint. And necessarily, too, as my locals is having a tournament on May 11th that I plan to attend with a fully painted roster!

I’ll start with perhaps one of my favorites, the “Fearless and Inventive” squad pack, harkening back to the opening scenes of Return of the Jedi, with Leia in her bounty hunter getup, Lando and R2D2 in disguise, and Luke in his iconic black robes. R2 and Luke were technically completed last month, but were not yet based. All of these were very fun to paint up, all being very individual – though I did struggle a great deal with R2 as many of his details were rather small and soft. Luke was ultimately the easiest, just being almost entirely black robes. Ultimately though I found Leia (or well, Boushh) the most fun to paint, as I got to play around with trying to differentiate a few different tans and browns on a single model. My current intention is to run these guys as one of my squads in the upcoming event, so I was happy to get them all done.

C:\Users\austi\AppData\Local\Microsoft\Windows\INetCache\Content.Word\20240430_092724.jpg

Next up, and totally new for you all, is the “That’s Good Business” squad pack. Have I mentioned how much I love the box names for Shatterpoint? They’re great, and this box has probably one of the best. Haha! But here we have what will likely be my second squad for the event, as Shatterpoint lists require you run two squads together to form your Strike Team. And who better to assist our Rebel friends than the magnificent Hondo Ohnaka and his band of pirates? Hondo here especially was a real joy to paint (well, except for the monkey-lizard on his shoulder, whom I should have left off for sub-assembly. Again the uniqueness aspect of many of these Shatterpoint squads strikes again, as really every one of these models was fun and individual. Unfortunately that individuality also means batch painting is nearly impossible, so the time it takes to paint these models is increased compared to my more usual projects – certainly a contributing factor to my significant decrease in finished models to show off this month. 

Now, if I have the time between the end of this month and the event, the plan is actually to replace the Weequay Pirates above with the generic Bounty Hunters from my recently acquired “Fistfull of Credits” squad pack. You will almost certainly see them – and likely their named compatriots – in the next monthly updated. But if I can get them done in the remaining week and a half is yet to be seen…?

Other than that, further progress has been made on the initial two boxes I purchased, the two different Ewok squad packs. Again, some of these were already complete at the end of last month, but now I have finished some more of them and have gotten them all based up. The generic Ewoks still remain unfinished though. Unlike many of the other models, they have not been very fun to paint, at least for me. To be honest, it is partially my fault for having assembled them completely first, instead of doing them in sub-assemblies. But partially it’s the model’s fault, as each of the Ewoks, of which there are three to a base, have nearly the same amount of detail as the individual character models, so the time required to paint them to my standard is just absurd. Hopefully they will be done by next month, but I am not so sure I will get back to them before other things.

Plans And Preparations

Beyond all my progress with Shatterpoint, I’ve been turning my attention towards preparing my various lists for the NOVA Open this year. I have signed up for most of the Blood Bowl events at NOVA, as well as one event for Legions Imperialis. Though the convention is months away, I do not want to have to be painting frantically in the weeks leading up to the event, and would rather get my various teams and whatnot completed beforehand, so I can shift focus back to my other projects. Of course, why not kill two birds with one stone though, and complete some things I want to do anyways, or projects that I have been holding off on? I haven’t fully decided on all the teams I will be bringing for the various Blood Bowl events, but I do have a short list that I figure I will make the focus of things for a while. Meanwhile, I need to get my Legions Imperialis painted up anyways, as I am falling behind with the releases, so they were to become a priority anyways. And I have already started on my Solar Auxilia Support boxes, as well as a clutch of vehicles that I have added since I last showed off the army. I had hoped to have some of them done this month, but the support weapons have proven to be a bit of a chore to paint – though the vehicles are thankfully the opposite. 

Now on the Blood Bowl side of things, I think I will be soon focusing on finishing up my Vampire team that has been sleeping in its coffin for a few months now. But besides that, the one team I have most certainly decided to bring is the College of Shadows for Dungeon Bowl, and I have begun the task of painting up that eclectic mix of Dark Elves, Skaven, and… Gnomes!

This little buddy is the test model for my College of Shadows team, showing off the team colors of dark blue and emerald green. He will be joined by a few more of his kind, alongside some Skaven Blitzers, Gutter Runners, and a Thrower, as well as the terrifying Witch Elf and another Dark Elf lineman. But more on them next month, hopefully! And maybe a little magical surprise to go along with them…


Michael S.

This month I’ve been busy with lots of travel, but wanted to still get as much does as possible. Last month, I set some ambitious goals of fully completing 3 units. Sadly, I fell a bit short of my original goal. I was able to complete 2 of my 3 units. In addition, I made some good progress on a few other models that were waiting for some paint. All said and done, not all too disappointed given my busy month!

First off, my Heresy Death Guard. These tactical support marines have made an appearance before as a half-finished unit, but I finally got transfers applied. They are just waiting for some varnish!

I am pretty stoked about the final look for this unit. The transfers really brings them together.

Next up, my Tomb Kings have their first completed regiment. A unit of skeleton warriors in bright red. Quite happy with how this scheme turned out, and I am looking forward to painting the next unit. This was a fun exercise in contrast paint for me, a tool I haven’t heavily used before as the primary paint for a unit.

With the completed units out of the way, I wanted to showcase a few miscellaneous models from my desk. My longtime 40k army is Black Templars, though shameful few models are fully painted. After painting the units above, I had the itch to get back to edge highlighting some black armor and pulled out a few models. I was able to get some paint on a few of the terminators from Leviathan.

Frustratingly, the AP Speedpaint I used on the shoulderpad started to crackle when drying. This seems to be a side effect of using it over top of a less-than-matte undercoat. It was relatively easy to hit it with a wash to “fix” the crackle effect, but the shoulder pad ended up a much darker color than I intended. Despite this setback, I was super happy with how the cape and face turned out. The heraldry needs some attention, as to the metallics, but otherwise the model is coming together nicely.

In a departure to some non-GW models, I spent a little bit of time working on my Malifaux crew. I wanted to play with some of my new vibrant colors from the updated Vallejo Game Color range. As a long time VGC-hater, these paints have quickly become my go-to. The original colors often had a satin/glossy finish, and many colors had poor coverage. The updated range is quite the opposite!

That just about does it for me! May is shaping up to be a similarly busy month, so in an effort to achieve my goals, I am only aiming to finish my unit of tactical marines left over from this month. Happy hobbying!


Mike P.

Firstly, a huge shoutout to Mike and Taylor—it was fantastic meeting you both over the weekend, and I’m incredibly grateful for all the love and support.

Now, to bring everyone up to speed: I’ve admittedly taken a bit of a break from wielding the paintbrush recently. Truth be told, last month’s update was missing because, A, my productivity took a dip, and B, I’ve been pouring my efforts into completing my final papers for my bachelor’s degree. However, amidst the chaos, I managed to make some progress on a remarkable new project—the Bretonnian Paladin. This model has been an absolute joy to paint, though I must confess, I lost track of time completely immersed in the process. But hey, sometimes that’s just part of the magic, isn’t it?

A statue of a knight holding a sword

Description automatically generated

In my initial article, I briefly mentioned my visit to Warhammer World, and now I’m excited to delve deeper into how I made that journey happen and share my experiences along the way. This isn’t meant to be the definitive guide, but rather a practical roadmap for those looking to embark on this adventure without breaking the bank. For those unfamiliar, Warhammer World is akin to Yankee Stadium for baseball fans or the Canton, Ohio for football enthusiasts—it’s the ultimate destination for tabletop miniatures aficionados, often likened to the “Disney World” of our niche hobby.

Surprisingly, prior to my own visit in 2022, I struggled to find comprehensive guidance on how to make the trip a reality. Despite reaching out to others who had been, I never received that insider’s perspective or “homeboy hook-up” that would truly demystify the process. It felt like an elusive secret guarded by those in the know. Since returning from my trip, I’ve been approached by numerous people seeking advice on how to replicate my experience and make their own Warhammer World pilgrimage. Thus, I feel compelled to share my insights and tips with fellow hobbyists eager to take the leap.

Picture it: mid-June 2022, a world still grappling with the aftershocks of COVID, and I’m feeling the weight of it all as I juggle the demands of my job. Every day feels like an uphill battle against the monotony, and I’m yearning for a break—something to shake up the routine. Then, in a moment of sheer desperation, a wild idea strikes me: what if I just went to Warhammer World?

Of course, there are hurdles to clear. Being married and in my line of work, jetting off to another country isn’t exactly a spontaneous decision. I figured it was just a fleeting daydream, something to ponder over my morning coffee. But then, I decided to broach the subject with my wife, expecting a skeptical response. To my surprise, she actually gave me her blessing. Emboldened by this unexpected support, I approached my workplace the next day—and to my astonishment, they too gave me the green light after some necessary paperwork and phone calls. Just like that, within the span of a single week, I had all the necessary approvals to make this impromptu self-adventure a reality. Shocking, indeed.

With all the necessary approvals in hand, I wasted no time. I swiftly purchased a plane ticket for the following Sunday, flying out from Baltimore to London. Anticipating my biggest hurdles, I tackled them head-on: securing my plane ticket, lodging, and a round-trip day train ticket. I knew that if I could nail down these three essentials, the entire trip would start to take shape. In terms of finances, I managed to snag all three items combined for a mere grand. Now, don’t get me wrong—I wasn’t living it up at the Ritz Carlton. Instead, I opted for a more budget-friendly option: a hostel above a pub in Shoreditch, a vibrant neighborhood in London. At just around 40 bucks a night, it was a steal; and if there are two things that I love most in this world, its beer and Warhammer.

As Sunday night descended, my wife dropped me off at BWI, and I embarked on a red-eye flight bound for London, with a layover in Iceland adding an unexpected twist to the journey. Despite my extensive flying experience, this particular flight proved to be one for the books. Peering out of my window, I was greeted by the breathtaking sight of Greenland’s icy expanse as the early morning light cast a mesmerizing glow. Upon touching down in Iceland, however, I received less-than-ideal news: my next flight was delayed by a whopping 8 hours, leaving me stranded in the Keflavik airport. Yet, surprisingly, I found myself unfazed by the setback. After all, there are certainly worse places to be marooned than in Iceland. To pass the time, I indulged in a few early morning beers, sampled some delectable Icelandic Pizza (a culinary delight!), and embraced my inner nomad by catching some shut-eye for the next five hours. Despite the unexpected delay, I couldn’t help but appreciate the unique experience unfolding before me.

A view of the sky from an airplane window
Description automatically generated
Photo I took over Greenland
A person wearing sunglasses and a hat
Description automatically generated
Sleeping off a few in Keflavik

Arriving in London late on a Monday afternoon, I wasted no time immersing myself in the vibrant energy of the city. With nothing but a trusty raincoat and my rucksack, I navigated the bustling streets, hopping on a shuttle (the Tube) from the airport to Liverpool Street Station. From there, a brief stroll led me to my humble abode for the night—a cozy hostel. After checking in, I rewarded myself with a well-deserved pint downstairs at the pub before calling it a night.

The next morning dawned bright and early, with a thrilling agenda awaiting me: a journey to the legendary Warhammer World in Nottingham. Armed with my faithful rucksack, I took the Tube to Paddington Station, where I boarded the East Midlands Railway (EMR) bound for my destination. The scenic two-hour train ride whisked me away to Nottingham, where I embarked on a picturesque half-hour walk along the serene river, finally arriving at the hallowed grounds of Warhammer World.

As I stepped foot inside, a sense of accomplishment washed over me. After nearly two decades of yearning, I had finally made it. For the next six hours, I savored every moment, immersing myself in the sights, scents, and exhibits that surrounded me. From leisurely strolls through the exhibit hall to perusing the offerings in the store, to soaking in the vibrant atmosphere of the gaming hall, I was in my element. A few pints and a hearty lunch at Bugman’s Bar only added to the euphoria of the experience.

A model of a castle
Description automatically generated
My favorite exhibit in the Exhibition Hall

A burger and fries on a tray
Description automatically generated
This ridiculous Burger I ordered for Lunch at Bugman’s Bar. It was amazing.

But alas, all good things must come to an end. Reluctantly, I bid farewell to Warhammer World, walking back to the train station and embarking on the return journey back to London. As the train whisked me away, I couldn’t help but reflect on the incredible journey I had just undertaken—a journey that had taken me from the comforts of my home in Maryland, USA, to the very heart of my long-held dreams. It was a feeling like no other, and I relished every moment of it.

For my final two days in London, I fully embraced my inner tourist, immersing myself in the rich tapestry of experiences the city had to offer. From the storied walls of the Tower of London to the spine-tingling thrills of the London Dungeon—an absolute must-see, by the way—I left no stone unturned in my quest for adventure.

With boundless energy and an insatiable curiosity, I traversed the city streets, weaving through iconic landmarks like Buckingham Palace and delving into the depths of world-class museums that housed treasures from centuries past. Along the way, I found myself forging new connections, striking up conversations with fellow travelers and locals alike, each encounter adding a vibrant hue to the canvas of my London adventure. Of course, no exploration of London would be complete without indulging in its vibrant pub culture. With a pint in hand, I raised a toast to new experiences and cherished memories, savoring the camaraderie and warmth that permeated each bustling establishment.

A large building with a clock tower
Description automatically generated
Photo I took of Parliament

As the sun set on my final evening in this captivating city, I couldn’t help but reflect on the whirlwind of experiences that had unfolded over the past several days. With a sense of fulfillment and contentment, I bid farewell to London, knowing that I had seized every opportunity and embraced every moment to the fullest. And so, as Friday morning dawned, I embarked on the journey homeward, my heart brimming with gratitude for the memories made and the adventures shared. England had left an indelible mark on my soul, and as I soared through the skies, I carried with me the essence of this remarkable journey—a journey of discovery, connection, and boundless exploration.

From meticulously planning each step to navigating unexpected delays and serendipitous encounters, every moment has been a testament to the beauty of embracing the unknown. Warhammer World provided a sanctuary for my passion, while London’s historic landmarks and vibrant culture offered a tapestry of experiences unlike any other. All this at a cost around 1300 USD. As I bid farewell to London and head home, I’m filled with gratitude for the memories made and the lessons learned. I am grateful to share these experiences and insights with other hobbyists searching for Warhammer World and looking to embark on their own journey. This adventure reignited my passion for exploration and reminded me of the power of seizing every opportunity . So much so that I even made the trip two more time since then. Here’s to the journey—the highs, the lows, and everything in between. 


Joe R.

Welcome back everyone! Last month was quite the spread of hobby related projects (I might have snuck a few in from previous months). This month is quite different! However, things are ramping up in preparation for a Blood Bowl tournament in Canada!

Heartsdale Hedonists – Chaos Chosen, Blood Bowl

Those of you who read through last month will recognize this heading already. I was preparing for a Blood Bowl tournament in Roanoke VA (the Big Lick Brawl). I had decided to outfit my Chaos Chosen with an Ogre instead of the traditional Minotaur. However, I didn’t have one of those painted! That wouldn’t have been a huge deal, except I paid a fellow named Rawlin to paint my Chaos Chosen team around 10 years ago. I wanted to paint my Ogre to match (as closely as I could manage) to the existing team.

Here is the minotaur from the team, Aurum Barre, that I am trying to match with the Ogre. I do my best painting when I am experimenting with new skills or pushing myself outside of my small comfort zone. Last month I showed a zenithal highlight of the ogre, some putty work to try matching the basing, and some initial glazing.

  I spent roughly another week on the Ogre, who I named Argenti Barre, from the last update. I continued to glaze some additional layers onto the skin and generally block in the few spaces without any color. I was very

pleased with the skin, HOWEVER, I definitely think it would benefit from a few additional passes on the highlights. I’m not going to fret.


At this point, I was pretty pleased with the product. The pink tones did NOT match, but I didn’t think it was going to be distracting enough for folks to call it out. I started working on the base. Again, I don’t think it matches completely, but it’s close enough. I was about to call it done when I decided to add a blood effect to the hand (just like the Minotaur has!). You can see the results below. Again, I was very pleased with the effect. I varnished this model! I almost never do that! To finish off, I decided to use a gloss varnish on the metal surfaces and the shoulder pad. I think it looks pretty cool.


Overall, Argenti did very well at Big Lick Brawl. He even got a few compliments, especially from people who know my track record with finishing things.

The Moot Points – Halflings, Blood Bowl

Okay! Here we go! Halflings are one of my favorite teams in Blood Bowl. Not because they are a particularly amazing team, but because they come with their own built-in vibe. You might say, “Joe… don’t all stunty teams come with the same vibe?” No random internet person! I’ve had a lot of success with Ogres, so when I play Ogres I’m playing to win. Halflings? Not so much. This is my fun, maybe I’ll win, but I’m just here for a great time. Why? Well, every one of my team members is based off a different superhero. They are all painted to reflect the hero they represent. This means I can directly look at the model and know who it is. This has led to some legends on the team. Michael John Custard (Booster Gold) is a ball hog but tends to pull off the big plays when I need them. Thor Odinsoup can take punches on the line all day and rarely get injured. This team was produced by Willy Miniatures through a Kickstarter several years ago. They are sculpted by Pedro Ramos, who is one of my favorite creatives working in Blood Bowl.


A few of us from the Northern Virginia area are headed up to Ottawa for the Amorical Cup in early June. The Amorical Cup is designed to be a North American Team tournament for Blood Bowl. It was supposed to occur in 2020, but obviously that didn’t happen. Now it’s back! I thought it would be nice to give the Moot Points a fresh coat of paint and make them look a little more dynamic if we’re going to travel to a different country for Blood Bowl. I painted this team years ago. In this case, “painted” means I base coated them. They look fine on the table, but I know with a little TLC they could look so much better.


Unfortunately, I forgot to take BEFORE pictures of the miniatures I’m presenting today. I’ll make sure to grab those for the next batch. Overall, I need to touch-up 13 Halflings, 2 Treemen, and the star player Griff Oberwald.


I had recently picked up a few triads from Two Thin Coats (Black to dark grey, Ivory to white, wave 1 greens) and wanted to test out those paints. So I selected my Batman Halfling, Bruce Wyne. Bruce’s main colors are Grey and black, with yellow and blue as secondary colors. I wasn’t planning to glaze this time, so I expected the highlights to come across a little more cartoony than Argenti. I did REALLY like glazing the Vallejo Red-Violet into the skin recesses, so I started with that. I cleaned up all of the basecoats. They had accumulated a lot of chips and I had applied a very sloppy wash, which had really dulled the colors. I worked the skin a bit. It’s not my best work, but it’s definitely better than it was.


You can see I had a little trouble highlighting the black, especially on the helmet and shoulder pad. I still haven’t figured out how to highlight spheres. So I basically edge highlighted and picked out a few bright highlights. I suspect this will be a problem with the whole team. I was really pleased with the yellow highlights. You can really see them on the shoulder pad, but they ended up really helping the model pop.

Finally, I finished by basing the model with Geek Gaming Scenics spring “sawdust grass”. I just applied a layer of semi thick PVA and dunked it into the sawdust. So far, it’s been pretty durable. I will definitely add a white Blood Bowl lines (time permitting) once the team has been cleaned up.


Then I jumped over to Bisquey Batson (Shazam! Or Captain Marvel for you comics OGs out there). Bisquey had the same problems as Bruce. Again, I started by glazing red violet into the recesses of the skin and then brightening the skin up. Then I started working on the whites. I’m pretty sure the basecoat color was the grey from the old citadel foundation paints. I wanted to preserve some of that color in the shadows. I… didn’t do a great job. I used Ulthuan Grey as the next highlight, which REALLY popped the whites. I finished with some very limited highlights from Two Thin Coats Trooper White. I’m still working on Bisquey’s reds and golds, but he’s definitely moved up in the world. I am planning to finish him this week and get him based.


 Next up? Thor Odinsoup is on deck!


A Tale of Many Warlords- February

The weather is starting to better, the days are getting longer and it’s finally time for another installment of your favorite Warhammer blog series. This was the first full month many of us had our Warhammer: The Old World minis and as you are about to see, we made a ton of progress, if not a lot of painting progress….

Michael S.

This month I spent more time than I hoped assembling models.

The Stone Age

I am naturally a bit slower than most when it comes to the building and painting process. I absolutely HATE seeing mold lines on a mini while I am painting, so my excitement to build some retro models lasted about 10 minutes, or as long as it takes to trim horrendous mold lines from a single skeleton torso. Many years of building modern kits has spoiled me on what I consider a long clean-up job for a mini, so after crawling across the finish line for my first 10 skeletons, I knew I had to change something about my process.

The Industrial Age

Knowing I had to build another… checks notes62 skeleton warriors drained me of most of my remaining excitement. I was in for the long haul and there was no turning back.

One of the few redeeming qualities of miniatures made in the 90s/2000s was the ability to mix and match parts. Very few pieces were numbered, and all you had to do was glue some arms to a body and that body to a base. It wasn’t until somewhat recently that mono-pose kits became the norm much to the displeasure of kitbashers everywhere. Another bonus of these interchangeable parts was that there was ALMOST no way to assemble your minis incorrectly. With this in mind, I pulled out my heavy duty clippers and got to work clipping out all the remaining skeleton spearmen. After about 15 minutes of focused work, I was left with my very own homemade box of citadel skulls!

My gameplan here was to streamline the process by building them all at once in an assembly line.

  1. Clip out all the parts
  2. Use a sharp hobby knife to cut away any extra material left from the sprue
  3. Use a dull hobby knife to scrape away any mold lines
  4. Use some fine sandpaper to smooth out any harsh lines left by previous steps
  5. Assemble

With a plan in place, I wasted no further time. I trimmed each piece, and moved it to the other side of the bin. Each step only used a single tool, so I didn’t have to worry much about picking up and putting down the same tool hundreds of times over the course of the whole kit.

This was the most time consuming part of building, but if you want great looking models, you have to start with a cleaned miniature. This is even more important for older models where the molds aren’t in great condition. The images below show a before and after of some pretty severe mold slips. That’s definitely going to leave a mark if not addressed in assembly. You’ll notice a few mold lines on the spine that just aren’t worth the effort, but the legs trimmed up nicely.

Mold lines that follow sharp edges on the model are often missed. I find taking a few seconds to clean these adds a lot to a mini’s final appearance. Edge highlights on super sharp edges (Like the shield on the right) have a tendency to be unnaturally thin compared to even a razor thin edge highlight on more rounded corners. Making sure all of your “sharp” edges are similar in shape makes it easier to get a good consistent edge highlight. Since the shields are going to be a major focus of these soldiers, it pays to take a little extra time now to prep them.

Once I took my final pass on all the parts, I sorted them as I went into small bins to keep parts of each type together. This made the assembly stage fly by. All in all I was able to assemble the other 30 spearmen in about 9 hours from start to finish. While it is by no means blazing fast, I am reasonably happy with the amount of time I spent given I was able to make all but a few mold shifts completely disappear.

From here on out, the rest of the process felt like assembling a lego kit.

The Information Age (Learning From My Mistakes)

Don’t play tomb kings.

Just kidding! Despite my desk being covered in a fine dusting of plastic shavings, ranking up my first two squads of warriors brought back all of my excitement and more. With larger projects, it easy to lose sight of the end goals, so breaking it down into smaller chunks really helped me stay motivated.

Tools For Retaining Your Sanity

Flash Scraper

Throughout my build of my Tomb Kings army, my most valuable tool has been a very dull hobby knife. A dulled blade is the perfect tool for scraping at mold lines, and is much less likely to damage a part then a sharp blade is. I have tried several other tools, including some dedicated micro deburring tools and have yet to find anything that is as easy to use and effective as a dull hobby knife.

Extra-Thin Plastic Cement

Some textures are just plain awful to clean if a mold line runs over them. In particular, plasma coils and rib cages come to mind. My preferred method for quickly tackling these is a quick light scrape with my dull hobby knife and some extra-thin cement. Brushing over just a tiny bit is usually enough to melt any shavings stuck in the detail and help hide the join.

Rubber Bands

Another useful tool was a handful of rubber bands in various sizes. Some parts, particularly the Skeleton Horses, just don’t want to stay together. Snapping a rubber band around parts as they dry helps speed up the assembly line process of building immensely. The Necrolith dragon also benefits from the added pressure to keep the ribcage together as it dries.

Other Projects

I sadly did nothing else this month except clip, sand and assemble tiny small skeletons.


Austin B.

February Progress?

Unlike the others, I have had to build fairly little this month. Between the fact that my army is composed of primarily of the mono-pose, single piece Night Goblins from Battle of Skull Pass, and I’d already done a fair bit of building last month, all I really had to do this month was rebase… checks notes… 90 goblins! Not really the most exciting process, but a far cry from removing mold lines from and assembling models nearly as old as I am. A simple afternoon and that was done. So now it was time to paint them, right?

Nope! Unfortunately I had some rather personal issues arise that tore through the first three weeks of this month, leaving me both short on capability and motivation for anything hobby related. While I have now begun the long process that is painting a veritable horde of goblins within the past few days, I am not even close to where I had hoped to be. Still, the process has been started, and I hope to have all or most of these basic bobos (gobos?) done by the next update.

C:\Users\austi\AppData\Local\Microsoft\Windows\INetCache\Content.Word\20240221_225823.jpg

Shush on the desk. It’s organized clutter, damnit! Maybe… Now, where did I put that pot of Nuln Oil again…?

Now, progress wasn’t on a complete standstill during the tumultuous early weeks of this month, and I was able to assemble a few further hero models and some unit fillers, mostly comprised of spare bits and the Looncourt models from Warhammer Underworlds. I won’t show those off quite yet though, as I still have a bit of work I want to do on them.

“February” Progress

Now, despite what was stated above, I am not without any work to show off! Between the time of our last post in January, and my unfortunate incident in early February, I was able to get a few more miniatures painted. Firstly, I finished up four more members to join the Squig Hopper unit for the model I showed off in the last update. The other five will come in time…

Furthermore, I was able to get ten Squigs done for a Squig Herder unit. They’ve been let loose! Where are their herders? Well, you’ll hopefully see them next month, so they can round off (or round up) the unit.

And last, but not least, I was able to paint perhaps one of my favorite models from the new Gloomspite Gitz range, the Loonboss on Giant Cave Squig. While he cannot lead my armies in the Old World, he’s still certainly an intimidating presence! The sickle-blade, the mask, the giant squig tongue… Ugh, I just love everything about this model.

Well, that’s it from me! Hopefully I have more to show you all next month. Much more…


Kevin C

So, as this is being posted, I am currently out of my house due to asbestos abatement, so my hobbying availability has certainly taken a hit in recent weeks. That being said, I was able to assemble the entire boxed set of Bretonnians before I left. Here are my thoughts:

The first thing that came to mind was just how much the sprues have changed in the past 20 years. Compare and contrast the two sprues, Men-at-Arms basically unchanged from when they were released back in … checks notes… 1998, and the Lord on Pegasus that was just released.

The tightness of the Lord on Pegasus sprue is definitely more in fashion these days, I assume thanks to the significant advancement in CAD software over the intervening years. I do appreciate the lack of waste that the smaller, tighter sprues offer, but at times they make it hard to cut pieces off the sprue cleanly, due to the weird angles. I have definitely had this problem with some of the newer kits, like the kill teams and this Lord on Pegasus. More on him later…

Knights

The knights were delightfully simple to build. I chose to keep the rider and the shield removed from the horse until after I have painted them, so that I can get to the hard to reach spaces while painting. 

Don’t mind the reindeer water mug…

I like keeping helmets on all my models whenever possible. Not because I am bad at painting faces (or, not only because I am bad at painting faces), but it helps to build the uniformity of the unit. I will be differentiating them in different ways, however, mostly through heraldry.

Archers

Don’t get me wrong, I like archers. However, they definitely have the peasant, unclean look. I actually prefer the older monopose archer models from the early 1990s which always looked … healthier to me? Anyway…

It is a good thing we have those stakes and braziers – they are a must for any Bretonnian player. That being said, even though there are tons of stakes with these archer sprues, there are only two 100x25mm bases for them to go on, meaning you can only construct a single unit with stakes. I’m going to see if I can procure more long narrow bases for more stake emplacements.

Men at Arms

So, I’ll be honest, I don’t like the look of these guys. Filthy peasants. That being said, I am so glad Games Workshop made the decision to move all infantry to 25mm bases. These guys can actually finally rank up cleanly. Well, with the exception of the banner knocking the guy behind him in the face. You know, the banner that doesn’t count for VPs for your opponent? Yeah, that one…

Similar to the knights, I have kept the shields off these guys, in order to be able to reach the rest of the miniature behind the shield. On the table, I will probably run these guys as a single large unit, but I ended up building two command sets, just in case.

Duke on Pegasus

Alright, now I’m really going to gripe. This was easily the WORST kit I have ever had to build. The instructions were bad, but I’ve had that before. What really made this kit terrible was two-fold: the miniature itself is hollow (most likely to reduce cost of plastic), and the joins were flat. This means that I have to hold the pieces together, often at weird angles, and they did not want to stay together.

Even after completing the model, instead of feeling a sense of accomplishment of a job well done, I just lifted my hands in disgust and said “good riddance”. I am not entirely confident it will stay glued together through the painting process, namely because the joins are so flipping precarious. As I said, I hated building this model.

Putting It All Together

Well, despite delays in shipping thanks to freak weather in Memphis, and having to deal with unexpected home repairs this month, I was able to build the entire army in the month of February.

My hope moving forward is that I will be able to finish painting a unit for each of our future updates, and given that, should have the entire set done by mid-summer.

Now to wait until nice, low-humidity weather, to be able to prime. Meanwhile…

In Other Hobby News

I was able to finish the rest of my Legions Imperialis miniatures, as well as a pair of Baenblades. I still do not like painting the infantry, but having them all complete is a nice feeling.

I put everything I currently own for Epic together (that has been painted, at least). What kills me is that, it is 20 tanks and 88 infantry bases, and the whole of it only adds up to 1850 points. Still waiting on those aircraft to get back into stock, as well as those support boxes…

I was able to get a good game of Legions in against my buddy Pox a few nights back. He has been printing terrain almost nonstop for the past two months, so he’s got a pretty sizeable and impressive table. I still lost, mostly due to my own mistakes, but it was good to finally put a fully painted army on the table.


Jerry S

February was one of those months in my hobby journey where it felt like I was getting nothing done. Looking back at the pictures of what I worked on this month however, nothing could be further from the truth. While I wasn’t spending my hobby time painting, I was certainly still moving my project(s) along.

After finally getting (most of) my Tomb Kings kits from Games-workshop, I was able to start the long and arduous process of building my skeletons. Michael detailed that terrible process more eloquently than I ever could up above so I will spare you the details.

My goal for the month was to get my “Battleline” built and ready for the painting booth and I am happy to report that I was successful! I actually was able to sneak in a couple Sepulchral Stalkers and some Ushabti as well(not pictured).

All told I’ve assembled 40 skeleton spearman, 20 archers, 20 Tomb Guard, a Casket of Souls and several different character models.

I still have a pile of models to build but I thought this was a good launching point to begin the painting phase. I’ve always been a sucker for teal tomb kings livery. To me, it just works perfectly with white and I had a ton of fun painting different shield designs on each of the warriors. This something I haven’t often done in my hobby history so I took every opportunity to vary the shields here. I already have some more ideas for the second and third batches of spearmen as well so we all have that to look forward to!

While this first block isn’t perfect (I already have some ideas for improvements I want to make), I am happy to have locked in my scheme and I am sure to refine it over the next…100 skeletons….

In other hobby news, after many years of wishing and wanting, I finally decided to snag a PLA printer. I grabbed the P1S after seeing the incredible results one of my friends was getting from his and I am absolutely in love with this machine. I’ve only had it a week but I have been testing and printing at a furious pace.

The main reason I bought this printer was to print terrain for my various game systems and to test it out I printed the below tower and cottage. As you can see the detail is outstanding and the setting I used were more “fast and dirty” than I would use going forward so I have high hopes as I learn how to use this amazing tool.

One of the main draws for Legions Imperialis for me is the ability to create the truly epic landscapes that we all imagine our battles to be fought. The next couple pictures are some proof of concepts for an industrial spaceport board that I plan on printing, building and painting ahead of a Legions Imperialis campaign this summer.

While I did not get as much final product done this month as I would’ve liked, there is no denying that I got a lot of work done. I hope to get some more finished minis out in March though. My goal as of today is to get my block of 20 Tomb Guard finished, quickly followed by a character or two from my tomb kings. After that I hope to get some paint on some Legions Imperialis titans as I wait for jetbikes to release.

Finally, I am hoping to keep up the pace with printing, I have a ton to learn with CAD and I hope to get some epic terrain pieces out here in the coming months.


Mike P. – https://www.instagram.com/middleearth_mike/

An Epic Saga of Mike’s Miniatures

Oldhammer Heroes

It’s been quite the month, albeit with precious few hours to dedicate to my hobbies. Work, life, you know how it goes…

However, amidst the hustle and bustle, I’ve managed to make some progress on my builds and put paint to a few models. In today’s article, I’m excited to showcase some of these creations along with the meticulous steps from inception to completion.

Currently, my focus lies predominantly in the realm of the Old World. There’s a certain charm to those aged metal GW sculpts, each one brimming with character even after two decades.

A group of figurines on a table

Description automatically generated

Following the assembly of the models—admittedly less labor-intensive with metal ones—I embark on a methodical assembly line process. Any gaps within the bases are deftly filled with green stuff (special thanks to Jerry for supplying me with this same line of green stuff a few years back). This meticulous step ensures a seamless finish, ready for the application of texture, typically sand, onto the base. Once the green stuff has set, I meticulously apply a uniform coat of PVA glue onto the base before plunging it into my sand pit. Though this entire process can span about an hour, the crucial point lies in allowing ample time for the sand and PVA glue to fully cure before progressing to priming.

A person holding a small model

Description automatically generated

A plastic box with small figurines in it

Description automatically generated

Once the sand has fully set, the model is primed and ready for the next stage. For priming, I rely on “Stynylrez” primer applied through an airbrush, ensuring a flawlessly even coat. Gone are the days of struggling with old rattle cans, where achieving the pristine flatness I desired seemed like an elusive feat. Given the material of these models, multiple layers of primer are essential to guarantee a solid coat, a meticulous process that demands patience and attention to detail. I can’t count the number of models I’ve had to abandon due to botched priming attempts, underscoring the importance of taking the time to get it right.

Once the primer has fully cured and every layer is meticulously covered, it’s time to dive into the exciting realm of painting. My approach to painting involves a blend of simple yet labor-intensive techniques, including basecoats, washes, layering, and highlights. It’s a methodical process that demands patience and attention to detail. With each miniature, I find myself investing hours, ensuring that every brushstroke contributes to the final masterpiece. While this meticulous approach may result in slower progress, the end result is undeniably worth it.

In the past, I’ve experimented with prioritizing quantity over quality, rushing through projects in an attempt to churn out as many miniatures as possible. However, I’ve come to realize that the depth of my affection for a model is directly proportional to the time and effort I invest in it. The miniatures that receive the full extent of my attention and care hold a special place in my heart, each one a testament to the passion and dedication poured into its creation.

Introducing a recent addition to my painting arsenal: the two thin coats paint range. In fact, I dove headfirst into this new venture, acquiring the entirety of wave two and half of wave one without hesitation. Let me tell you, these paints have exceeded my expectations in every aspect. Their smooth consistency and vibrant pigmentation seamlessly complement my existing Citadel paints, resulting in a harmonious blend ideal for layering and highlighting techniques.

After numerous painstaking hours of meticulous brushwork, I proudly unveiled the final iteration of the three models I had been diligently working on. The culmination of this laborious process revealed a level of detail and depth that truly surpassed my initial aspirations.A figurine of a person with feathers

Description automatically generatedA figurine of a viking with wings and a cape

Description automatically generatedA figurine of a person with a sword

Description automatically generated


As you can see, we are all hard at work over here at Urban Cowboy Hobbies and I can honestly say the best is yet to come for each of our warlords. Stay tuned as each of us keeps moving forward with our hobby goals and I hope that we have motivated y’all to get after it yourselves.

Adios,

Jerry