A Tale of Many Warlords- April

Jerry S.

Howdy All! I’m taking lead this month and I gotta admit I’m pretty happy with my progress this month. This has been a pretty exciting month on my hobby desk. I continued my roll with my Tomb Kings and was able to get a good amount of progress on a couple Horus Heresy projects.
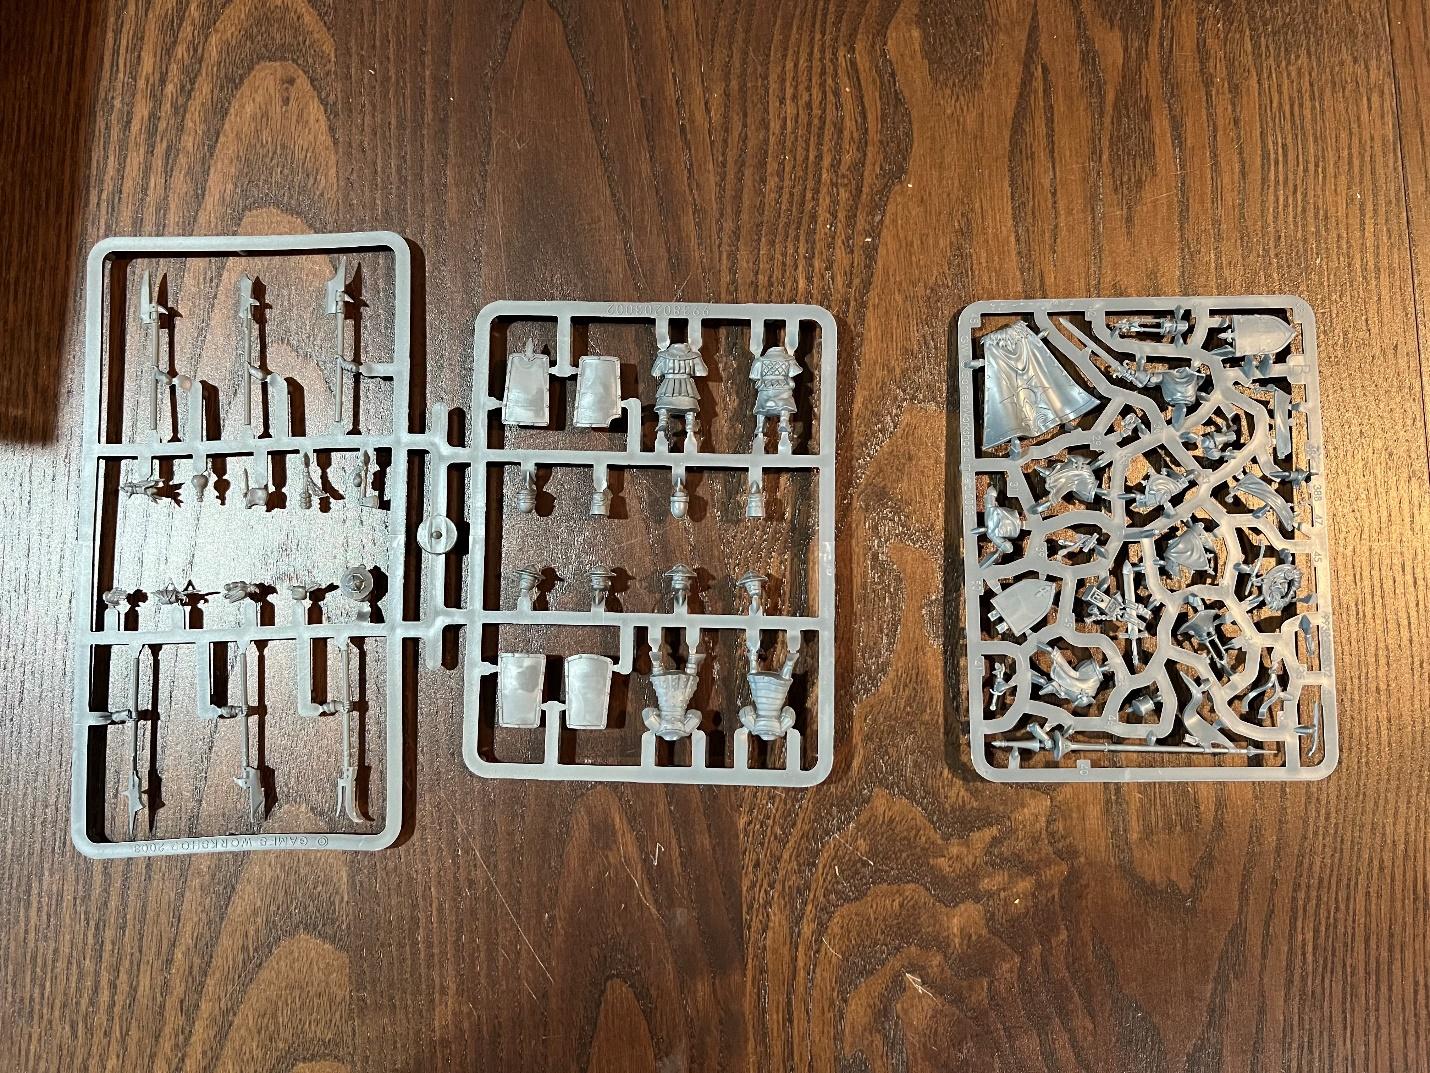
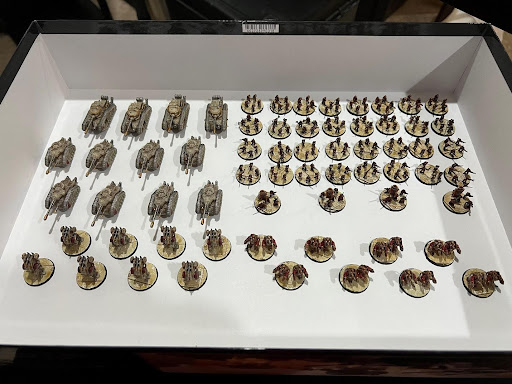
Tomb Kings

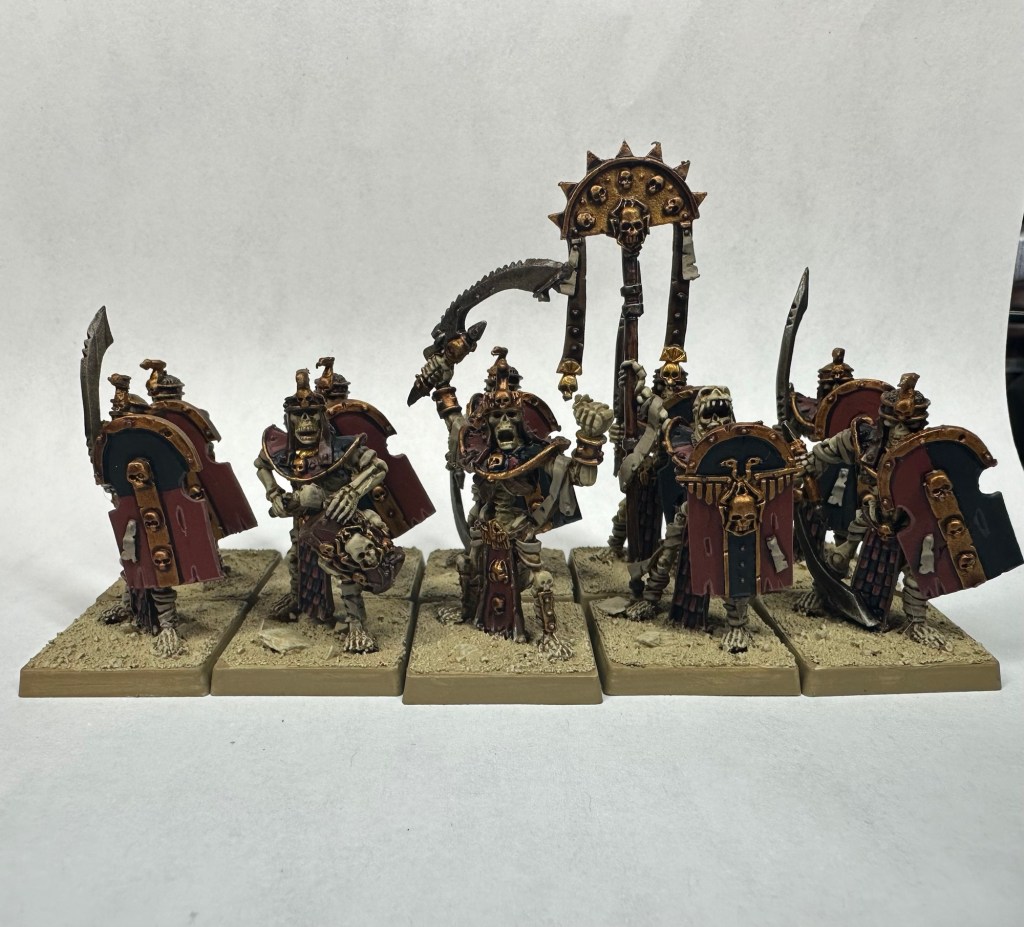
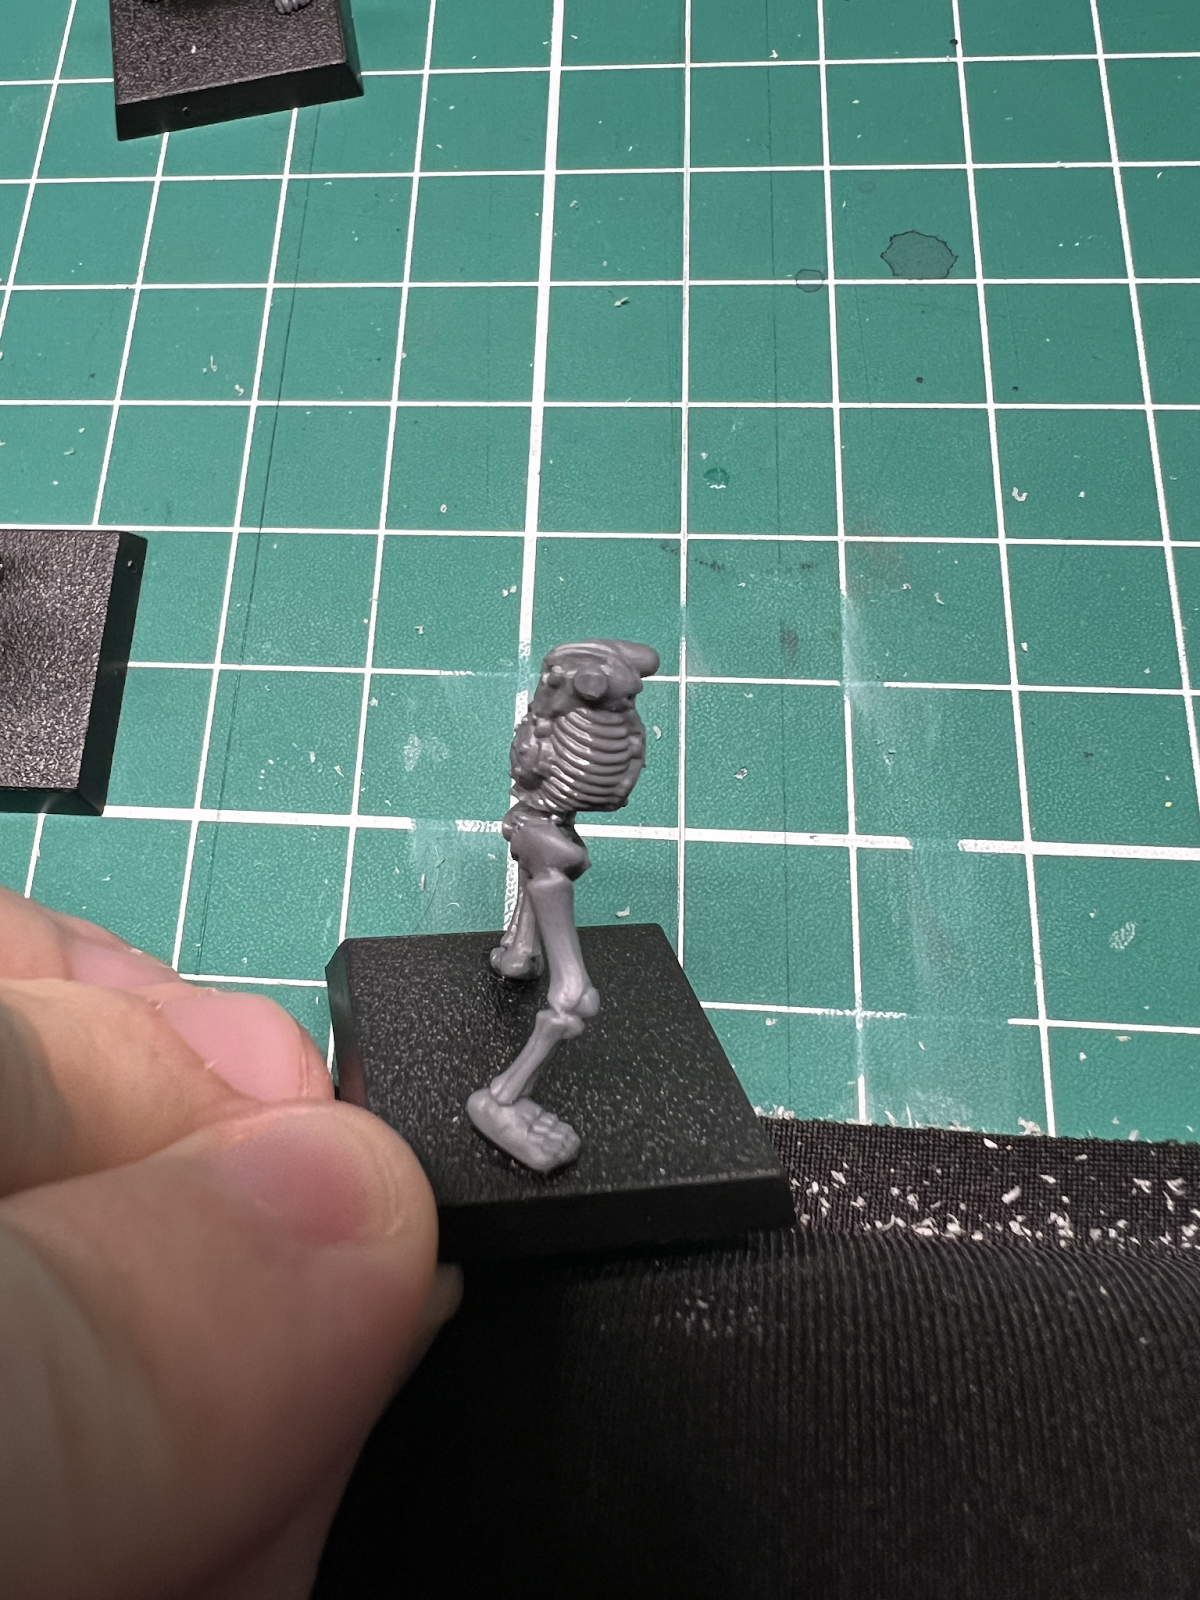
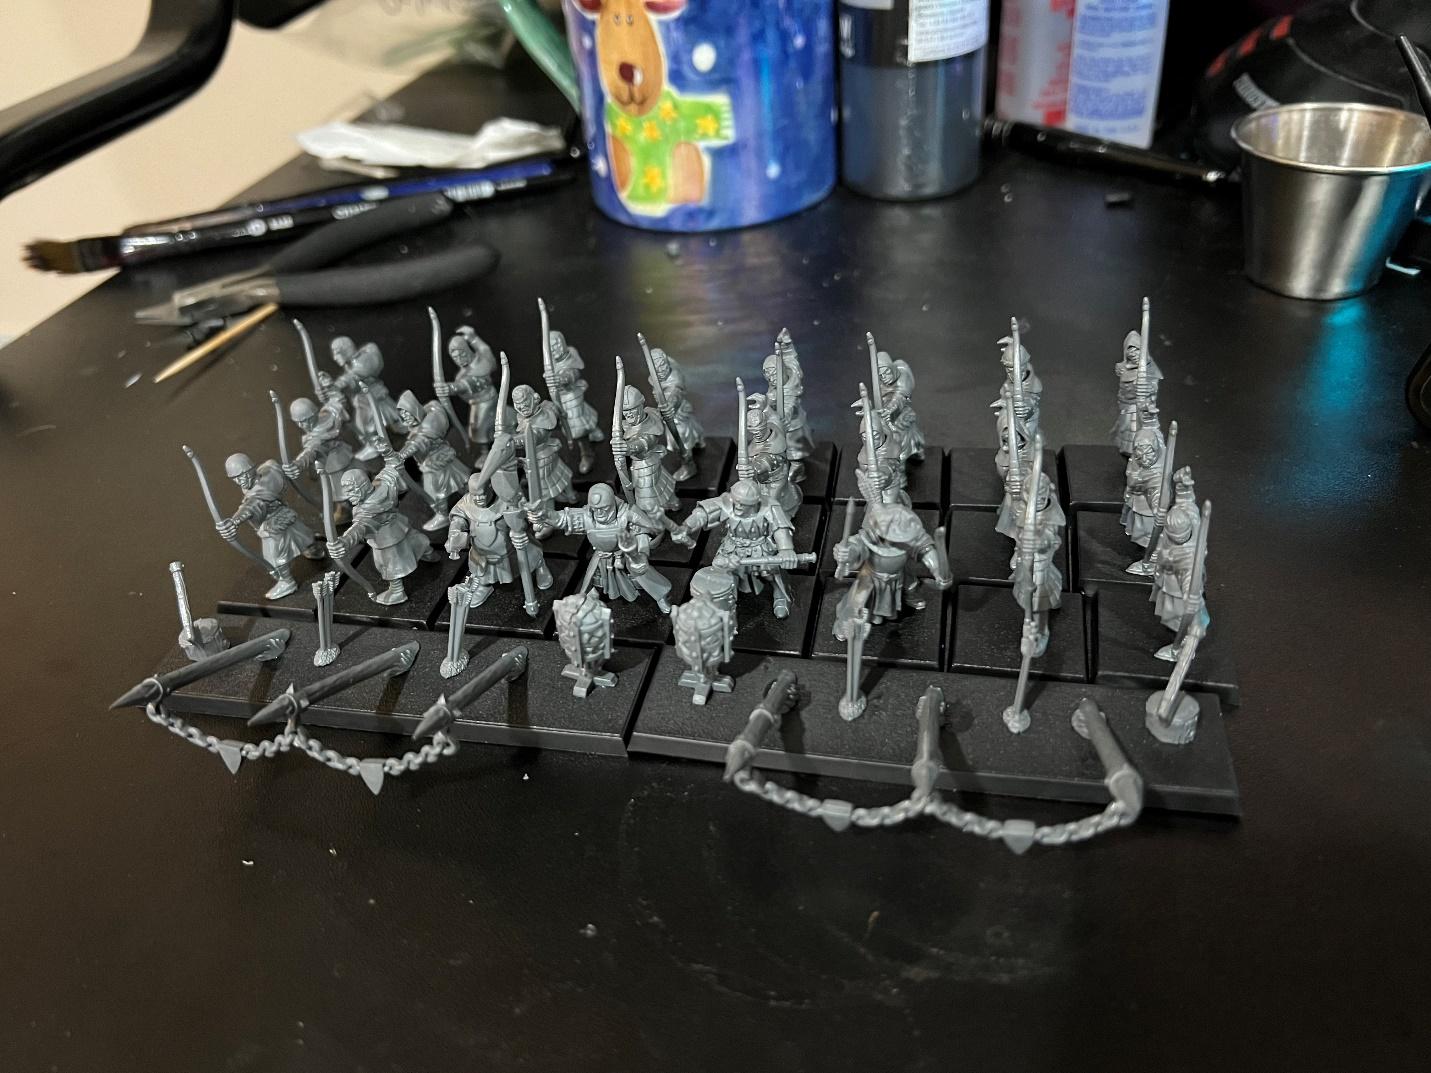
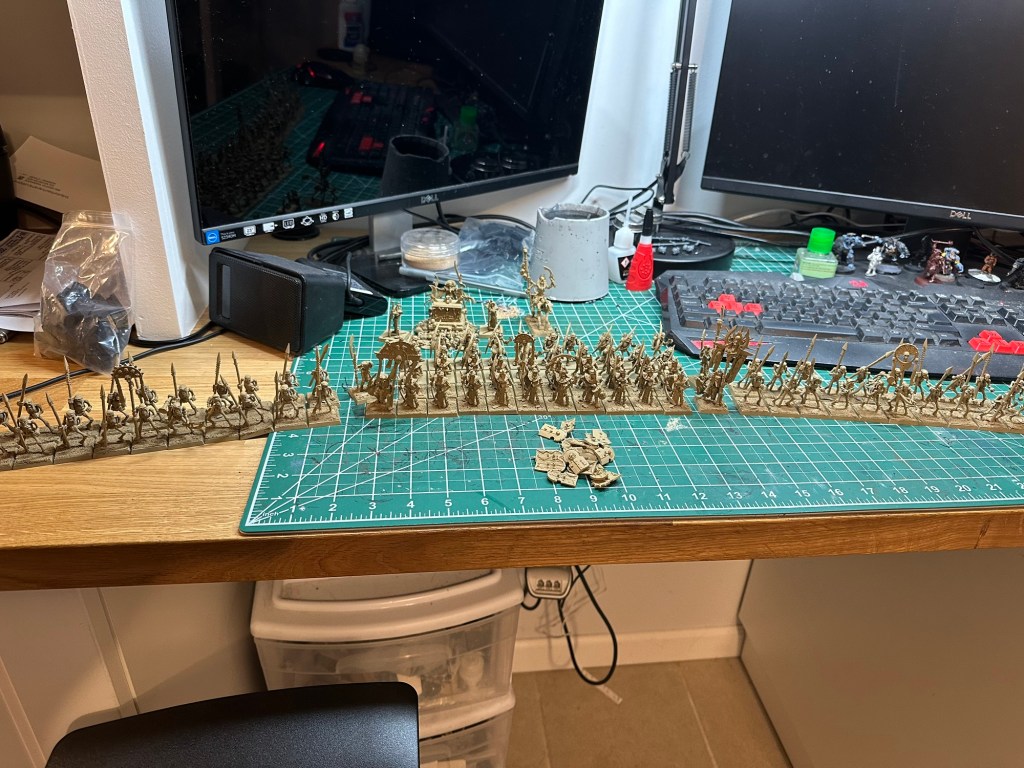
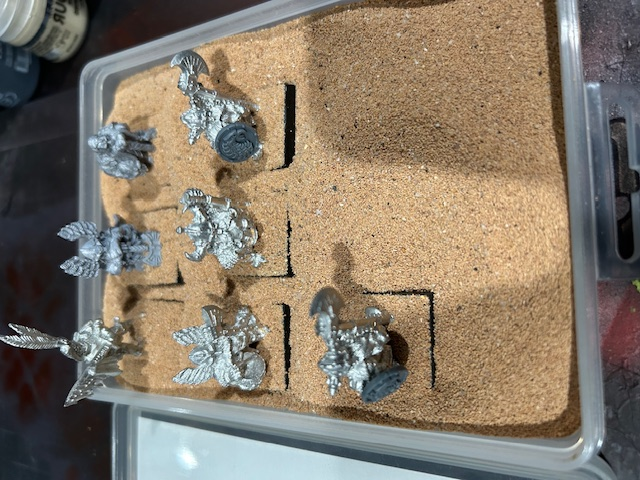
To start, I’ve continued making steady progress on my Tomb Kings with another block of 20 skeletons painted in the teal white scheme that I showed off in February. This is my 3rd 20 skeleton block completed and they make quite the sight all lined up. These 3 blocks of bones will be the main bulk of my Tomb Kings army for the time being.

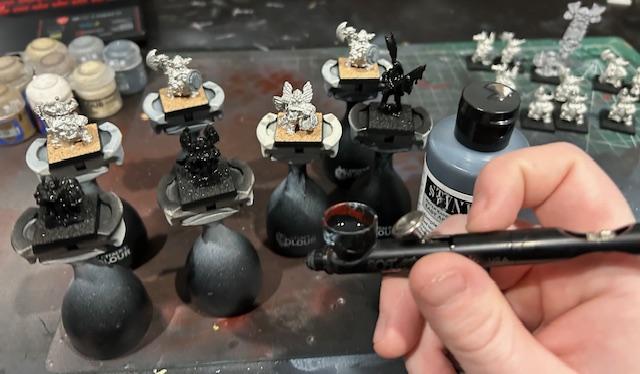
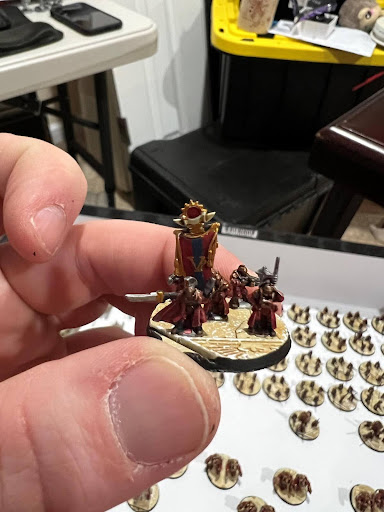
While I still have 20 skeleton archers to paint, I will be taking a small break from painting the rank and file this month to paint up some of the more fun models in the Tomb Kings lineup. Below is a work in progress shot of a casket of souls I was working on as our April deadline arrived. I am very much looking forward to seeing this model completed, as well as one of the more Colossal models in the range.

The Horus Heresy

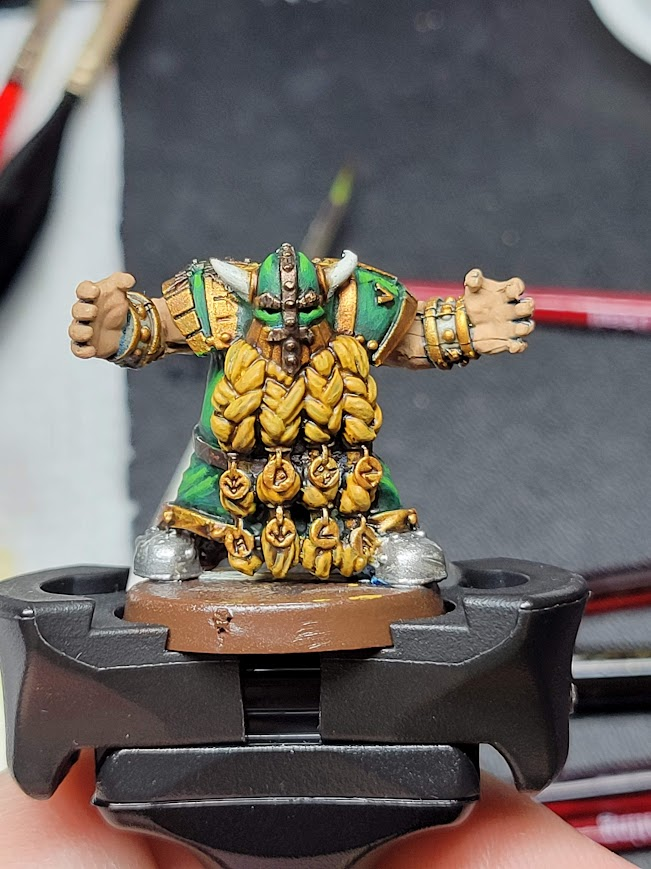
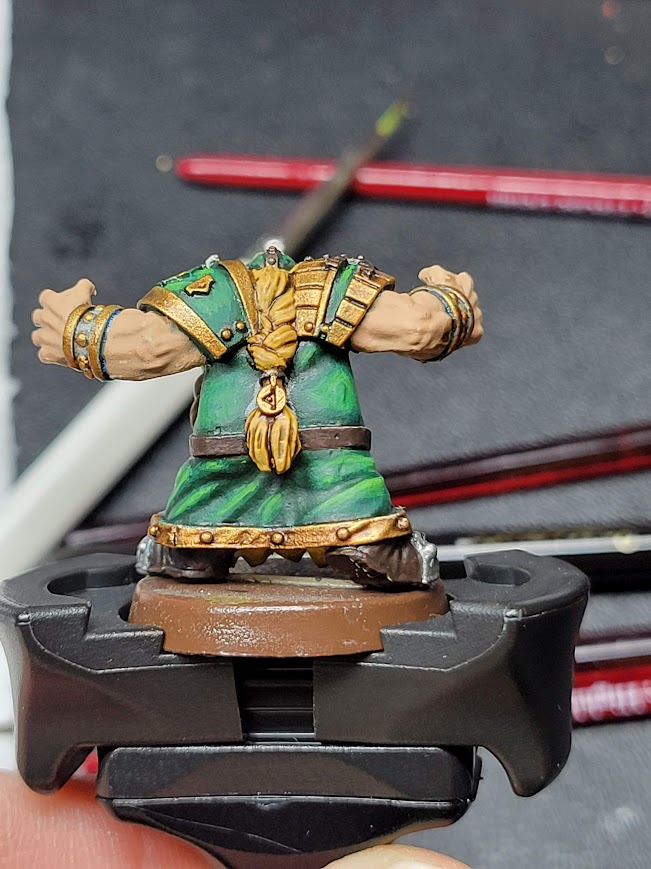
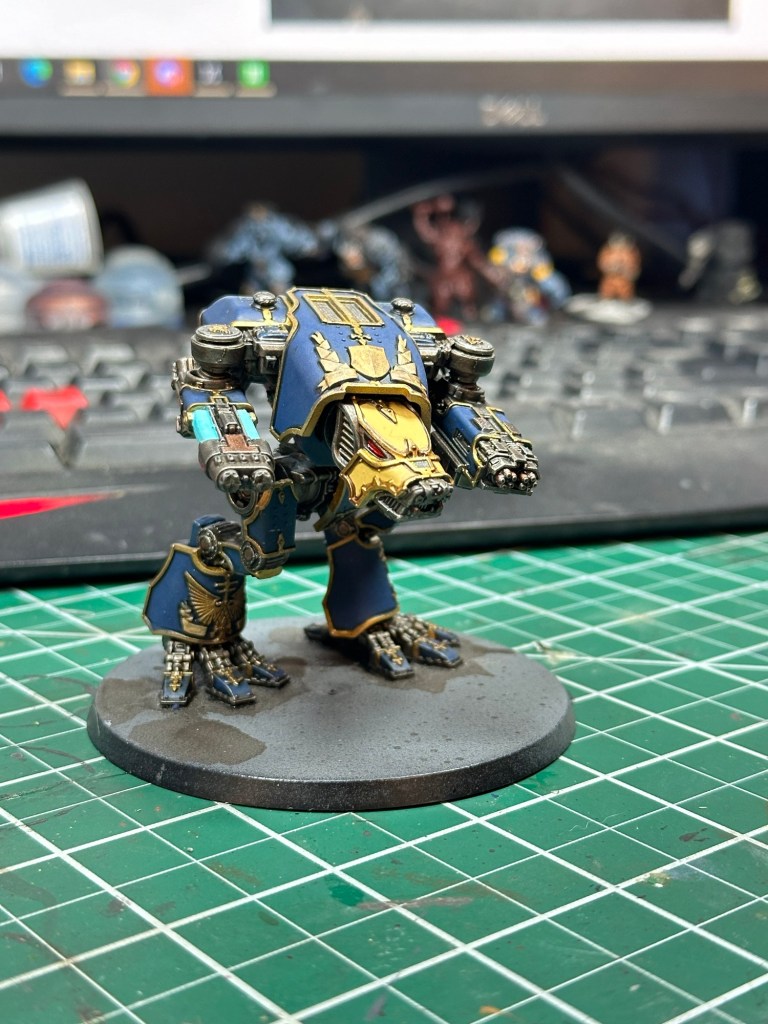
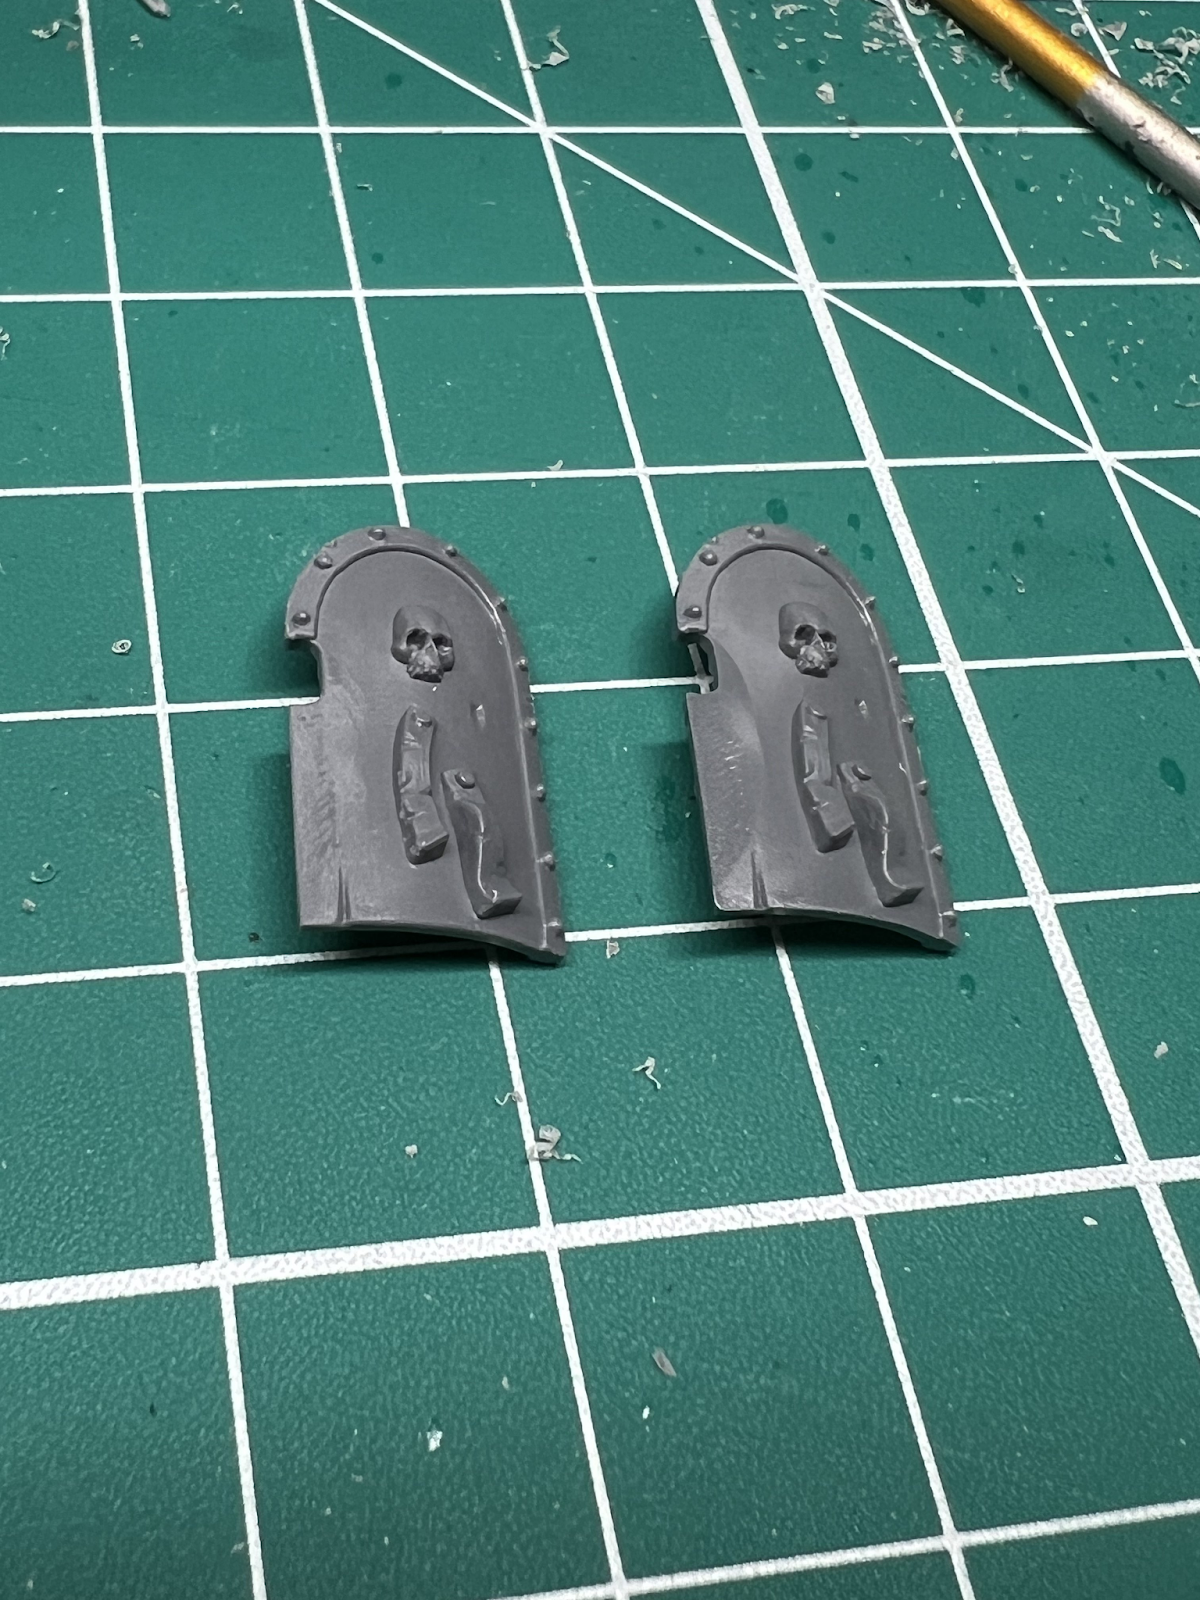
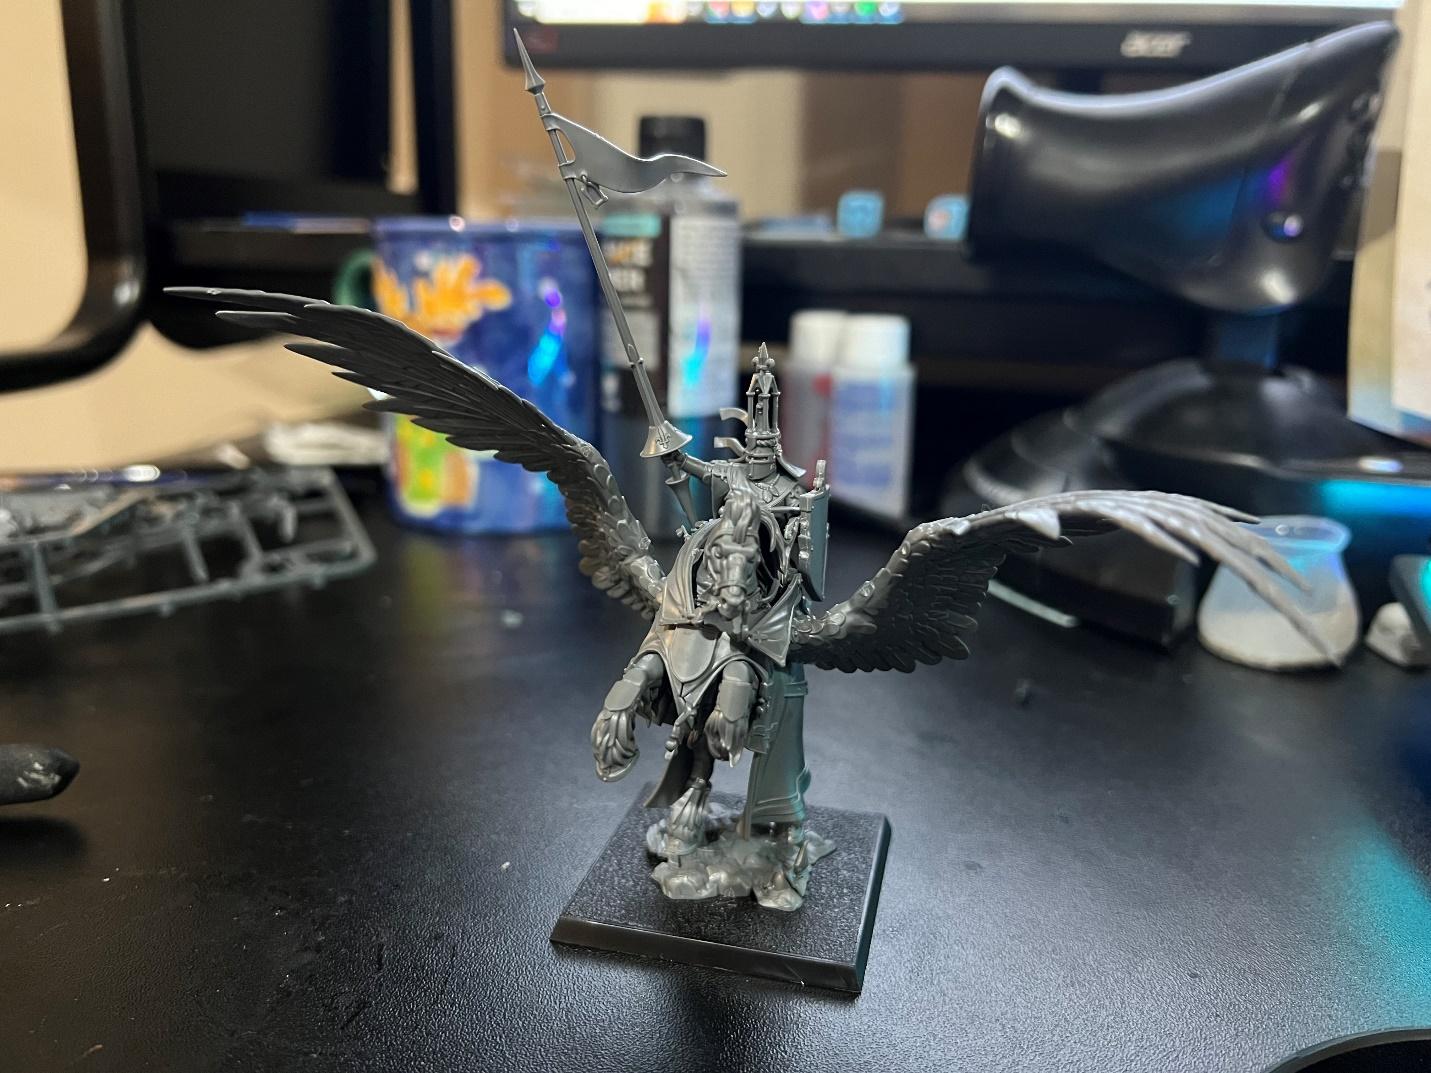
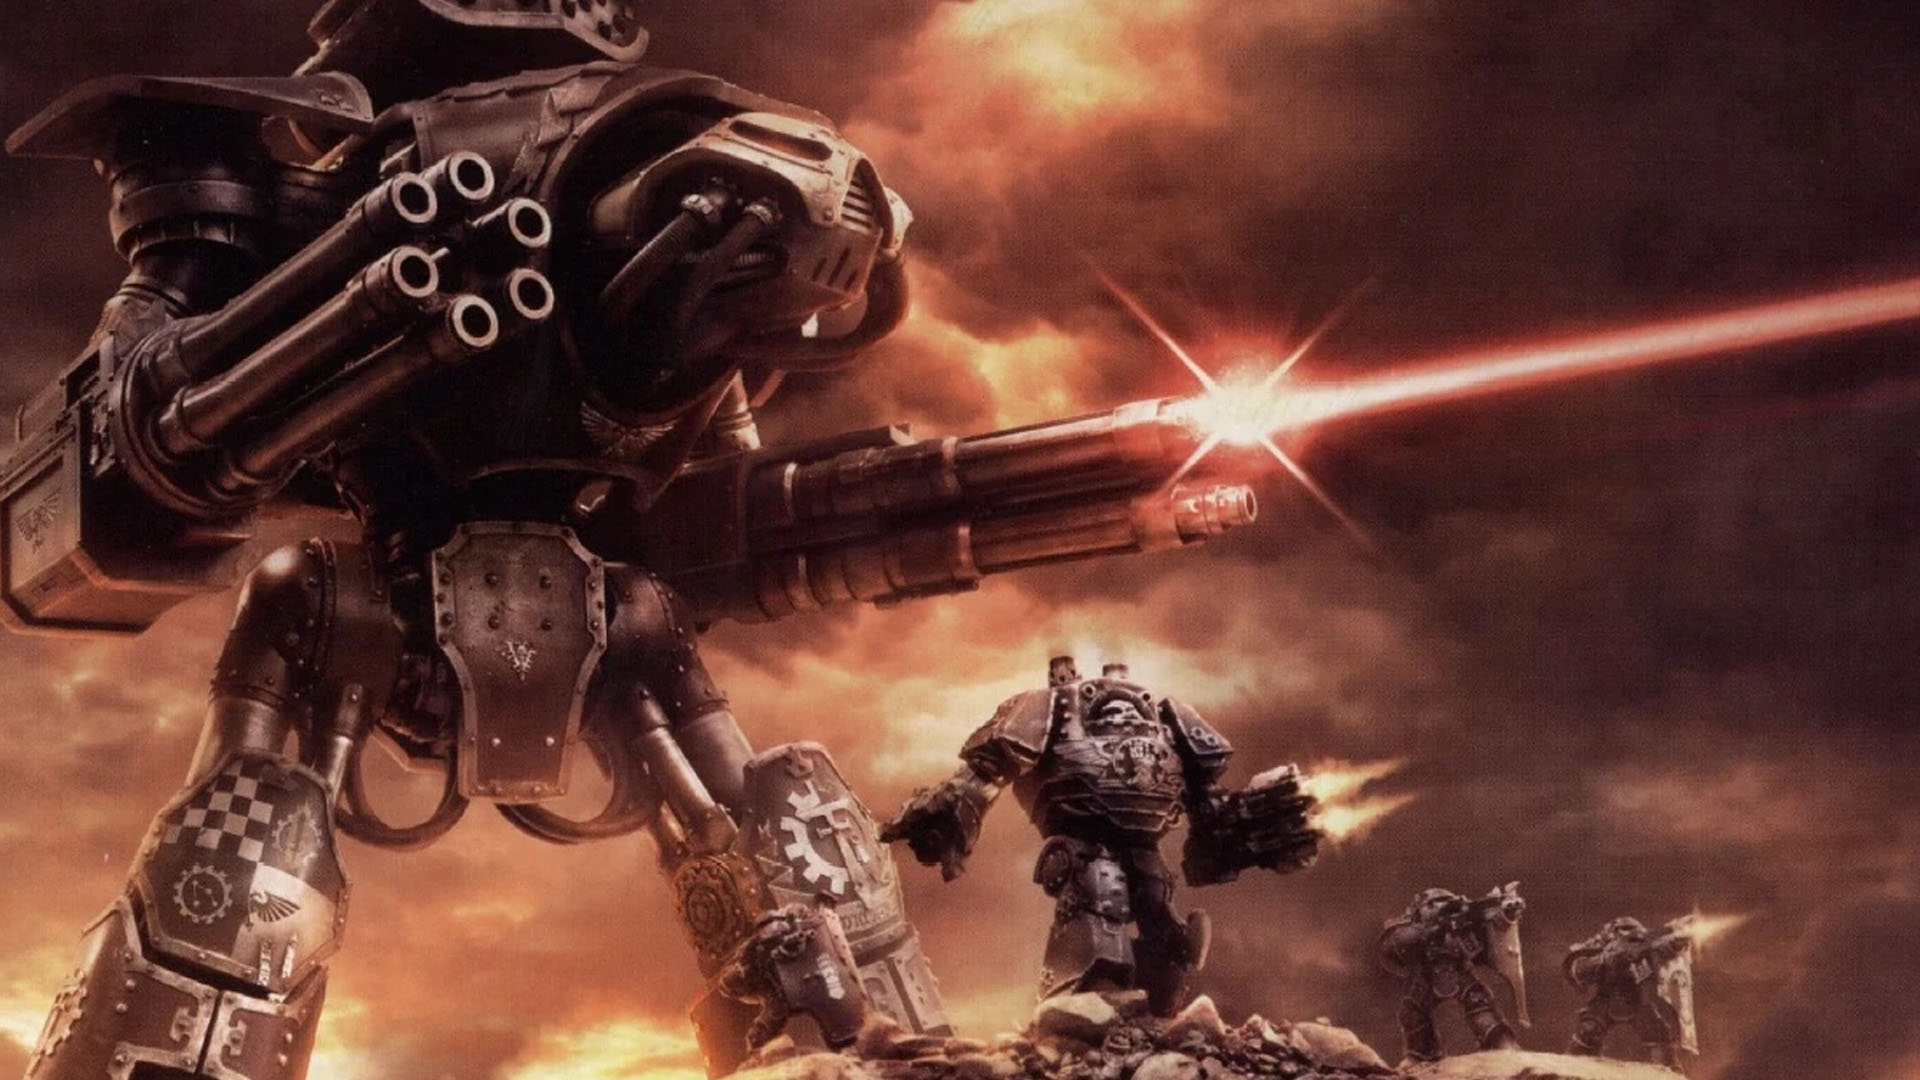
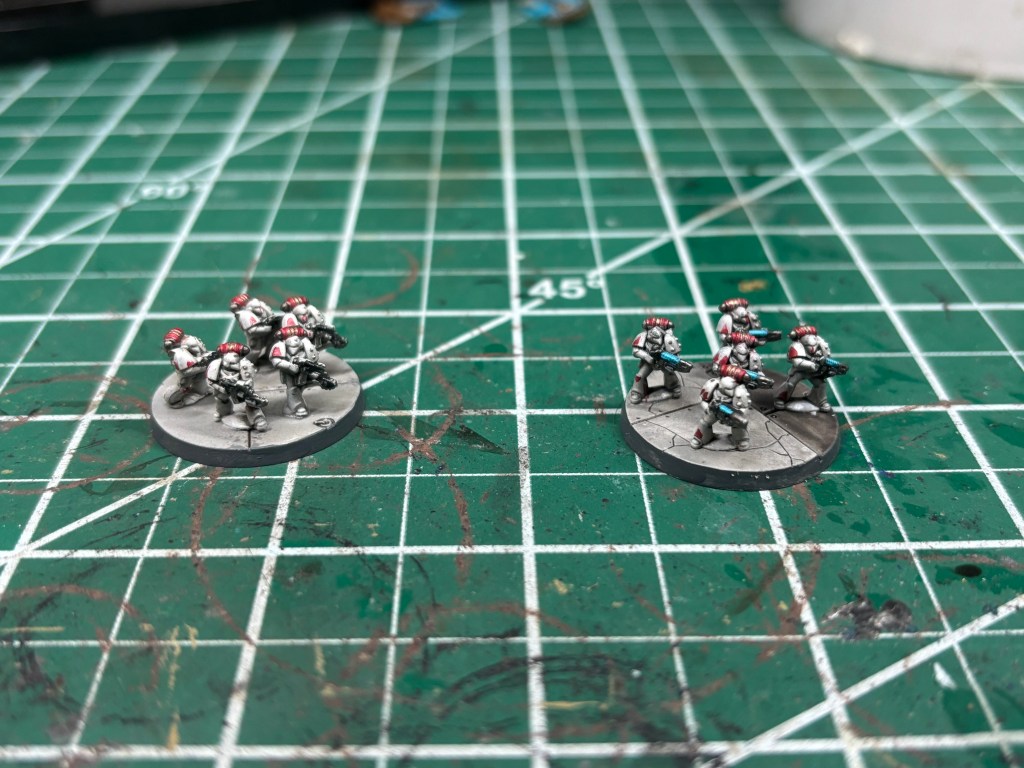
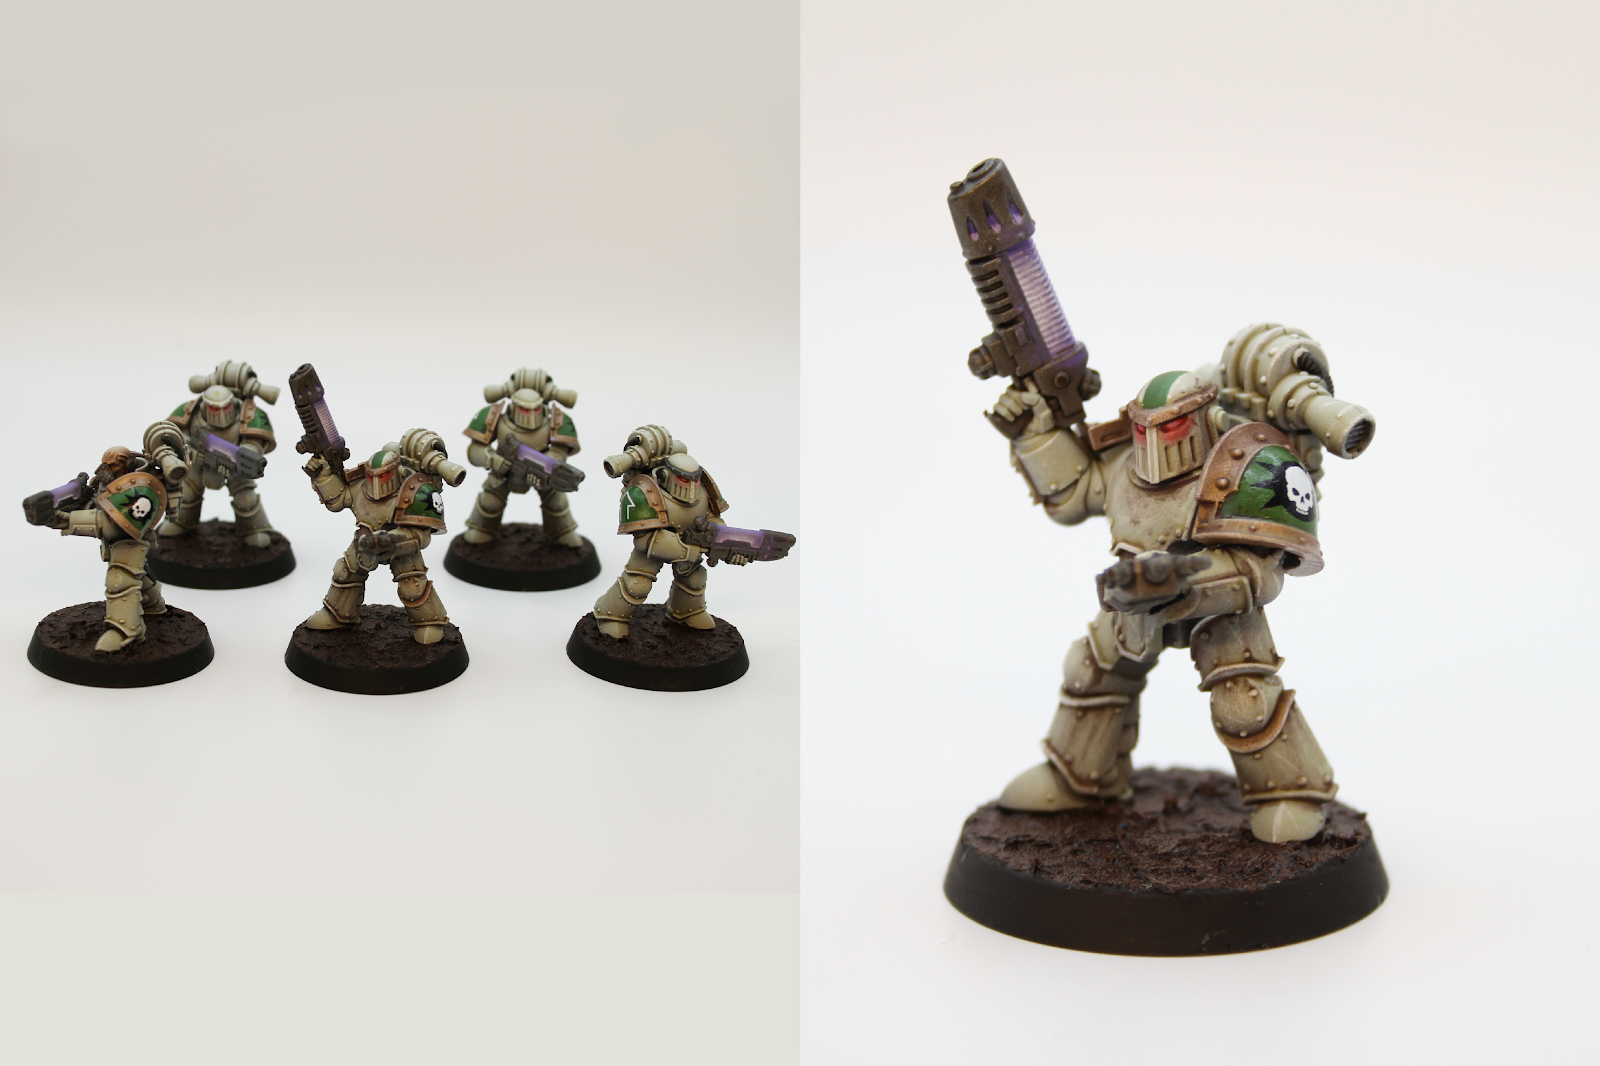
Turning our attention to the 31st millennium- I made some great progress on a squad of 5 Gal Vorbak and a Terminator Captain for my Word Bearers force that I will be using at the NOVA Open’s Zone Mortalis event in September.

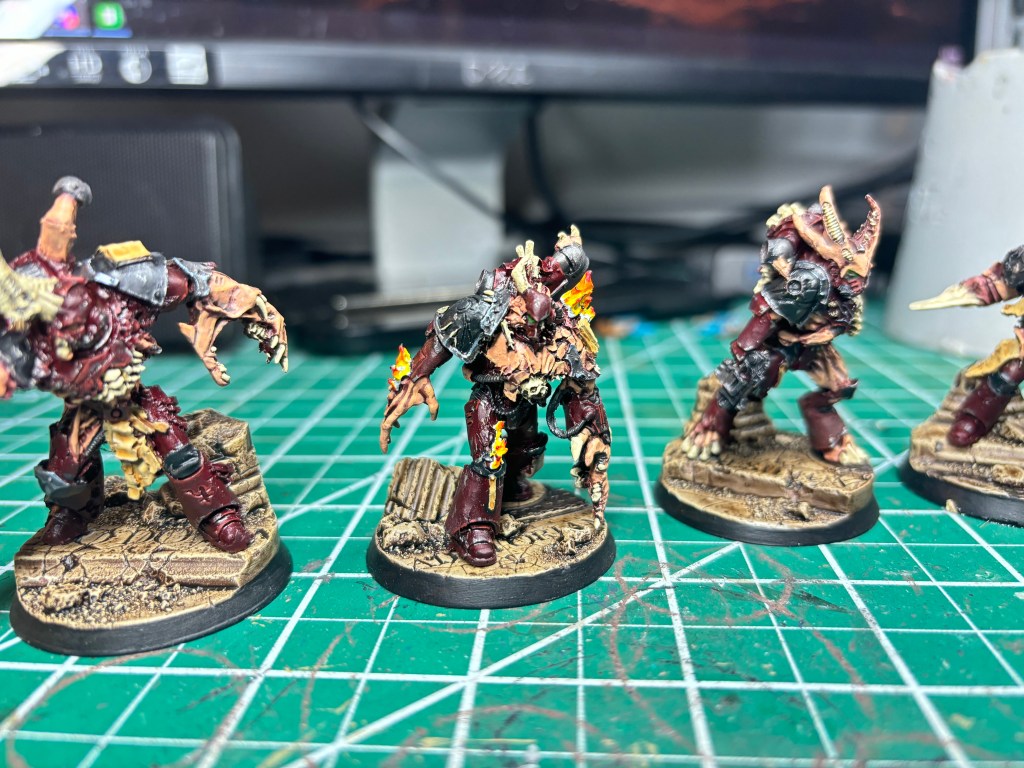
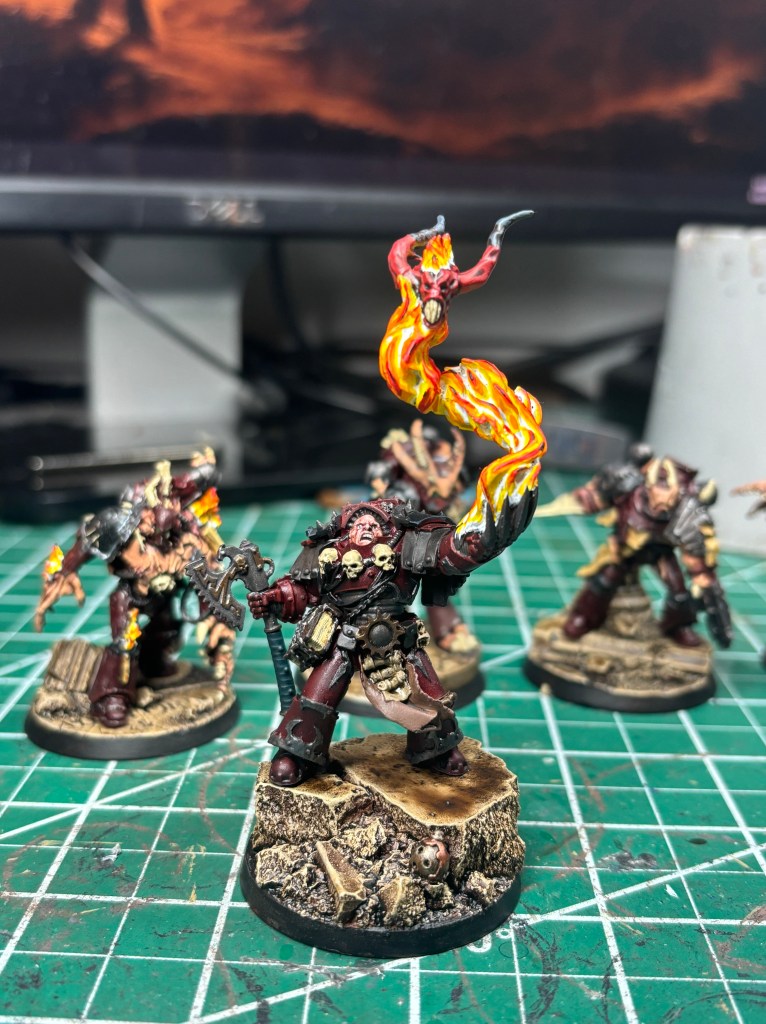
This was my first time painting a fire effect and while the transitions could be a little smoother, I am thrilled with the finished product.
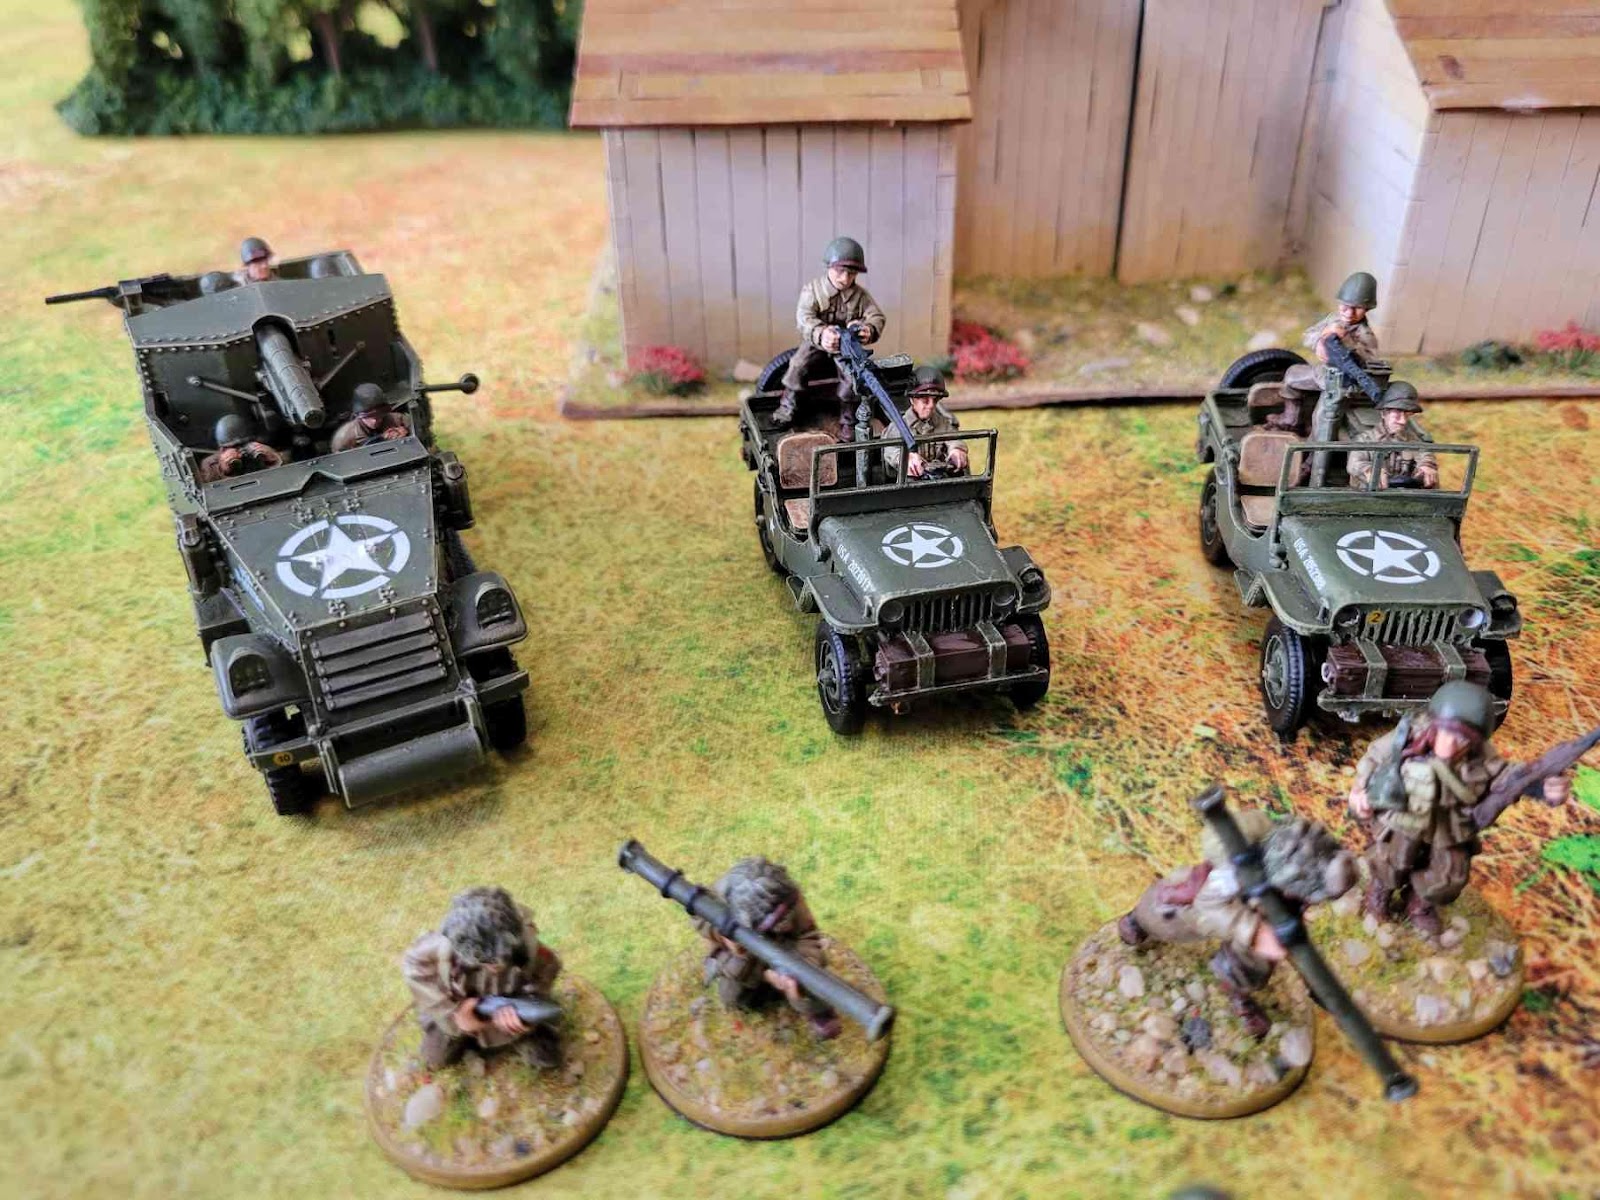
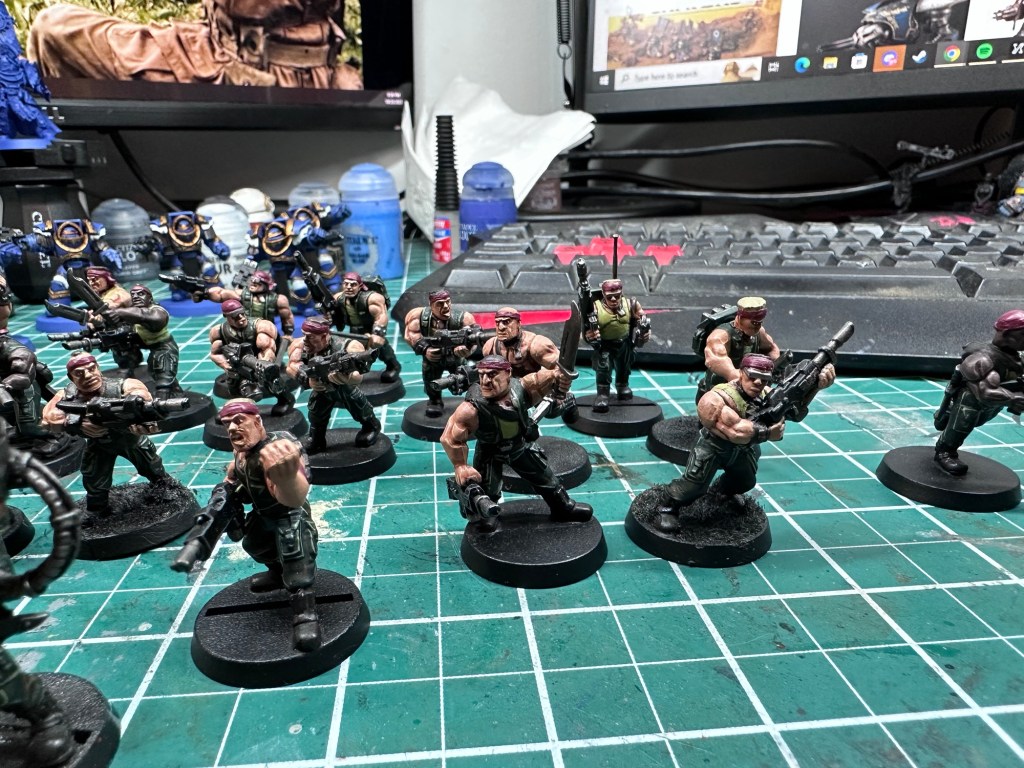
Solar Auxilia

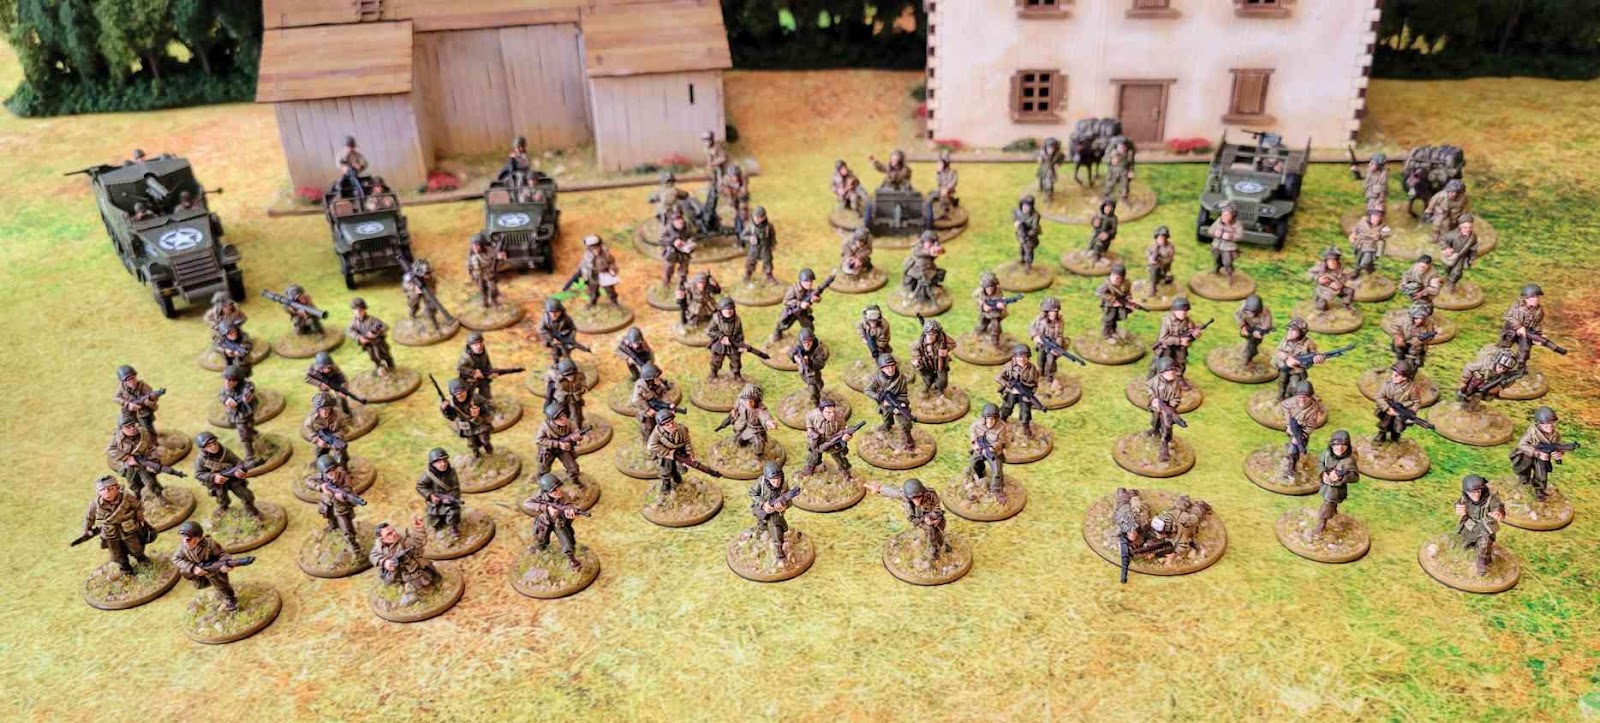
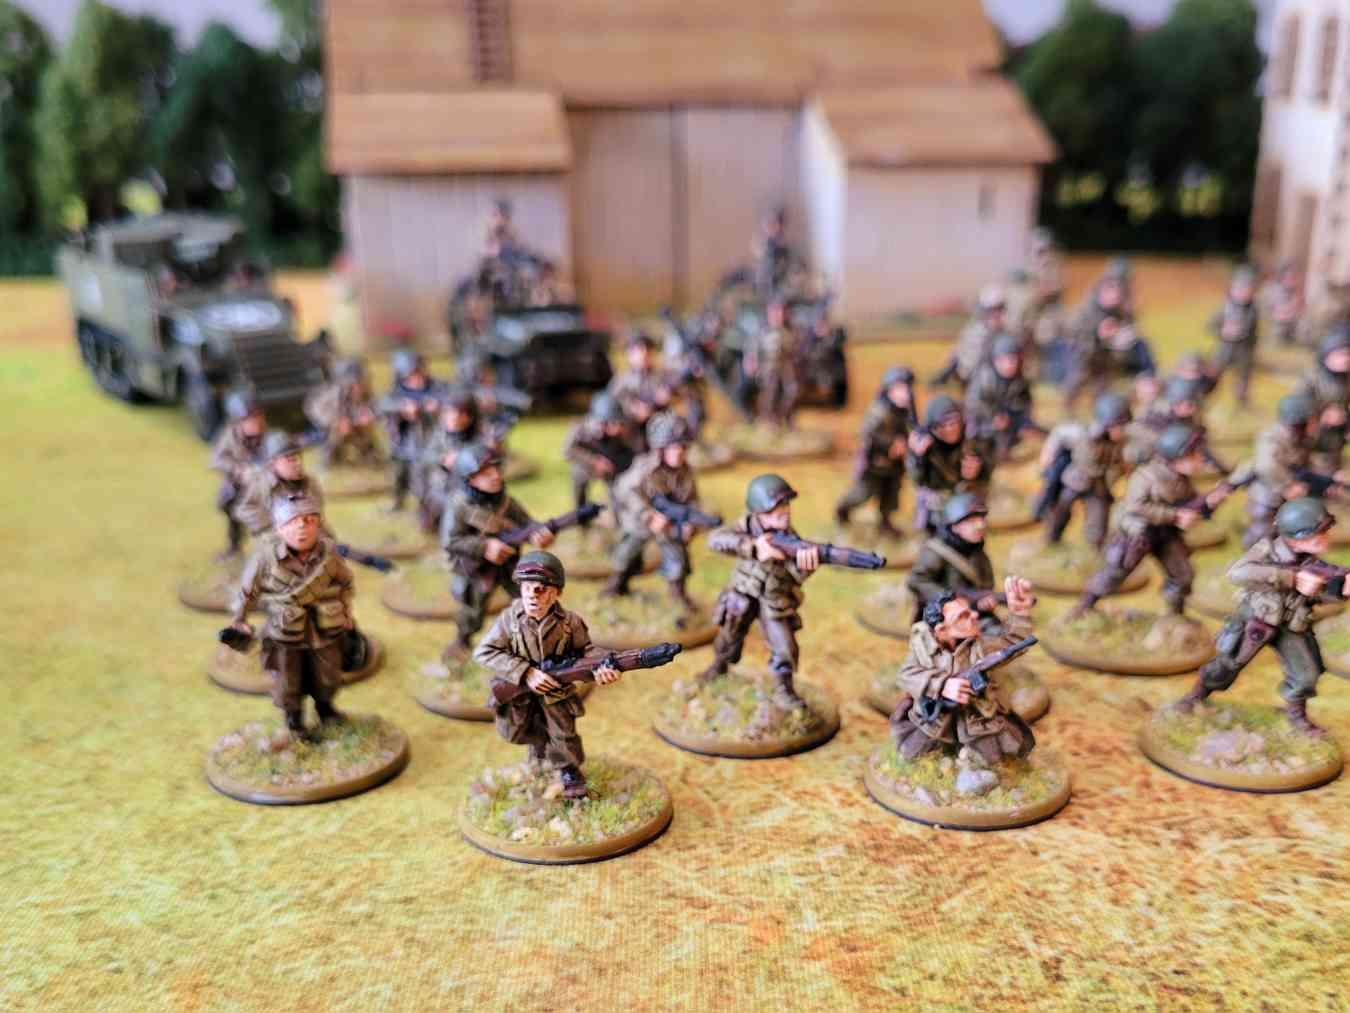
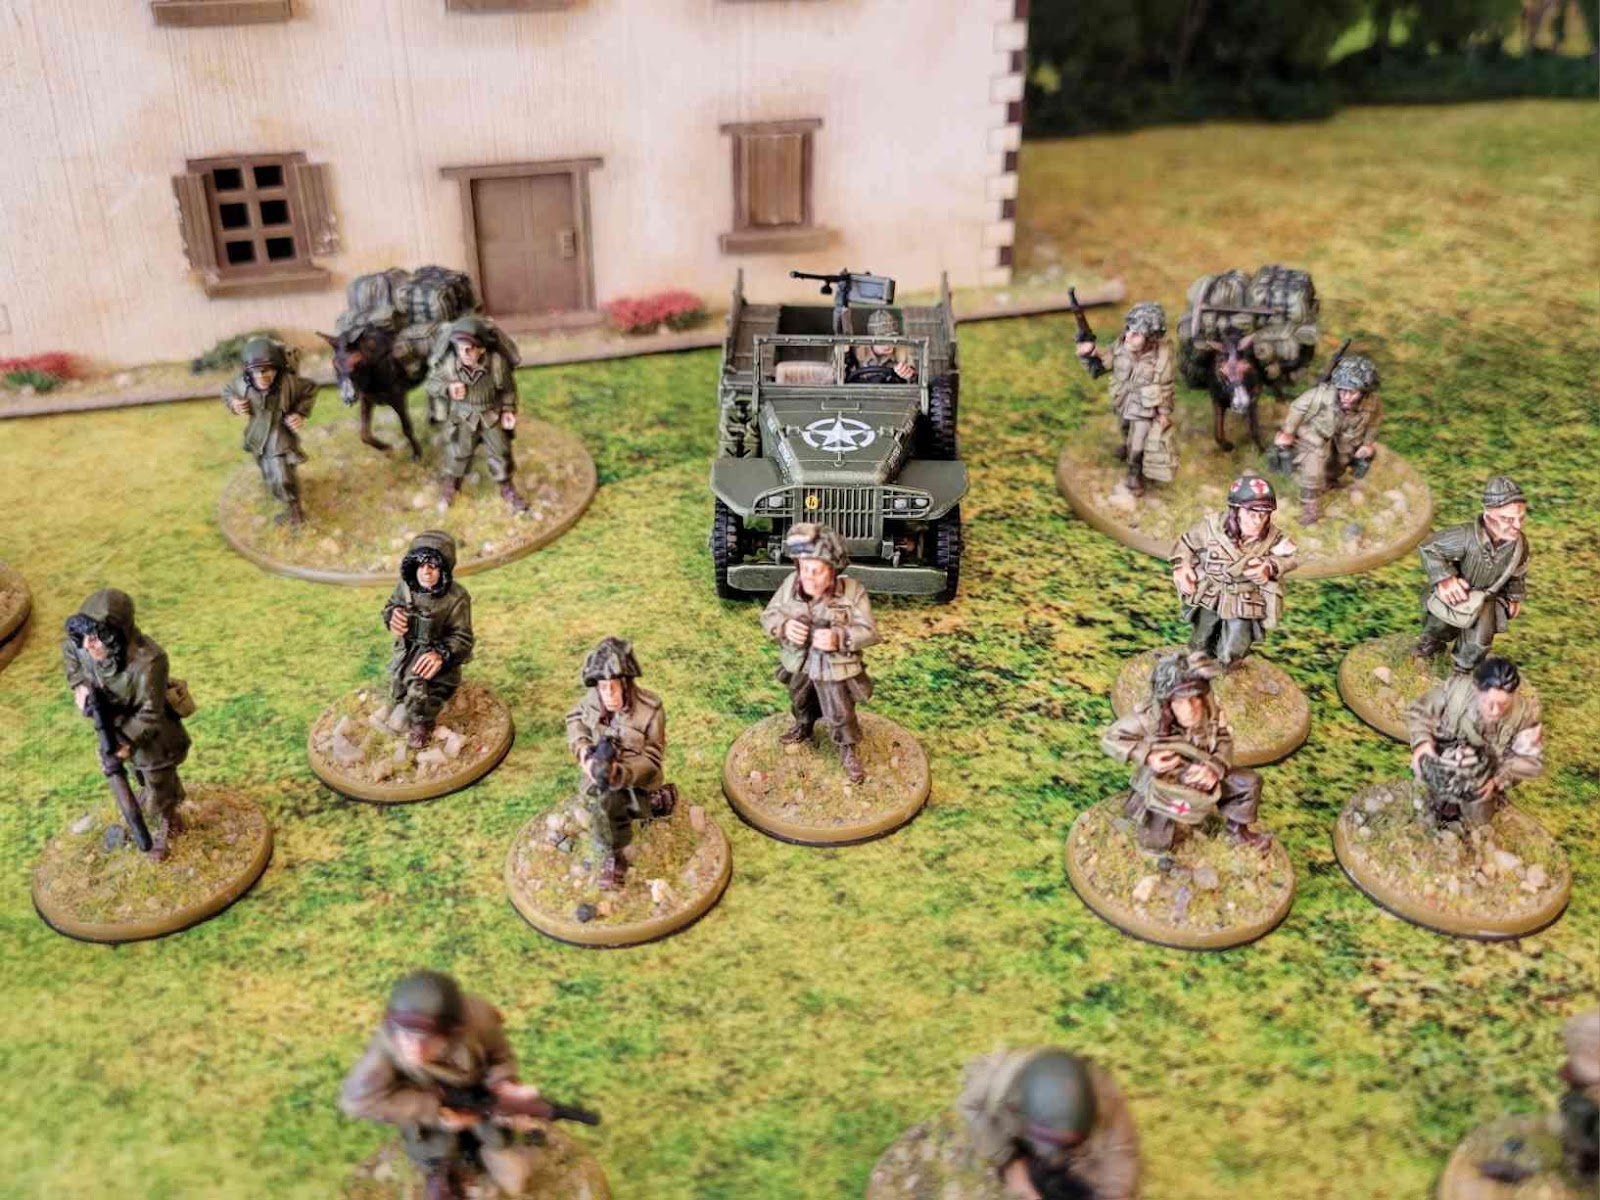
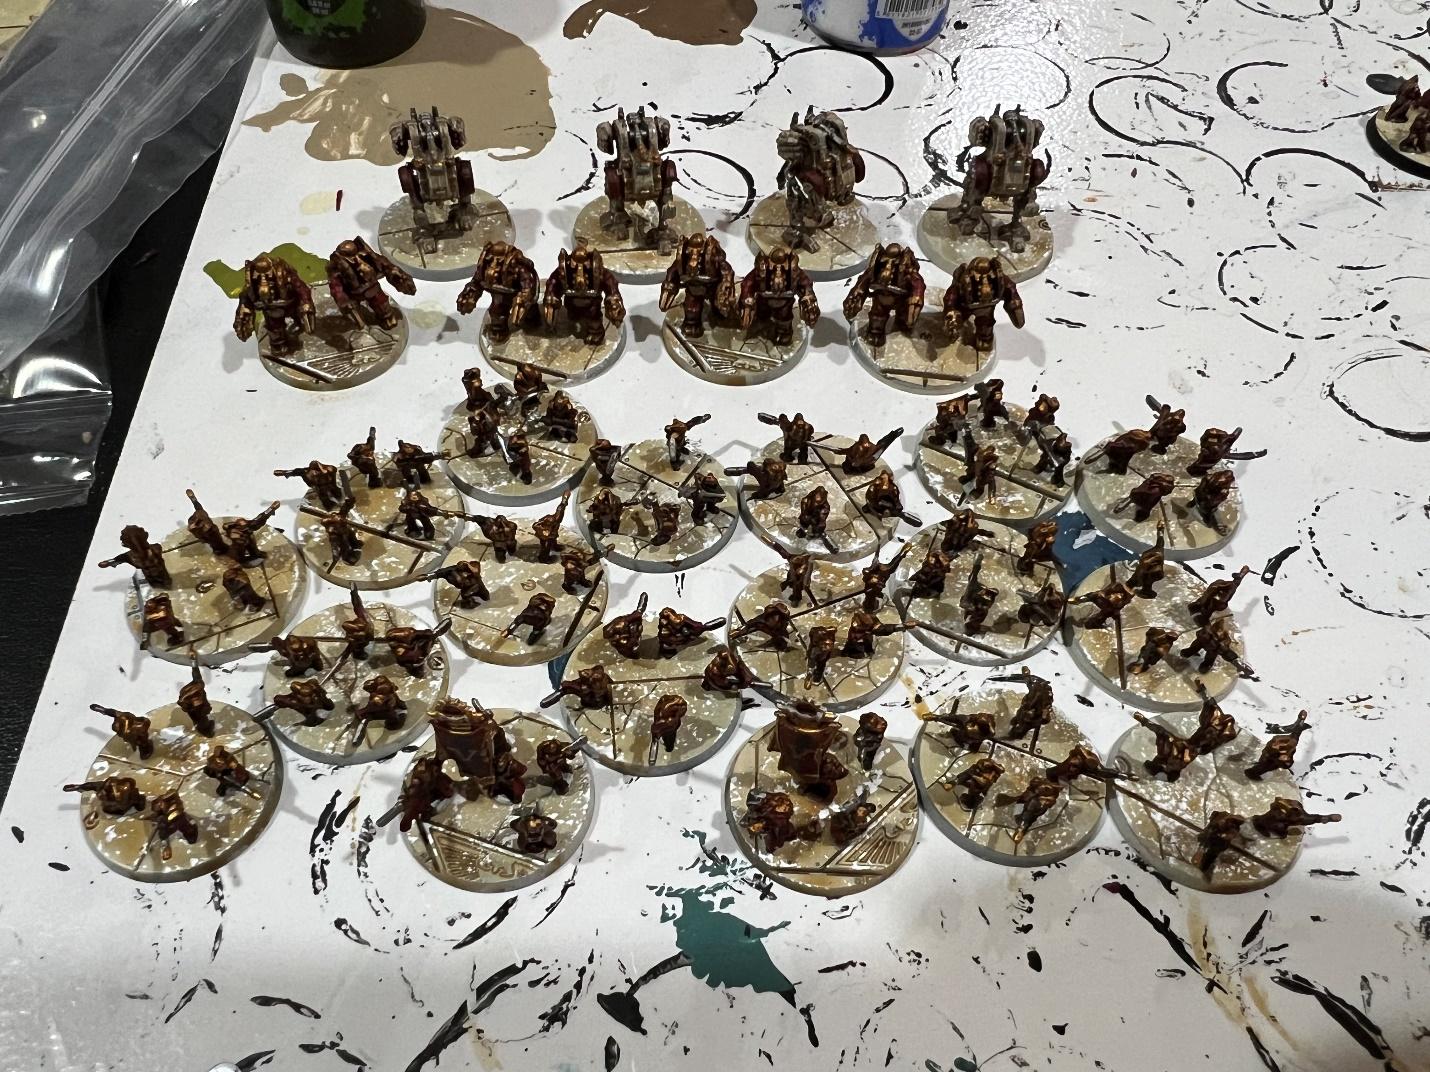
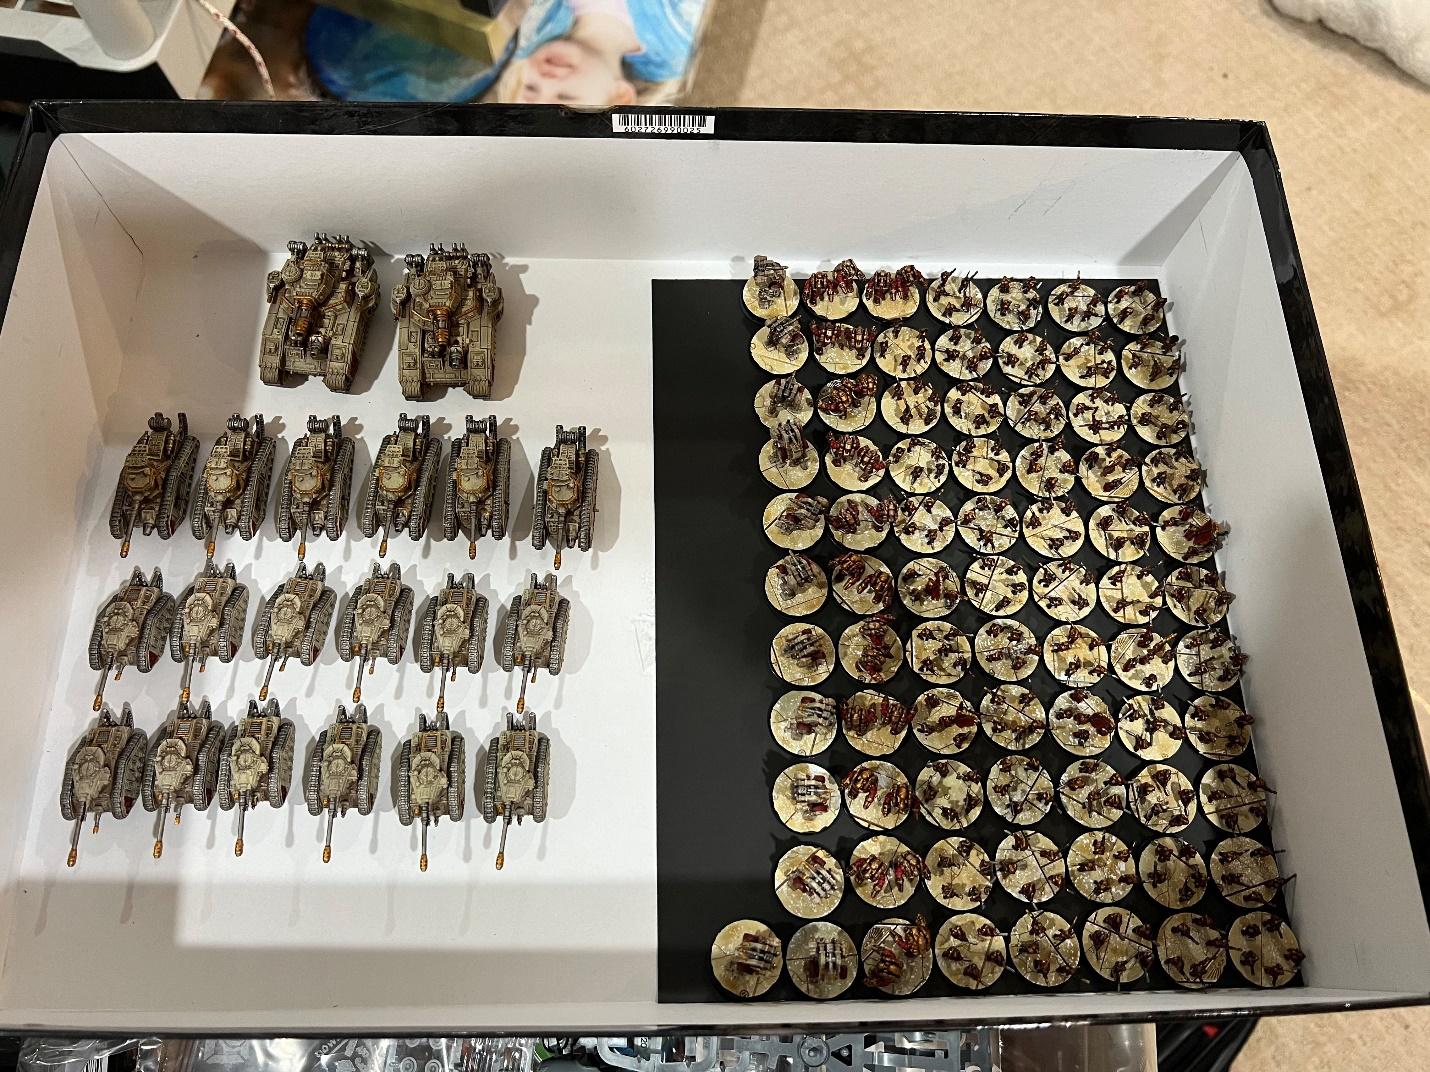
I’ve been waffling back and forth on what army I wanted to bring to my NOVA doubles event and this month’s release gave me my answer. Anybody who knows me, knows that my first love in warhammer is the humble guardsman. The release of Solar Auxilia in plastic, has given me the incredible opportunity to work on an army that I’ve always loved, albeit from afar. I have acquired a few of the resin models from the always generous Mike P. and along with my headfirst dive into the new plastics, I will soon be able to put a 3000 point (unpainted) army on the field.

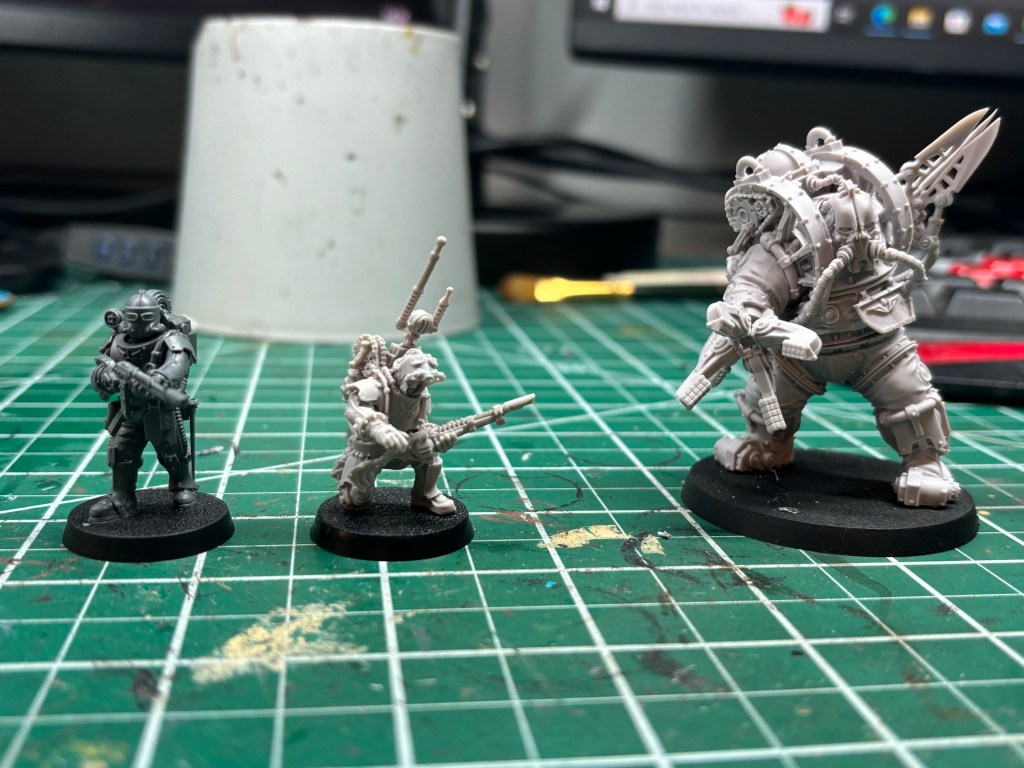
Needless to say, I’ve gone fully off the deep end on this release as this isn’t even half of the pile of Solar Auxilia models I have in my backlog now.

I think its safe to say that for the rest of the year, our loyal readers can expect to see a constant stream of finished Solar Auxilia models to join the already steady stream of Tomb Kings.

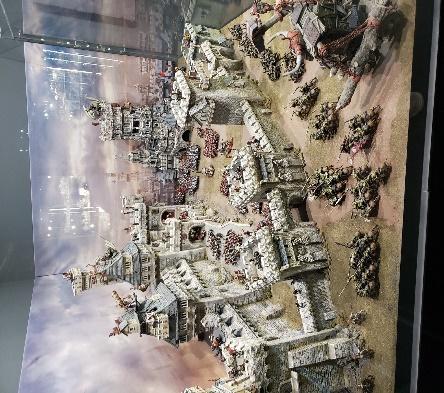
To finish up this month, I have a couple pictures of my first painted epic White Scars, alongside some 3d printed terrain that will be used as an Armies on Parade board for the NOVA open.

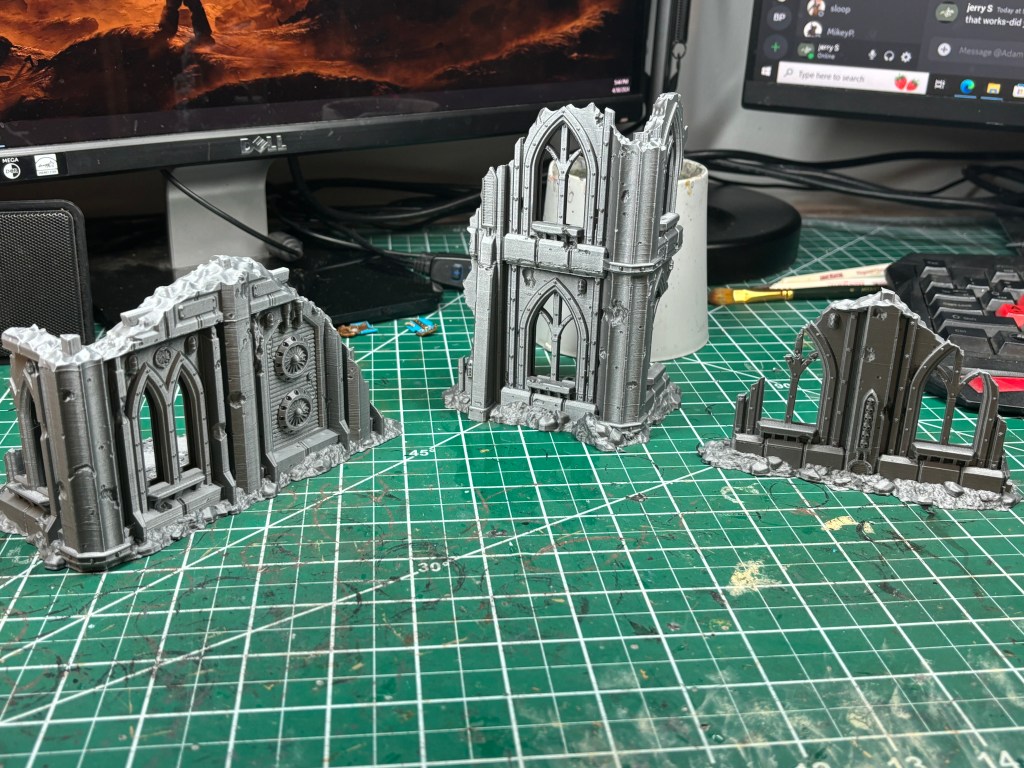
Oh and this landing pad….I wonder what will be calling this home…..


Kevin C.

Sadly, in contrast to last month where I had two Bretonnian units done, this month I have … none. With several deliverables at work, as well as a family trip down to Texas to see the eclipse in the middle of the month, my hobby time was severely curtailed. But, I was able to see a total solar eclipse for the first time, albeit through the clouds. So, this was cool…

I’ve also started hitting a groove where I watch my friends (and wife) play Helldivers 2 during the evenings, defending managed democracy, while I paint. It’s an enjoyable distraction, and I get to keep up with the gossip.

Legions Imperialis

So, I have a butt-ton of LI stuff to still paint:

  • Three Support Boxes (thank you Austin for needling me into buying a third)
  • Two Malcador Infernuses (Infernii?)
  • Two Valdor Tanks
  • Six Lightning Fighters
  • Two Marauder Bombers
  • Four Warhound Titans
  • Two Reaver Titans

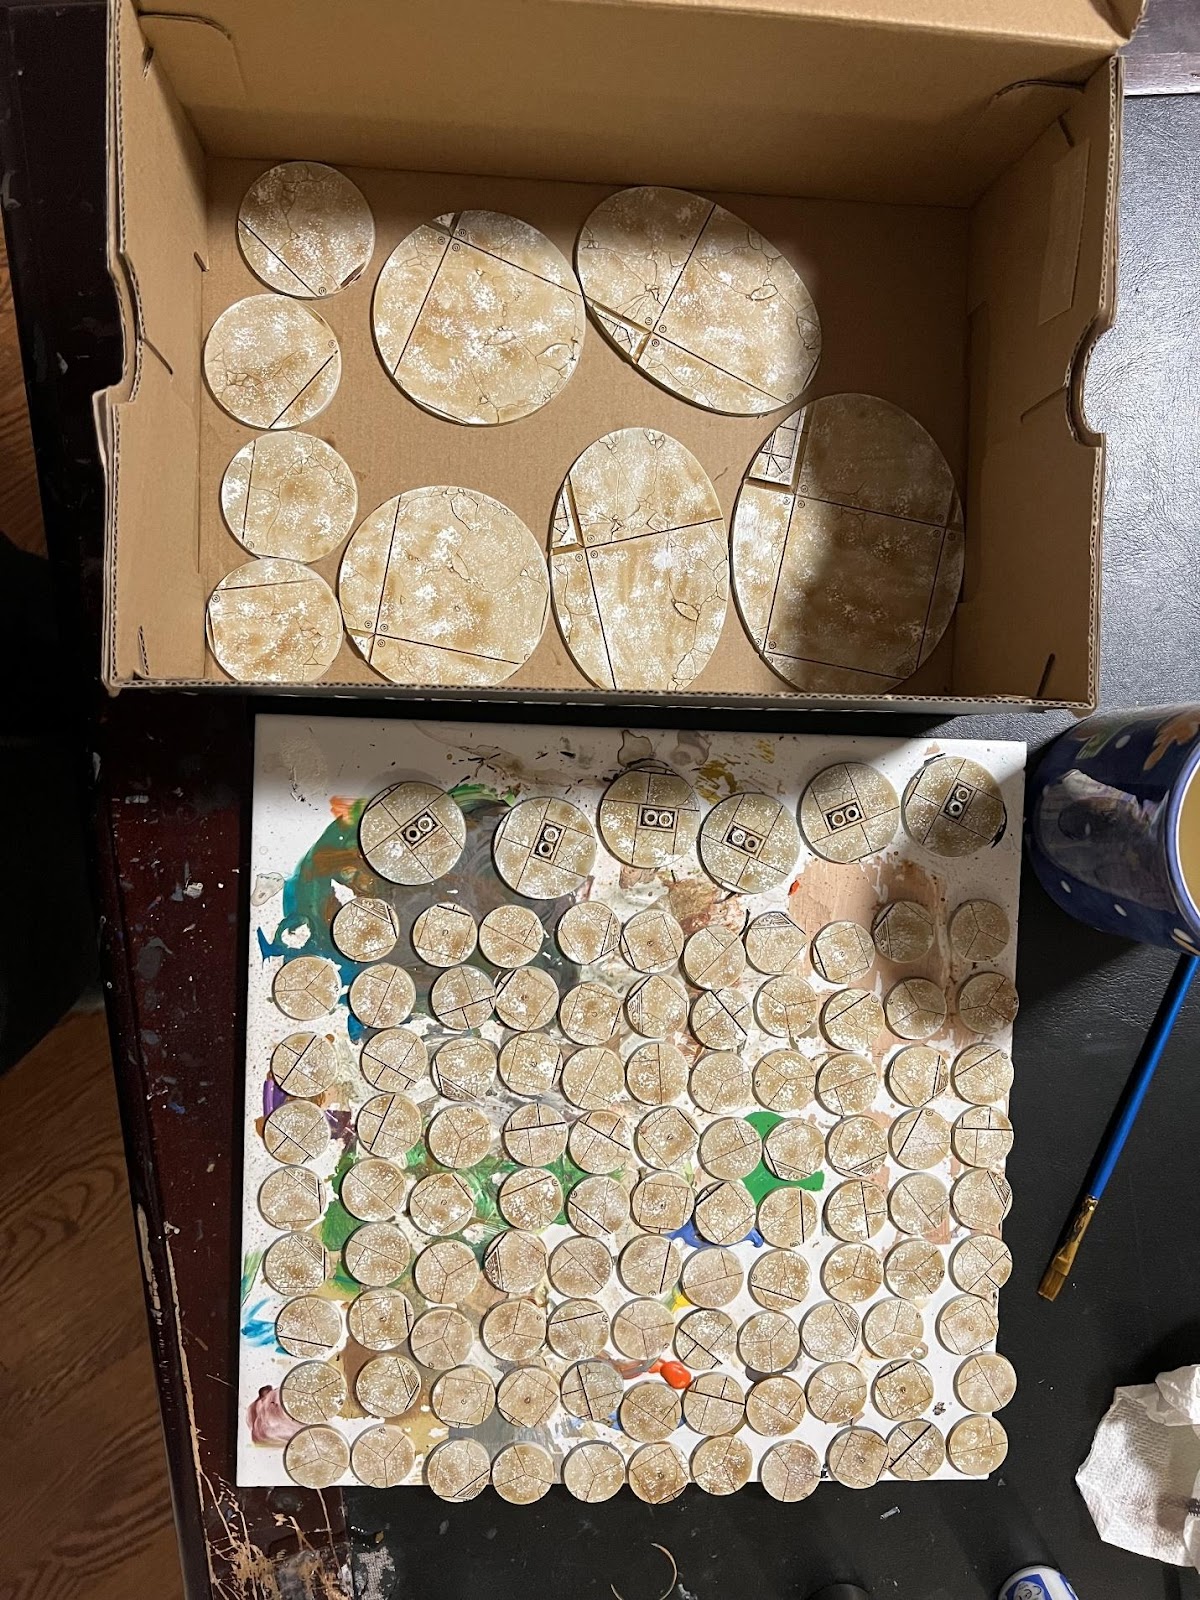
I am very, very slowly making my way through the list. I decided to get the bases done, all in one go, with the technique shown on the Games Workshop Youtube channel video here (https://youtu.be/6MB5hLu9dlw).

  • Wraithbone primer
  • Seraphim Sepia Wash
  • Stipple brush with White Scar

This provides a nice contrast to my red & gold Vostroyans – it’s lighter in color, but still from the warm side of the palette, so it brings the force together.

After these were complete, I got super lazy and primed all of the platforms in the Support box Leadbelcher, and painted a few details on them after I got back from Texas. They are not great, but they are done, which has a quality all of its own.

Blood Bowl Black Orcs

These were not mine, but friends of the blog, who are Very Serious Blood Bowl Players™, needed a team done by May 3. I told them I could help them out, since I’ve painted Black Orcs before, which was a bit ambitious of me, considering my workload this month.

For Orc skin, I generally like doing lighter green skin, since that tends to make them pop on the table more. I really like Duncan Rhodes’ recipe that he uses for his Goff Boy in this video (https://youtu.be/EHxvAN7haMs). It’s not Blood Bowl, but it works well for most orcs, and it’s scalable – meaning, if I want to add extra details, it’s definitely doable.

  • Orruk Flesh Base
  • Athonian Camoshade Wash
  • Orruk Flesh first highlight
  • Nurgling Green second highlight
  • Kislev Flesh on select areas – lips, eartips, nosetips, scar tissue

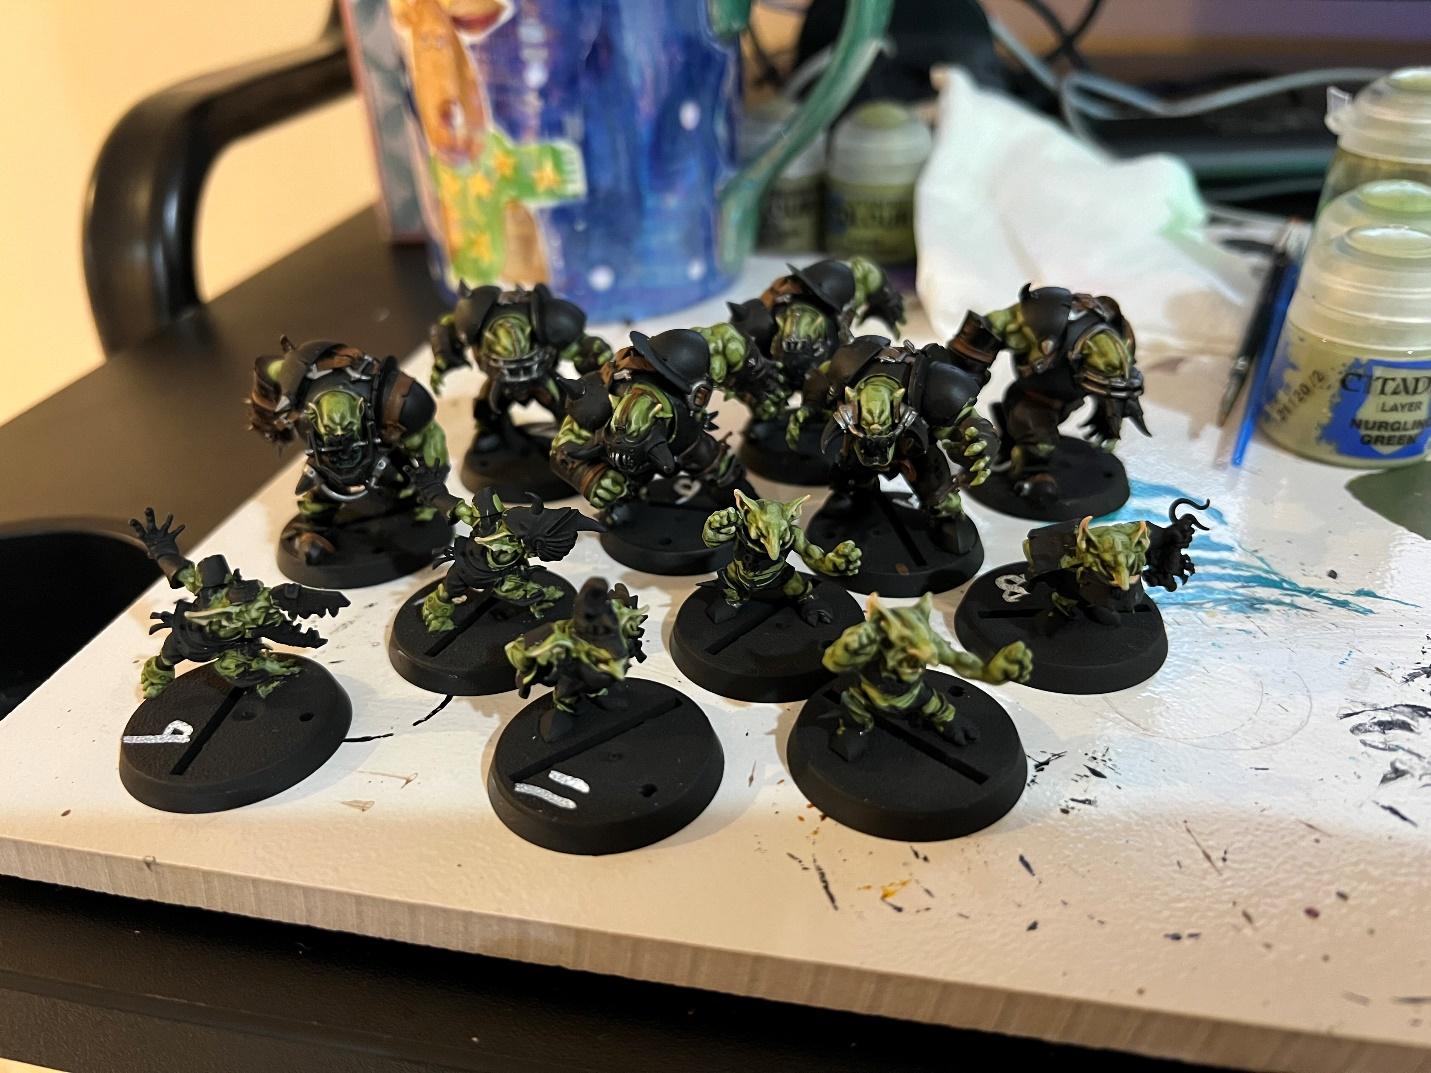
Because they are supposed to be Black Orcs, I based the armor all in Leadbelcher and then covered it in Black Contrast – very easy dark armor there that you can then build upon with Stormhost Silver highlight. For the leather pants and belts, I used two different recipes for brown that I also use for my Bretonnians.

  • Rhinox Hide 🡪 Doombull Brown 🡪 Tuskgor Fur for the pants (I use this for the leather bits on Bretonnians)
  • Mournfang Brown 🡪 Skrag Brown for the belts

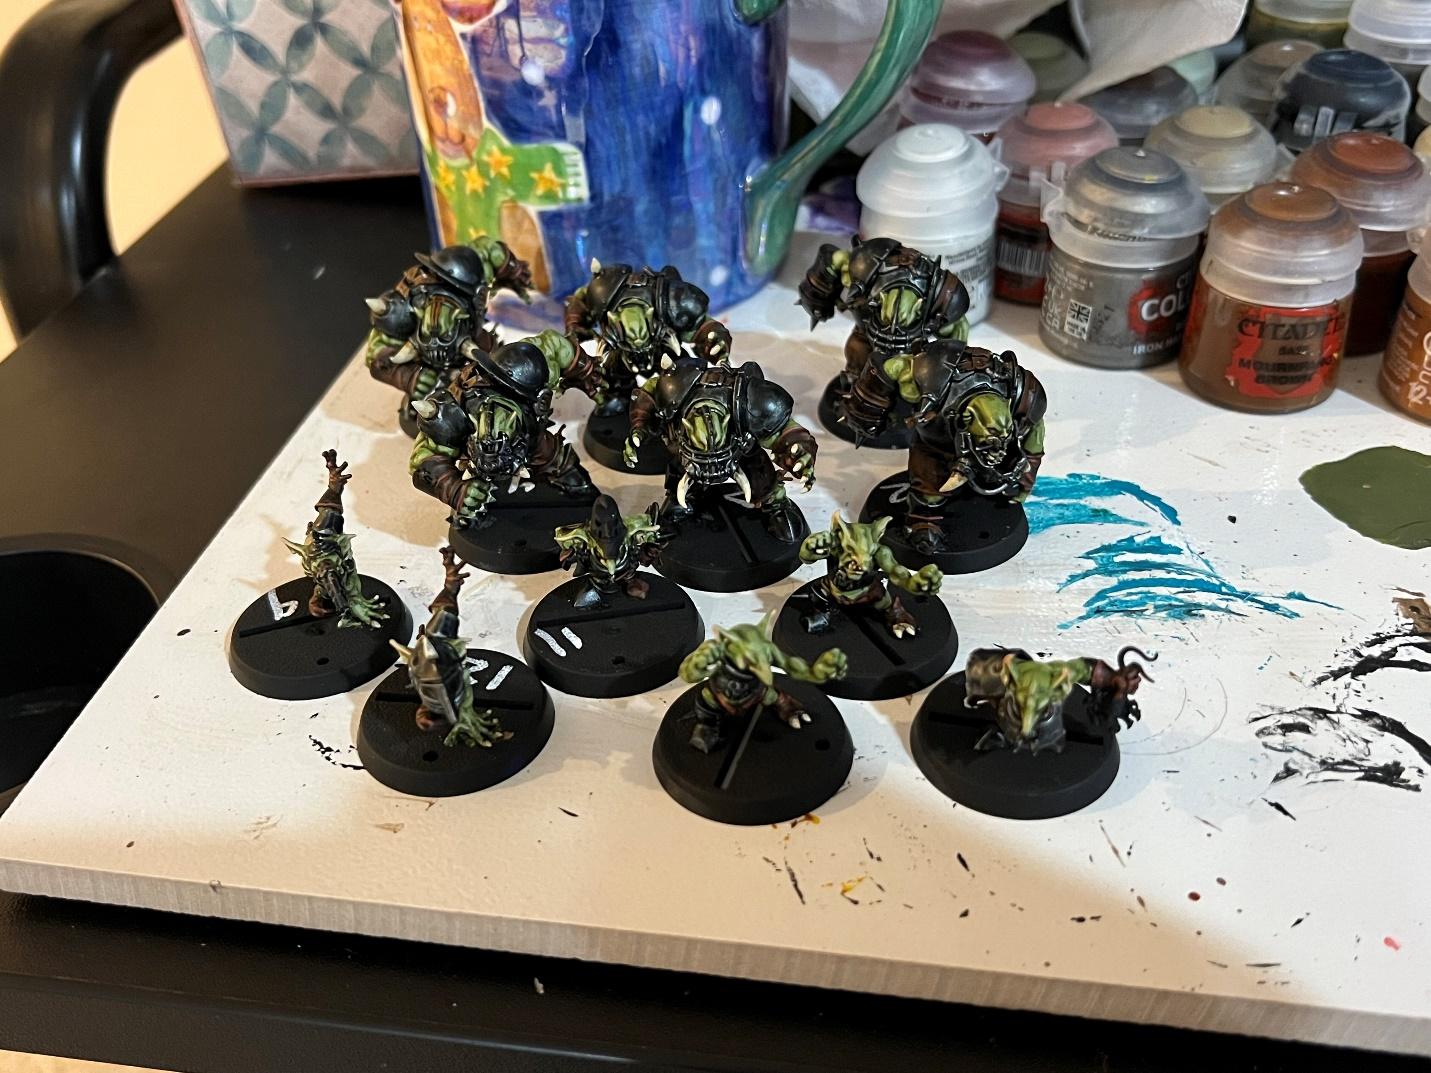
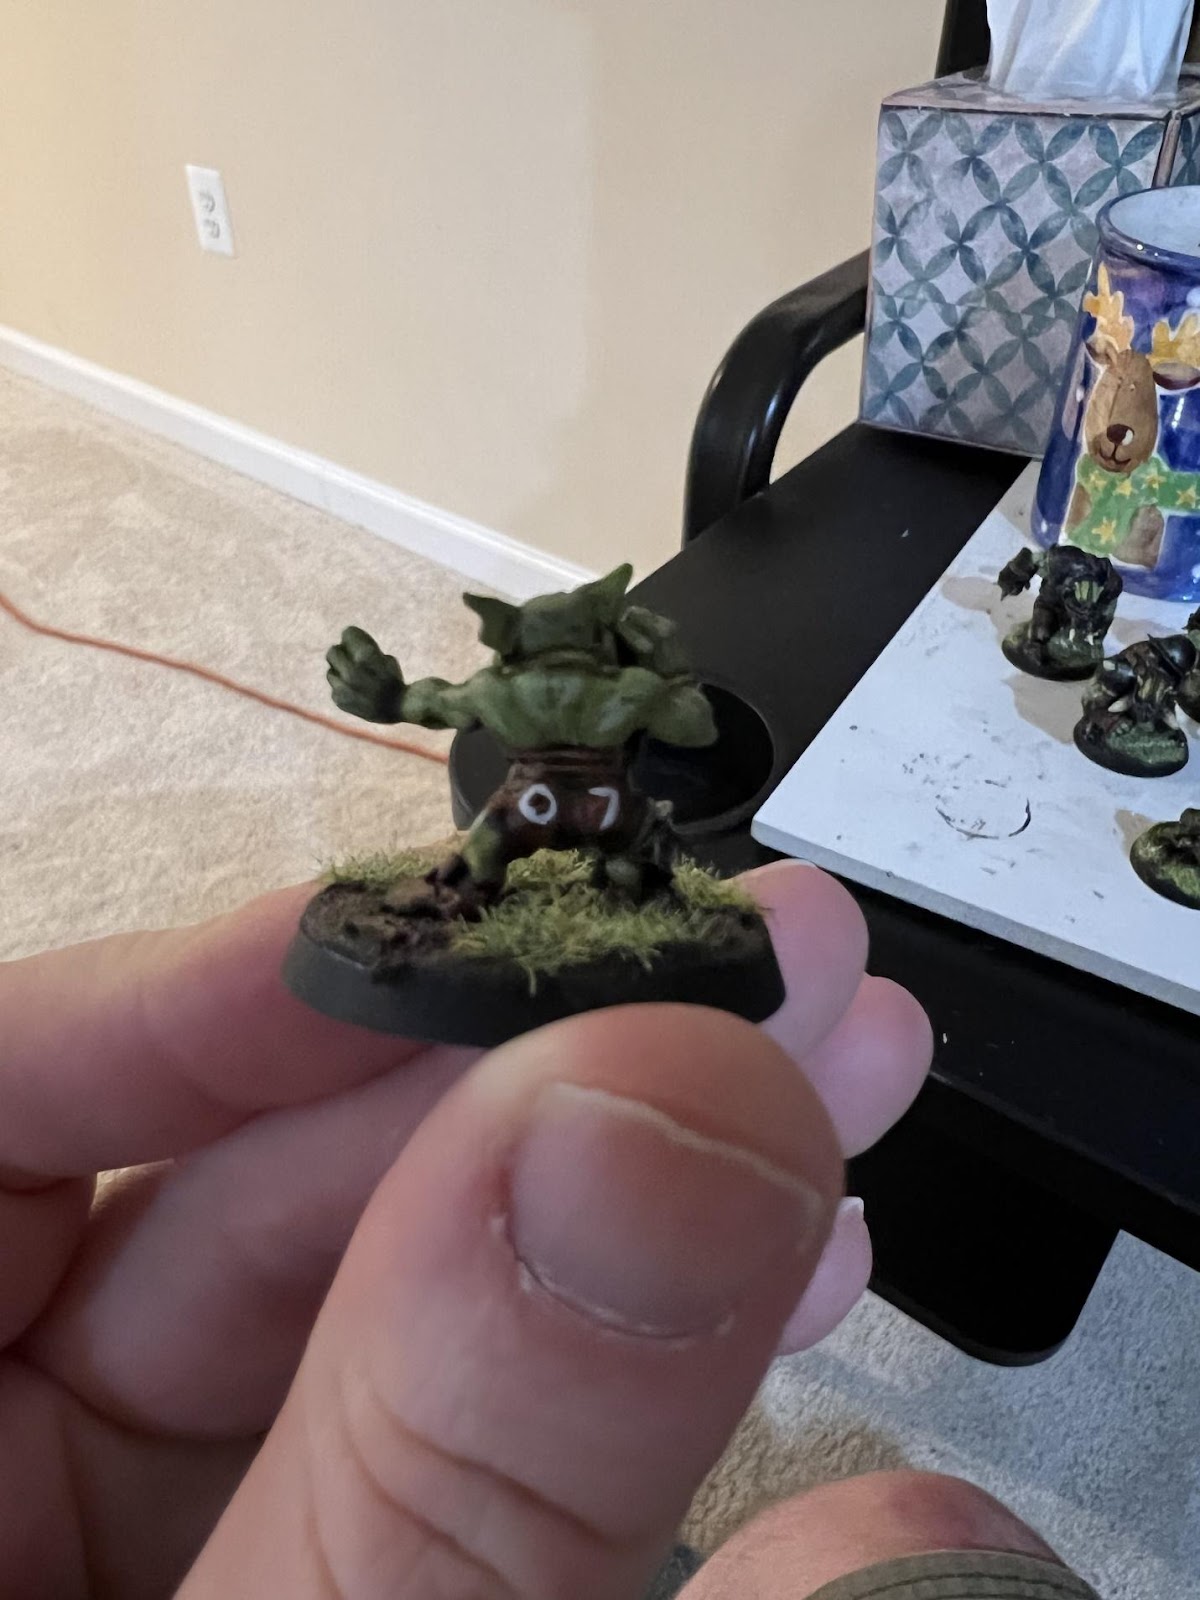
Because, as noted before, the owners of these Black Orcs are Very Serious Blood Bowl Players™, they needed these minis to have numbers for League Play. For the orcs, this isn’t a problem, but there is not a lot of armor for the goblins. So, I decided to put the numbers on their butts.

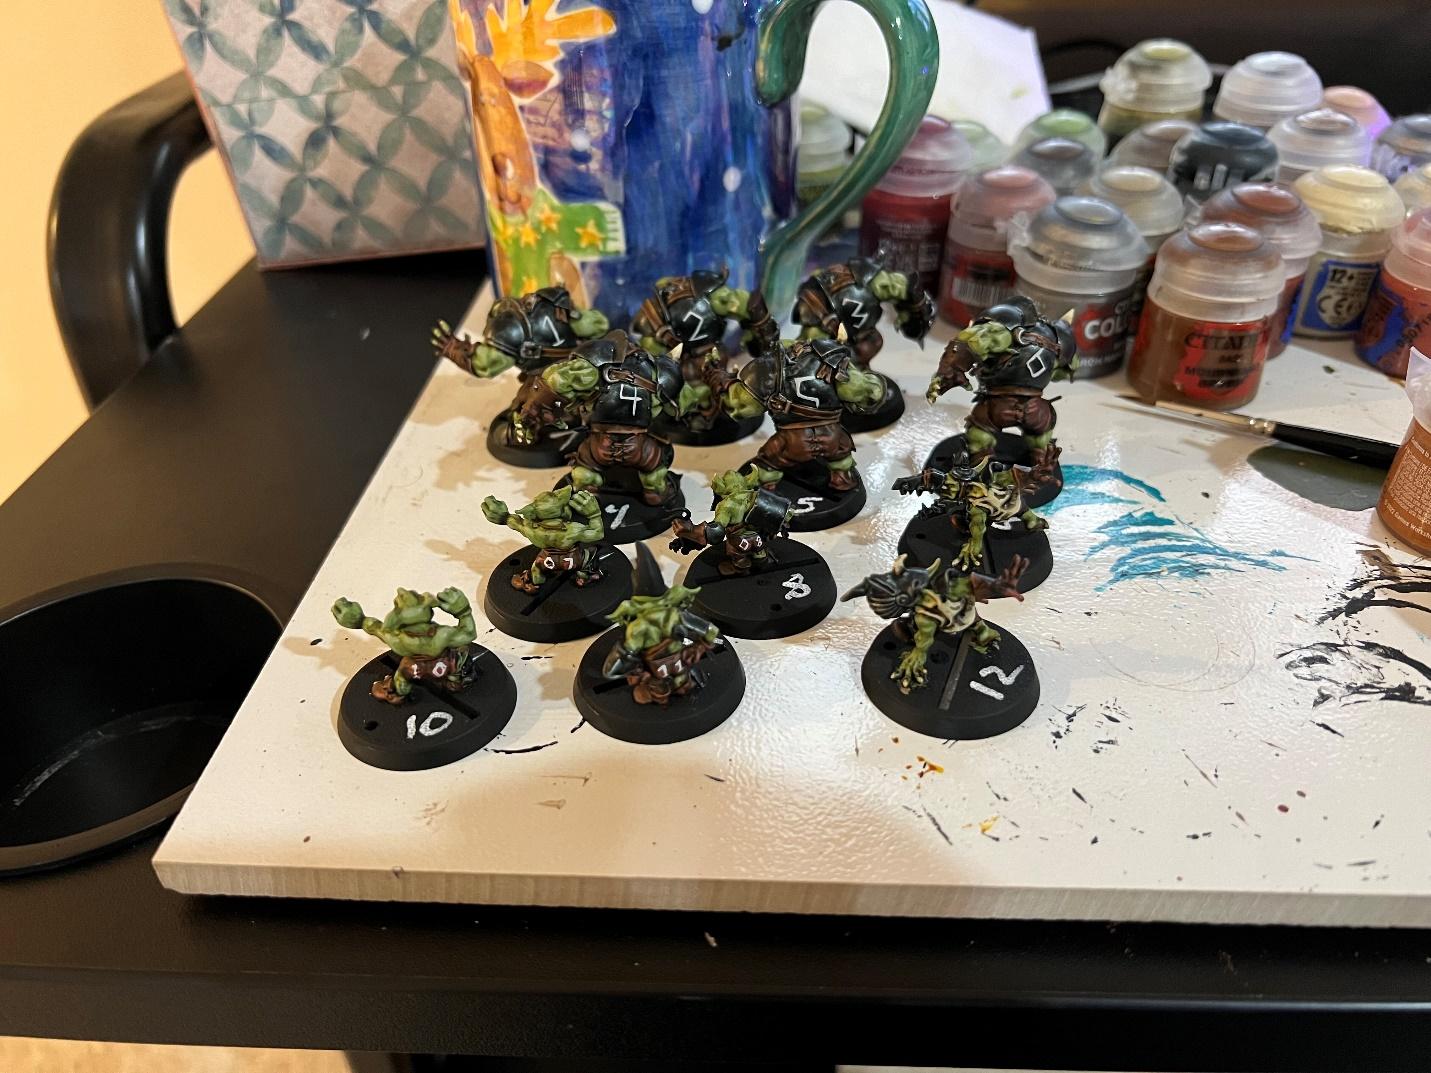
Finally, I decided to try out Technical Paints, using more or less the same recipe I plan to use for the movement trays for my Bretonnians, as shown in this video (https://youtu.be/k7tUuwJgZAs). Stirland Mud, Agrax Earthshade, and Gorthor Brown, along with healthy heaping of grass flock. To make it more football-like, I added white lines to the grass, using a coffee stirrer.

Supporting My Bretonnians

So, I was not able to paint any Bretonnian miniatures, but that doesn’t mean I did not paint anything for The Old World. A few months ago, I bought some movement trays from Litko, when they had just released Lance Formation shaped movement trays. I finally got time to glue them together and paint them accordingly. I also magnetized both the Knight bases and the movement trays, for easier transport. Hopefully this will make transporting them so much easier than packing them individually – I will not be doing that again.

That is all for me. I am hopeful that next month I will have the remainder of my knights completed. Until then!


Austin B.

April Advancements

Much like some of the others, this month has been a busy time for me, particularly with work. But still, I was able to get a bit of hobbying done in what little free time I had, though not quite as much as I had hoped. Between the lack of time and my constant jumping between projects, I don’t have as much to show as some of the others here – though with a few things in stages on the painting table, the next month might prove more productive! Still, it wasn’t a meaningless month, and I’ve still made great progress on miniatures for my newest obsession: Star Wars Shatterpoint. And necessarily, too, as my locals is having a tournament on May 11th that I plan to attend with a fully painted roster!

I’ll start with perhaps one of my favorites, the “Fearless and Inventive” squad pack, harkening back to the opening scenes of Return of the Jedi, with Leia in her bounty hunter getup, Lando and R2D2 in disguise, and Luke in his iconic black robes. R2 and Luke were technically completed last month, but were not yet based. All of these were very fun to paint up, all being very individual – though I did struggle a great deal with R2 as many of his details were rather small and soft. Luke was ultimately the easiest, just being almost entirely black robes. Ultimately though I found Leia (or well, Boushh) the most fun to paint, as I got to play around with trying to differentiate a few different tans and browns on a single model. My current intention is to run these guys as one of my squads in the upcoming event, so I was happy to get them all done.

C:\Users\austi\AppData\Local\Microsoft\Windows\INetCache\Content.Word\20240430_092724.jpg

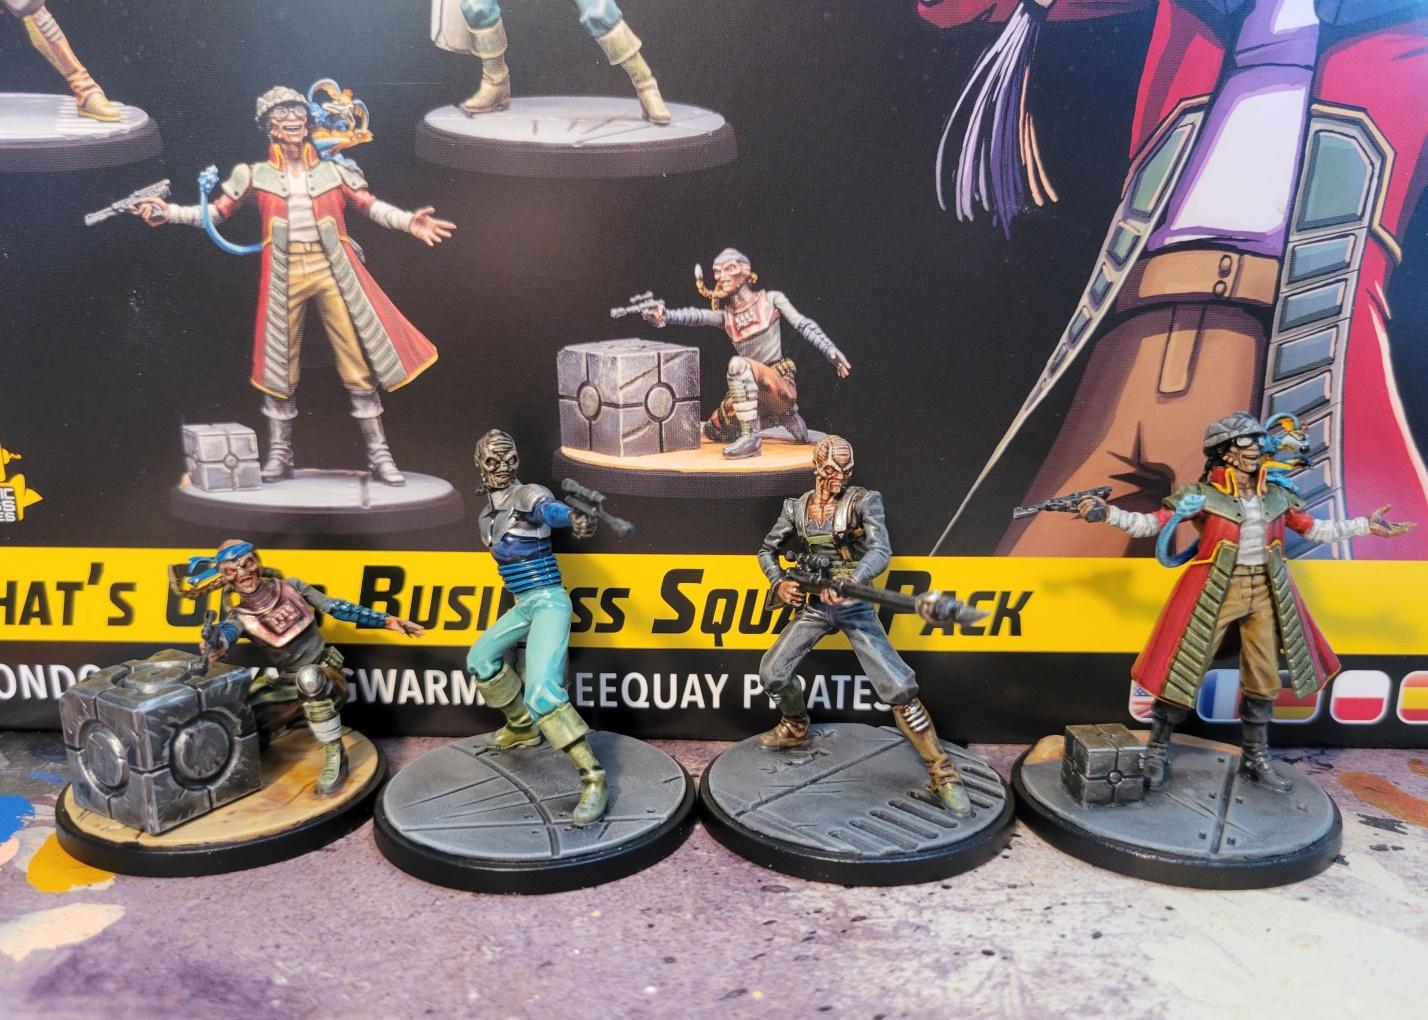
Next up, and totally new for you all, is the “That’s Good Business” squad pack. Have I mentioned how much I love the box names for Shatterpoint? They’re great, and this box has probably one of the best. Haha! But here we have what will likely be my second squad for the event, as Shatterpoint lists require you run two squads together to form your Strike Team. And who better to assist our Rebel friends than the magnificent Hondo Ohnaka and his band of pirates? Hondo here especially was a real joy to paint (well, except for the monkey-lizard on his shoulder, whom I should have left off for sub-assembly. Again the uniqueness aspect of many of these Shatterpoint squads strikes again, as really every one of these models was fun and individual. Unfortunately that individuality also means batch painting is nearly impossible, so the time it takes to paint these models is increased compared to my more usual projects – certainly a contributing factor to my significant decrease in finished models to show off this month. 

Now, if I have the time between the end of this month and the event, the plan is actually to replace the Weequay Pirates above with the generic Bounty Hunters from my recently acquired “Fistfull of Credits” squad pack. You will almost certainly see them – and likely their named compatriots – in the next monthly updated. But if I can get them done in the remaining week and a half is yet to be seen…?

Other than that, further progress has been made on the initial two boxes I purchased, the two different Ewok squad packs. Again, some of these were already complete at the end of last month, but now I have finished some more of them and have gotten them all based up. The generic Ewoks still remain unfinished though. Unlike many of the other models, they have not been very fun to paint, at least for me. To be honest, it is partially my fault for having assembled them completely first, instead of doing them in sub-assemblies. But partially it’s the model’s fault, as each of the Ewoks, of which there are three to a base, have nearly the same amount of detail as the individual character models, so the time required to paint them to my standard is just absurd. Hopefully they will be done by next month, but I am not so sure I will get back to them before other things.

Plans And Preparations

Beyond all my progress with Shatterpoint, I’ve been turning my attention towards preparing my various lists for the NOVA Open this year. I have signed up for most of the Blood Bowl events at NOVA, as well as one event for Legions Imperialis. Though the convention is months away, I do not want to have to be painting frantically in the weeks leading up to the event, and would rather get my various teams and whatnot completed beforehand, so I can shift focus back to my other projects. Of course, why not kill two birds with one stone though, and complete some things I want to do anyways, or projects that I have been holding off on? I haven’t fully decided on all the teams I will be bringing for the various Blood Bowl events, but I do have a short list that I figure I will make the focus of things for a while. Meanwhile, I need to get my Legions Imperialis painted up anyways, as I am falling behind with the releases, so they were to become a priority anyways. And I have already started on my Solar Auxilia Support boxes, as well as a clutch of vehicles that I have added since I last showed off the army. I had hoped to have some of them done this month, but the support weapons have proven to be a bit of a chore to paint – though the vehicles are thankfully the opposite. 

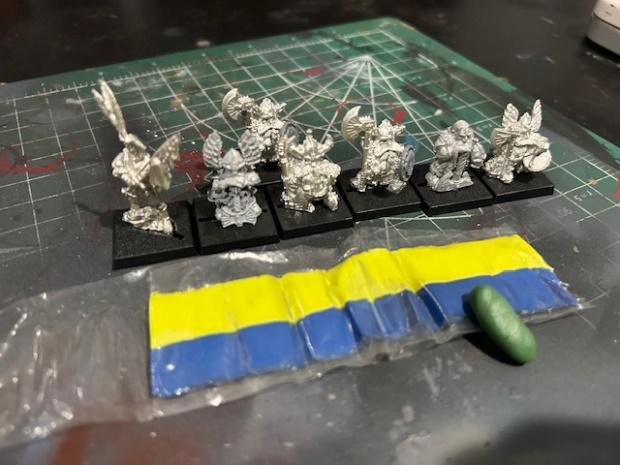
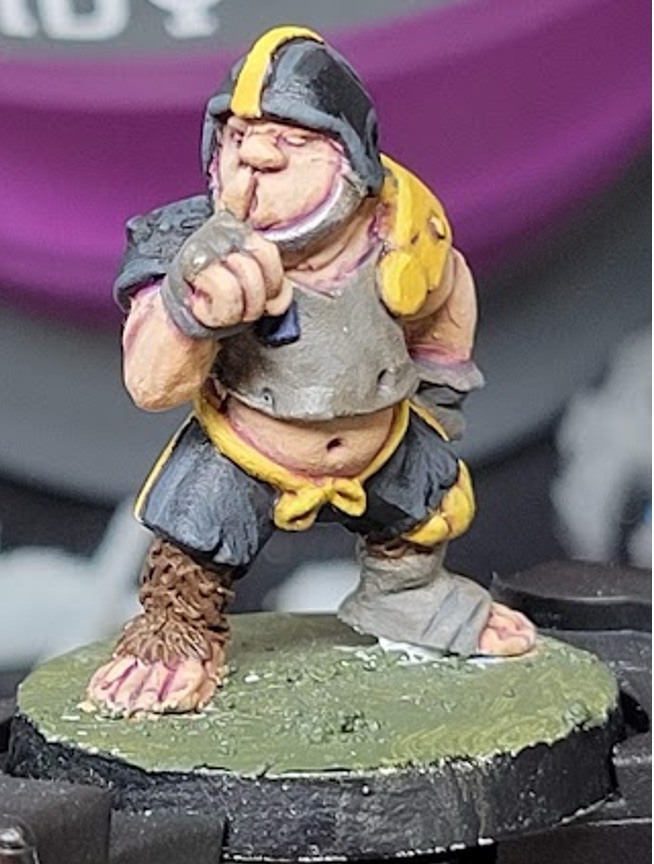
Now on the Blood Bowl side of things, I think I will be soon focusing on finishing up my Vampire team that has been sleeping in its coffin for a few months now. But besides that, the one team I have most certainly decided to bring is the College of Shadows for Dungeon Bowl, and I have begun the task of painting up that eclectic mix of Dark Elves, Skaven, and… Gnomes!

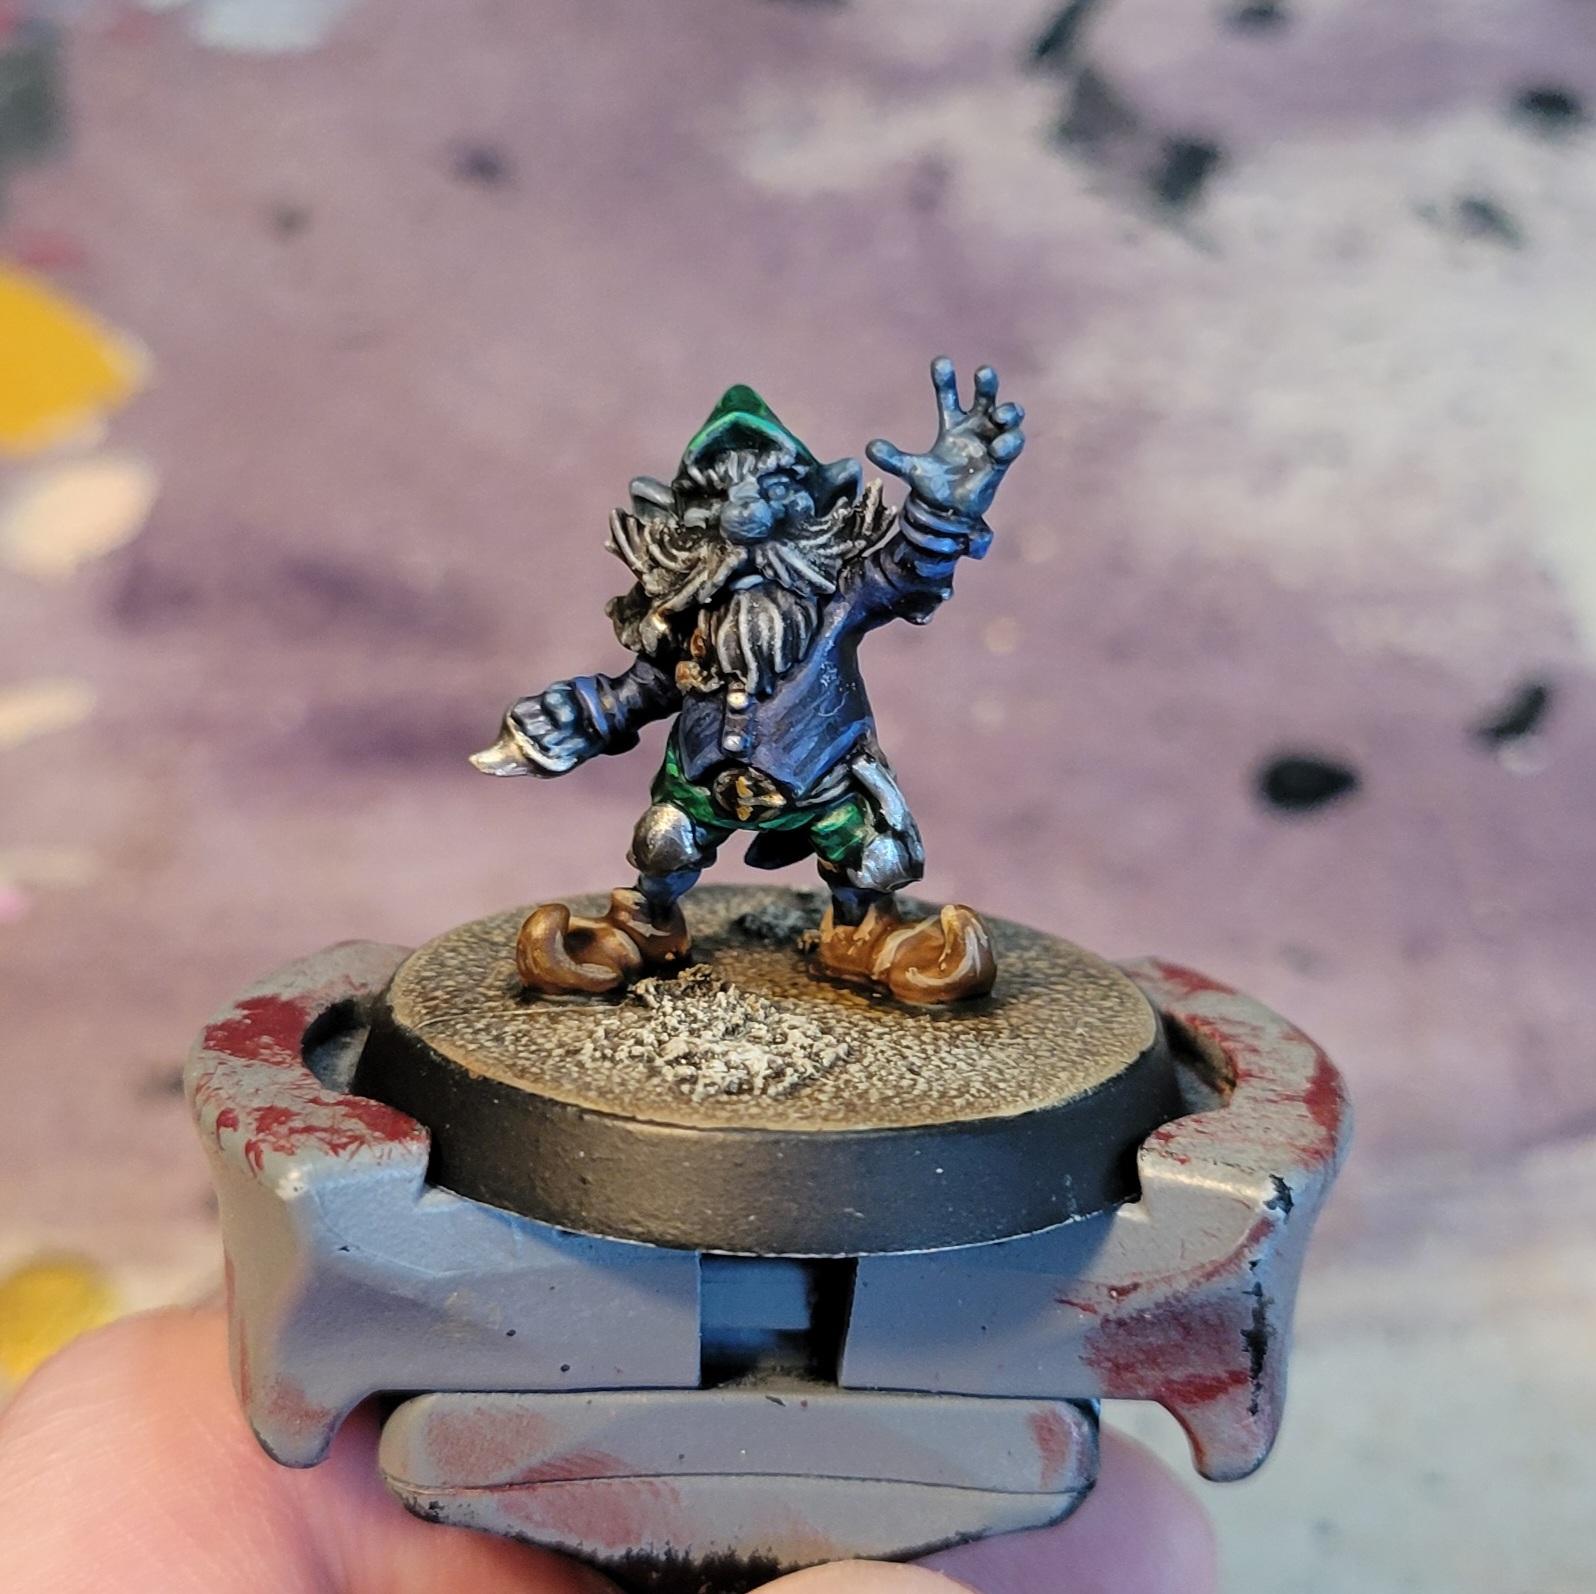
This little buddy is the test model for my College of Shadows team, showing off the team colors of dark blue and emerald green. He will be joined by a few more of his kind, alongside some Skaven Blitzers, Gutter Runners, and a Thrower, as well as the terrifying Witch Elf and another Dark Elf lineman. But more on them next month, hopefully! And maybe a little magical surprise to go along with them…


Michael S.

This month I’ve been busy with lots of travel, but wanted to still get as much does as possible. Last month, I set some ambitious goals of fully completing 3 units. Sadly, I fell a bit short of my original goal. I was able to complete 2 of my 3 units. In addition, I made some good progress on a few other models that were waiting for some paint. All said and done, not all too disappointed given my busy month!

First off, my Heresy Death Guard. These tactical support marines have made an appearance before as a half-finished unit, but I finally got transfers applied. They are just waiting for some varnish!

I am pretty stoked about the final look for this unit. The transfers really brings them together.

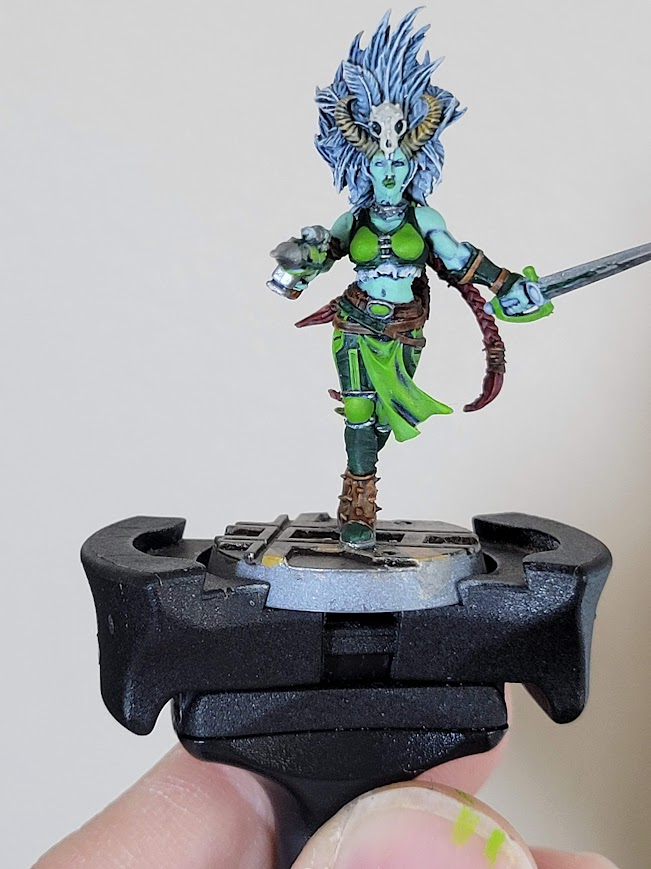
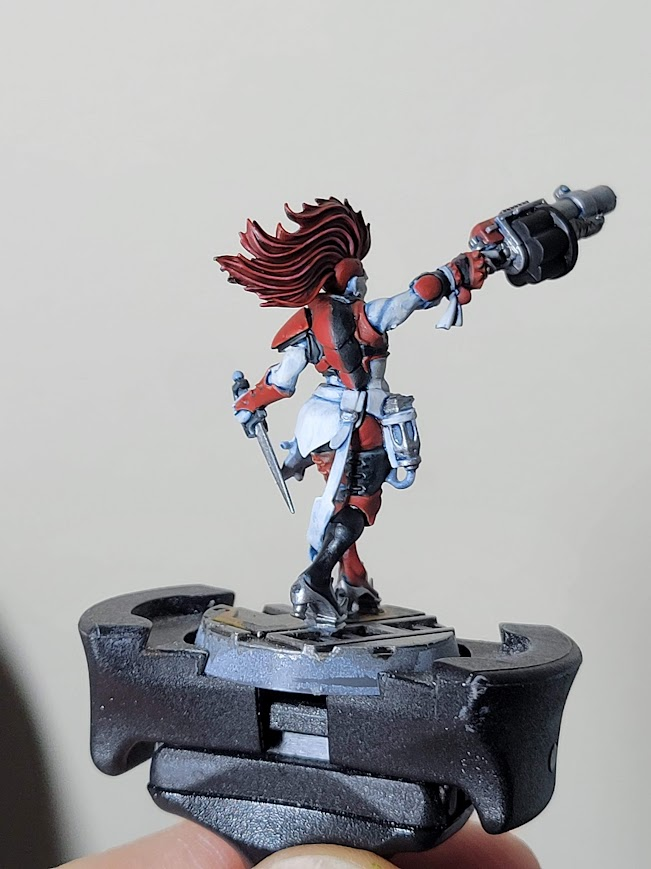
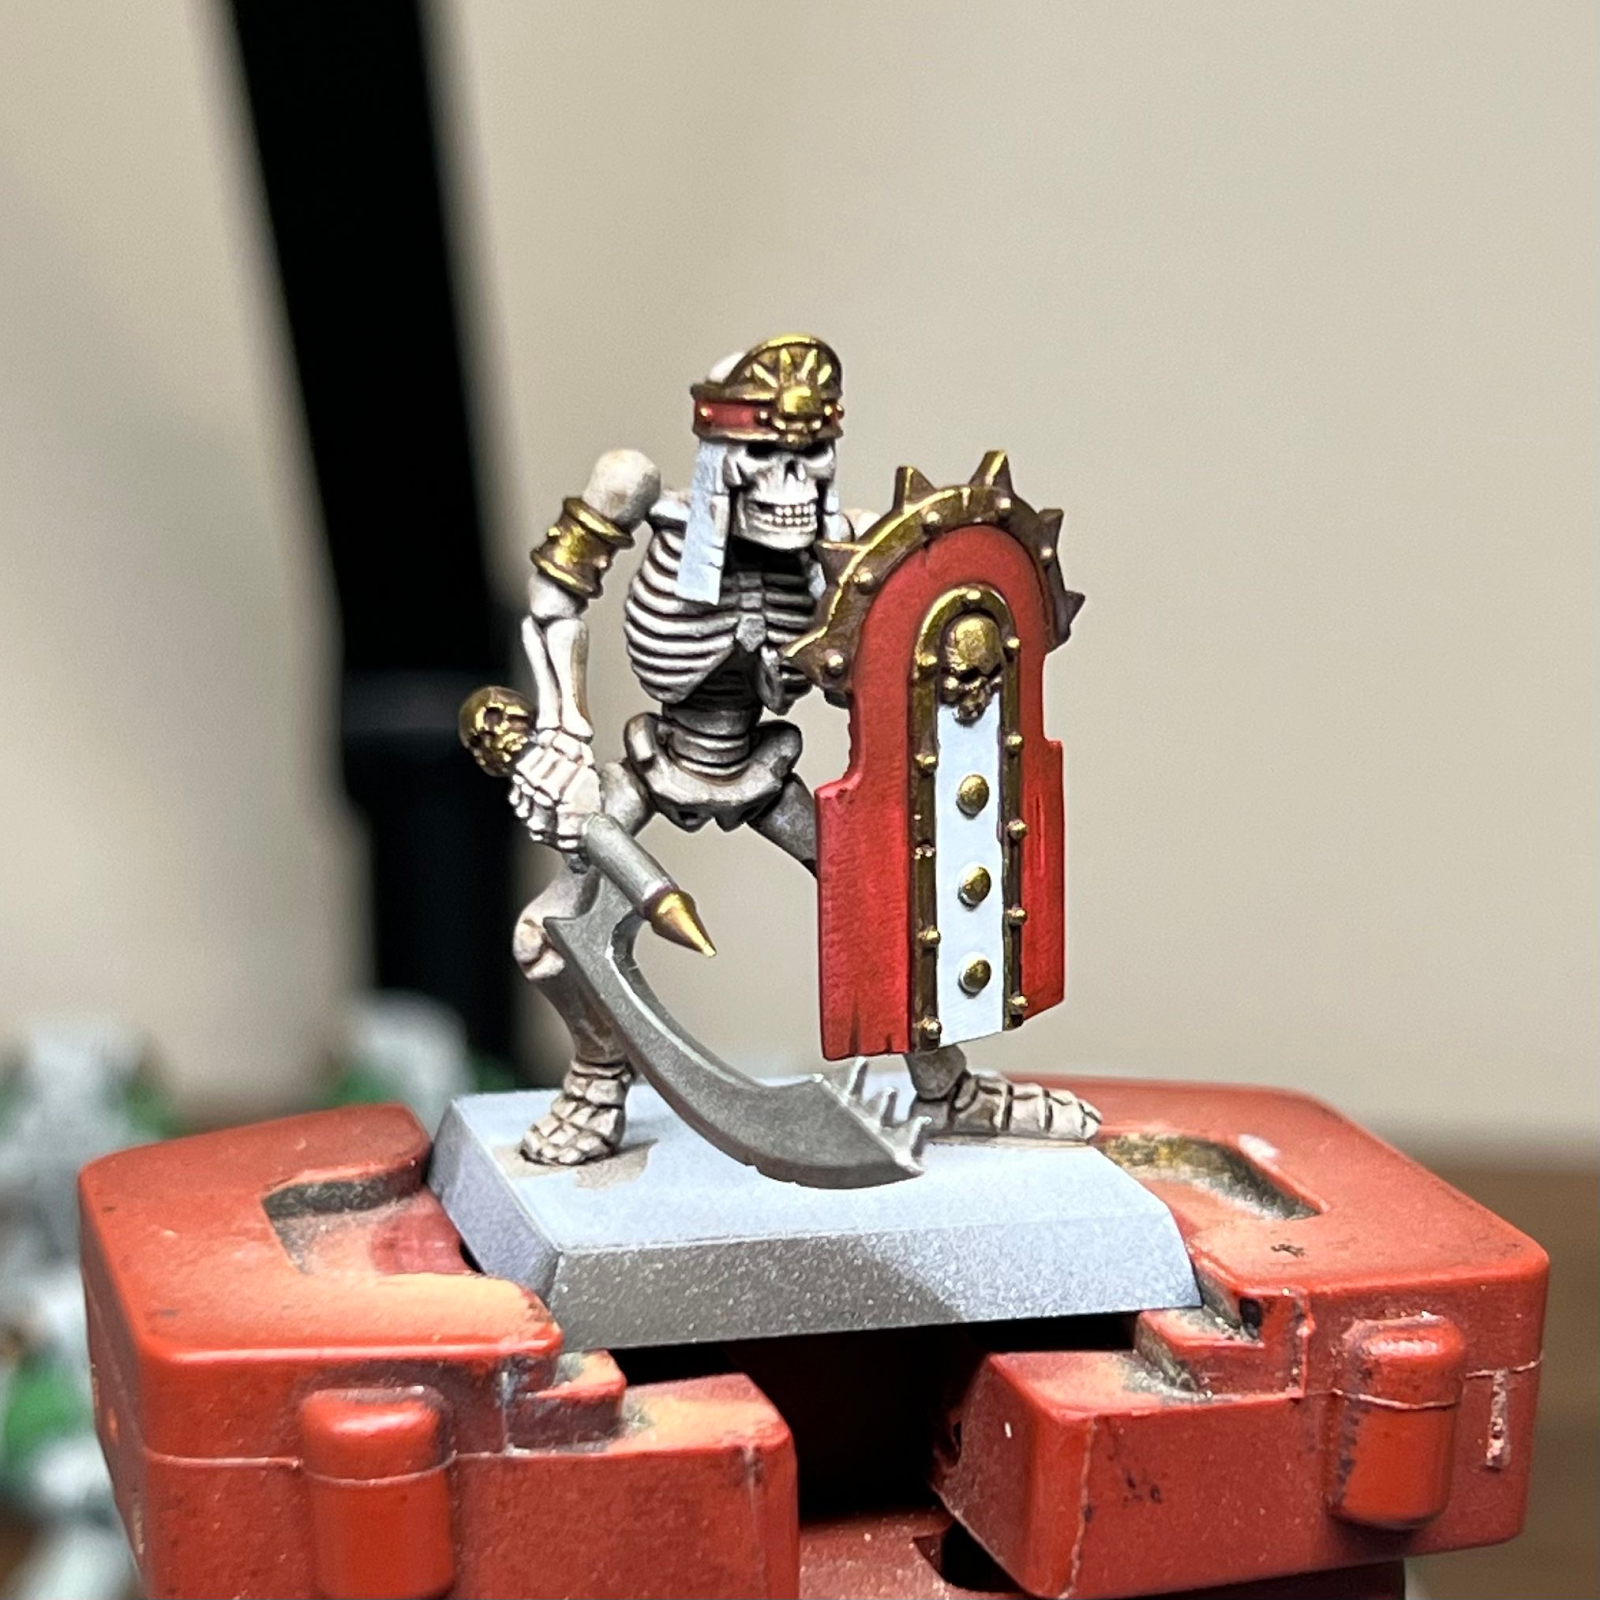
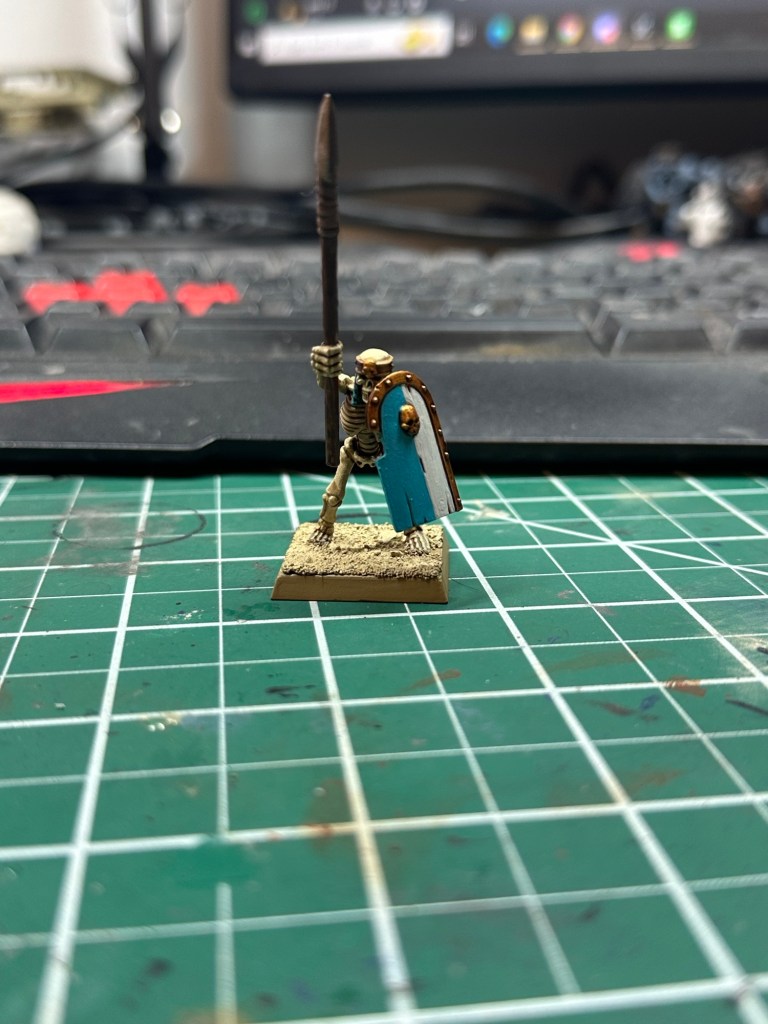
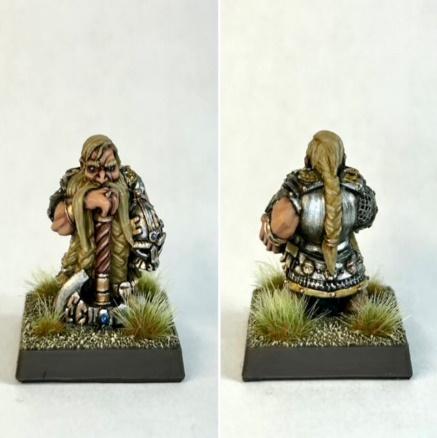
Next up, my Tomb Kings have their first completed regiment. A unit of skeleton warriors in bright red. Quite happy with how this scheme turned out, and I am looking forward to painting the next unit. This was a fun exercise in contrast paint for me, a tool I haven’t heavily used before as the primary paint for a unit.

With the completed units out of the way, I wanted to showcase a few miscellaneous models from my desk. My longtime 40k army is Black Templars, though shameful few models are fully painted. After painting the units above, I had the itch to get back to edge highlighting some black armor and pulled out a few models. I was able to get some paint on a few of the terminators from Leviathan.

Frustratingly, the AP Speedpaint I used on the shoulderpad started to crackle when drying. This seems to be a side effect of using it over top of a less-than-matte undercoat. It was relatively easy to hit it with a wash to “fix” the crackle effect, but the shoulder pad ended up a much darker color than I intended. Despite this setback, I was super happy with how the cape and face turned out. The heraldry needs some attention, as to the metallics, but otherwise the model is coming together nicely.

In a departure to some non-GW models, I spent a little bit of time working on my Malifaux crew. I wanted to play with some of my new vibrant colors from the updated Vallejo Game Color range. As a long time VGC-hater, these paints have quickly become my go-to. The original colors often had a satin/glossy finish, and many colors had poor coverage. The updated range is quite the opposite!

That just about does it for me! May is shaping up to be a similarly busy month, so in an effort to achieve my goals, I am only aiming to finish my unit of tactical marines left over from this month. Happy hobbying!


Mike P.

Firstly, a huge shoutout to Mike and Taylor—it was fantastic meeting you both over the weekend, and I’m incredibly grateful for all the love and support.

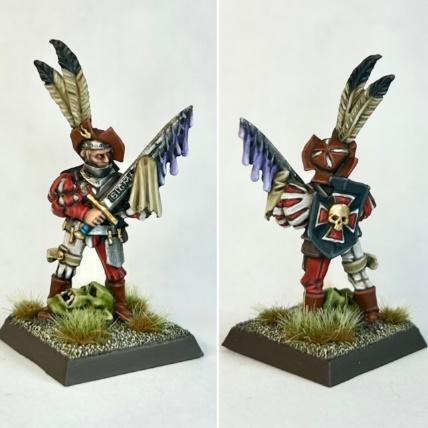
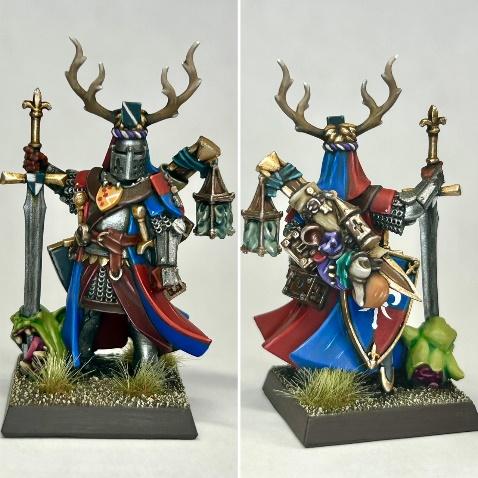
Now, to bring everyone up to speed: I’ve admittedly taken a bit of a break from wielding the paintbrush recently. Truth be told, last month’s update was missing because, A, my productivity took a dip, and B, I’ve been pouring my efforts into completing my final papers for my bachelor’s degree. However, amidst the chaos, I managed to make some progress on a remarkable new project—the Bretonnian Paladin. This model has been an absolute joy to paint, though I must confess, I lost track of time completely immersed in the process. But hey, sometimes that’s just part of the magic, isn’t it?

A statue of a knight holding a sword

Description automatically generated

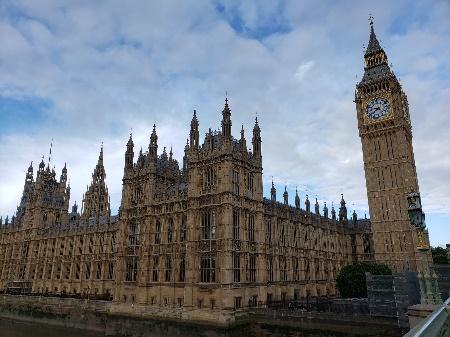
In my initial article, I briefly mentioned my visit to Warhammer World, and now I’m excited to delve deeper into how I made that journey happen and share my experiences along the way. This isn’t meant to be the definitive guide, but rather a practical roadmap for those looking to embark on this adventure without breaking the bank. For those unfamiliar, Warhammer World is akin to Yankee Stadium for baseball fans or the Canton, Ohio for football enthusiasts—it’s the ultimate destination for tabletop miniatures aficionados, often likened to the “Disney World” of our niche hobby.

Surprisingly, prior to my own visit in 2022, I struggled to find comprehensive guidance on how to make the trip a reality. Despite reaching out to others who had been, I never received that insider’s perspective or “homeboy hook-up” that would truly demystify the process. It felt like an elusive secret guarded by those in the know. Since returning from my trip, I’ve been approached by numerous people seeking advice on how to replicate my experience and make their own Warhammer World pilgrimage. Thus, I feel compelled to share my insights and tips with fellow hobbyists eager to take the leap.

Picture it: mid-June 2022, a world still grappling with the aftershocks of COVID, and I’m feeling the weight of it all as I juggle the demands of my job. Every day feels like an uphill battle against the monotony, and I’m yearning for a break—something to shake up the routine. Then, in a moment of sheer desperation, a wild idea strikes me: what if I just went to Warhammer World?

Of course, there are hurdles to clear. Being married and in my line of work, jetting off to another country isn’t exactly a spontaneous decision. I figured it was just a fleeting daydream, something to ponder over my morning coffee. But then, I decided to broach the subject with my wife, expecting a skeptical response. To my surprise, she actually gave me her blessing. Emboldened by this unexpected support, I approached my workplace the next day—and to my astonishment, they too gave me the green light after some necessary paperwork and phone calls. Just like that, within the span of a single week, I had all the necessary approvals to make this impromptu self-adventure a reality. Shocking, indeed.

With all the necessary approvals in hand, I wasted no time. I swiftly purchased a plane ticket for the following Sunday, flying out from Baltimore to London. Anticipating my biggest hurdles, I tackled them head-on: securing my plane ticket, lodging, and a round-trip day train ticket. I knew that if I could nail down these three essentials, the entire trip would start to take shape. In terms of finances, I managed to snag all three items combined for a mere grand. Now, don’t get me wrong—I wasn’t living it up at the Ritz Carlton. Instead, I opted for a more budget-friendly option: a hostel above a pub in Shoreditch, a vibrant neighborhood in London. At just around 40 bucks a night, it was a steal; and if there are two things that I love most in this world, its beer and Warhammer.

As Sunday night descended, my wife dropped me off at BWI, and I embarked on a red-eye flight bound for London, with a layover in Iceland adding an unexpected twist to the journey. Despite my extensive flying experience, this particular flight proved to be one for the books. Peering out of my window, I was greeted by the breathtaking sight of Greenland’s icy expanse as the early morning light cast a mesmerizing glow. Upon touching down in Iceland, however, I received less-than-ideal news: my next flight was delayed by a whopping 8 hours, leaving me stranded in the Keflavik airport. Yet, surprisingly, I found myself unfazed by the setback. After all, there are certainly worse places to be marooned than in Iceland. To pass the time, I indulged in a few early morning beers, sampled some delectable Icelandic Pizza (a culinary delight!), and embraced my inner nomad by catching some shut-eye for the next five hours. Despite the unexpected delay, I couldn’t help but appreciate the unique experience unfolding before me.

A view of the sky from an airplane window
Description automatically generated
Photo I took over Greenland
A person wearing sunglasses and a hat
Description automatically generated
Sleeping off a few in Keflavik

Arriving in London late on a Monday afternoon, I wasted no time immersing myself in the vibrant energy of the city. With nothing but a trusty raincoat and my rucksack, I navigated the bustling streets, hopping on a shuttle (the Tube) from the airport to Liverpool Street Station. From there, a brief stroll led me to my humble abode for the night—a cozy hostel. After checking in, I rewarded myself with a well-deserved pint downstairs at the pub before calling it a night.

The next morning dawned bright and early, with a thrilling agenda awaiting me: a journey to the legendary Warhammer World in Nottingham. Armed with my faithful rucksack, I took the Tube to Paddington Station, where I boarded the East Midlands Railway (EMR) bound for my destination. The scenic two-hour train ride whisked me away to Nottingham, where I embarked on a picturesque half-hour walk along the serene river, finally arriving at the hallowed grounds of Warhammer World.

As I stepped foot inside, a sense of accomplishment washed over me. After nearly two decades of yearning, I had finally made it. For the next six hours, I savored every moment, immersing myself in the sights, scents, and exhibits that surrounded me. From leisurely strolls through the exhibit hall to perusing the offerings in the store, to soaking in the vibrant atmosphere of the gaming hall, I was in my element. A few pints and a hearty lunch at Bugman’s Bar only added to the euphoria of the experience.

A model of a castle
Description automatically generated
My favorite exhibit in the Exhibition Hall

A burger and fries on a tray
Description automatically generated
This ridiculous Burger I ordered for Lunch at Bugman’s Bar. It was amazing.

But alas, all good things must come to an end. Reluctantly, I bid farewell to Warhammer World, walking back to the train station and embarking on the return journey back to London. As the train whisked me away, I couldn’t help but reflect on the incredible journey I had just undertaken—a journey that had taken me from the comforts of my home in Maryland, USA, to the very heart of my long-held dreams. It was a feeling like no other, and I relished every moment of it.

For my final two days in London, I fully embraced my inner tourist, immersing myself in the rich tapestry of experiences the city had to offer. From the storied walls of the Tower of London to the spine-tingling thrills of the London Dungeon—an absolute must-see, by the way—I left no stone unturned in my quest for adventure.

With boundless energy and an insatiable curiosity, I traversed the city streets, weaving through iconic landmarks like Buckingham Palace and delving into the depths of world-class museums that housed treasures from centuries past. Along the way, I found myself forging new connections, striking up conversations with fellow travelers and locals alike, each encounter adding a vibrant hue to the canvas of my London adventure. Of course, no exploration of London would be complete without indulging in its vibrant pub culture. With a pint in hand, I raised a toast to new experiences and cherished memories, savoring the camaraderie and warmth that permeated each bustling establishment.

A large building with a clock tower
Description automatically generated
Photo I took of Parliament

As the sun set on my final evening in this captivating city, I couldn’t help but reflect on the whirlwind of experiences that had unfolded over the past several days. With a sense of fulfillment and contentment, I bid farewell to London, knowing that I had seized every opportunity and embraced every moment to the fullest. And so, as Friday morning dawned, I embarked on the journey homeward, my heart brimming with gratitude for the memories made and the adventures shared. England had left an indelible mark on my soul, and as I soared through the skies, I carried with me the essence of this remarkable journey—a journey of discovery, connection, and boundless exploration.

From meticulously planning each step to navigating unexpected delays and serendipitous encounters, every moment has been a testament to the beauty of embracing the unknown. Warhammer World provided a sanctuary for my passion, while London’s historic landmarks and vibrant culture offered a tapestry of experiences unlike any other. All this at a cost around 1300 USD. As I bid farewell to London and head home, I’m filled with gratitude for the memories made and the lessons learned. I am grateful to share these experiences and insights with other hobbyists searching for Warhammer World and looking to embark on their own journey. This adventure reignited my passion for exploration and reminded me of the power of seizing every opportunity . So much so that I even made the trip two more time since then. Here’s to the journey—the highs, the lows, and everything in between. 


Joe R.

Welcome back everyone! Last month was quite the spread of hobby related projects (I might have snuck a few in from previous months). This month is quite different! However, things are ramping up in preparation for a Blood Bowl tournament in Canada!

Heartsdale Hedonists – Chaos Chosen, Blood Bowl

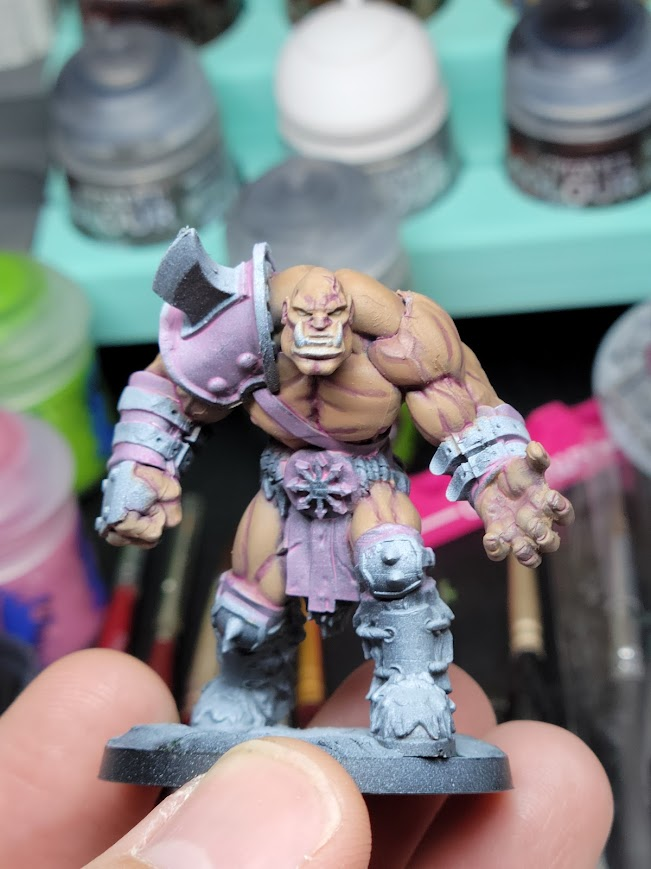
Those of you who read through last month will recognize this heading already. I was preparing for a Blood Bowl tournament in Roanoke VA (the Big Lick Brawl). I had decided to outfit my Chaos Chosen with an Ogre instead of the traditional Minotaur. However, I didn’t have one of those painted! That wouldn’t have been a huge deal, except I paid a fellow named Rawlin to paint my Chaos Chosen team around 10 years ago. I wanted to paint my Ogre to match (as closely as I could manage) to the existing team.

Here is the minotaur from the team, Aurum Barre, that I am trying to match with the Ogre. I do my best painting when I am experimenting with new skills or pushing myself outside of my small comfort zone. Last month I showed a zenithal highlight of the ogre, some putty work to try matching the basing, and some initial glazing.

  I spent roughly another week on the Ogre, who I named Argenti Barre, from the last update. I continued to glaze some additional layers onto the skin and generally block in the few spaces without any color. I was very

pleased with the skin, HOWEVER, I definitely think it would benefit from a few additional passes on the highlights. I’m not going to fret.


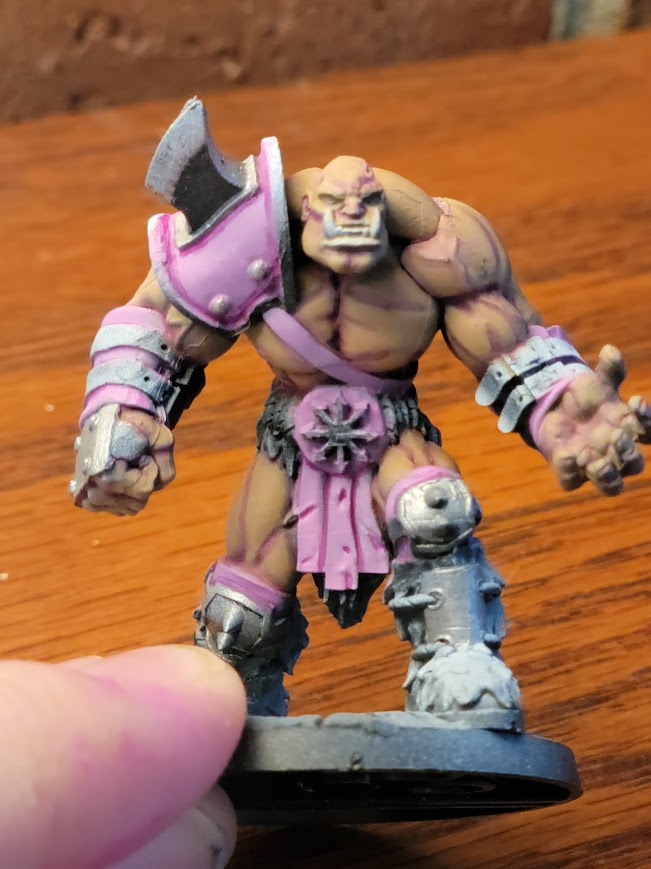
At this point, I was pretty pleased with the product. The pink tones did NOT match, but I didn’t think it was going to be distracting enough for folks to call it out. I started working on the base. Again, I don’t think it matches completely, but it’s close enough. I was about to call it done when I decided to add a blood effect to the hand (just like the Minotaur has!). You can see the results below. Again, I was very pleased with the effect. I varnished this model! I almost never do that! To finish off, I decided to use a gloss varnish on the metal surfaces and the shoulder pad. I think it looks pretty cool.


Overall, Argenti did very well at Big Lick Brawl. He even got a few compliments, especially from people who know my track record with finishing things.

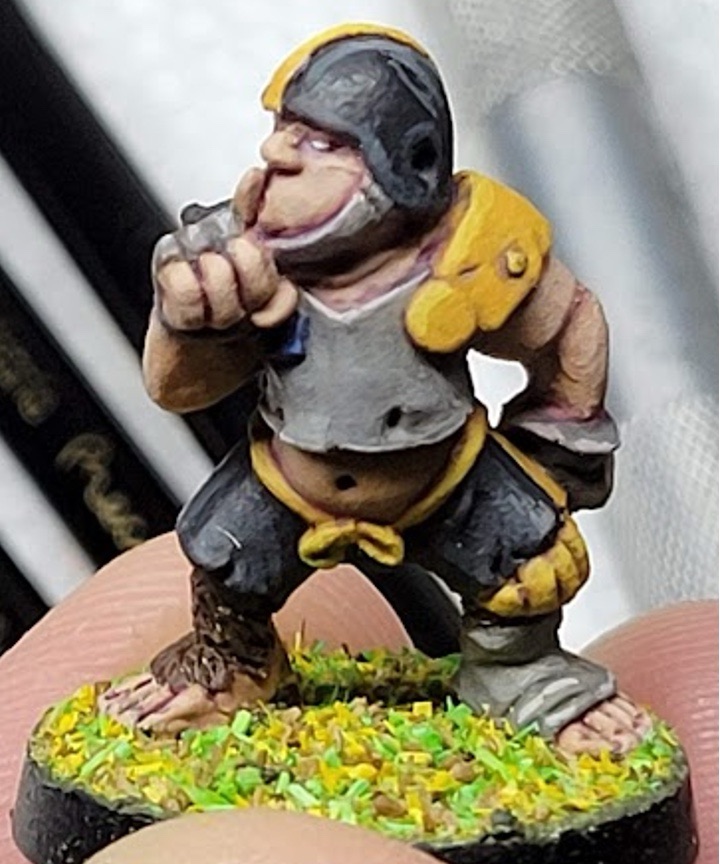
The Moot Points – Halflings, Blood Bowl

Okay! Here we go! Halflings are one of my favorite teams in Blood Bowl. Not because they are a particularly amazing team, but because they come with their own built-in vibe. You might say, “Joe… don’t all stunty teams come with the same vibe?” No random internet person! I’ve had a lot of success with Ogres, so when I play Ogres I’m playing to win. Halflings? Not so much. This is my fun, maybe I’ll win, but I’m just here for a great time. Why? Well, every one of my team members is based off a different superhero. They are all painted to reflect the hero they represent. This means I can directly look at the model and know who it is. This has led to some legends on the team. Michael John Custard (Booster Gold) is a ball hog but tends to pull off the big plays when I need them. Thor Odinsoup can take punches on the line all day and rarely get injured. This team was produced by Willy Miniatures through a Kickstarter several years ago. They are sculpted by Pedro Ramos, who is one of my favorite creatives working in Blood Bowl.


A few of us from the Northern Virginia area are headed up to Ottawa for the Amorical Cup in early June. The Amorical Cup is designed to be a North American Team tournament for Blood Bowl. It was supposed to occur in 2020, but obviously that didn’t happen. Now it’s back! I thought it would be nice to give the Moot Points a fresh coat of paint and make them look a little more dynamic if we’re going to travel to a different country for Blood Bowl. I painted this team years ago. In this case, “painted” means I base coated them. They look fine on the table, but I know with a little TLC they could look so much better.


Unfortunately, I forgot to take BEFORE pictures of the miniatures I’m presenting today. I’ll make sure to grab those for the next batch. Overall, I need to touch-up 13 Halflings, 2 Treemen, and the star player Griff Oberwald.


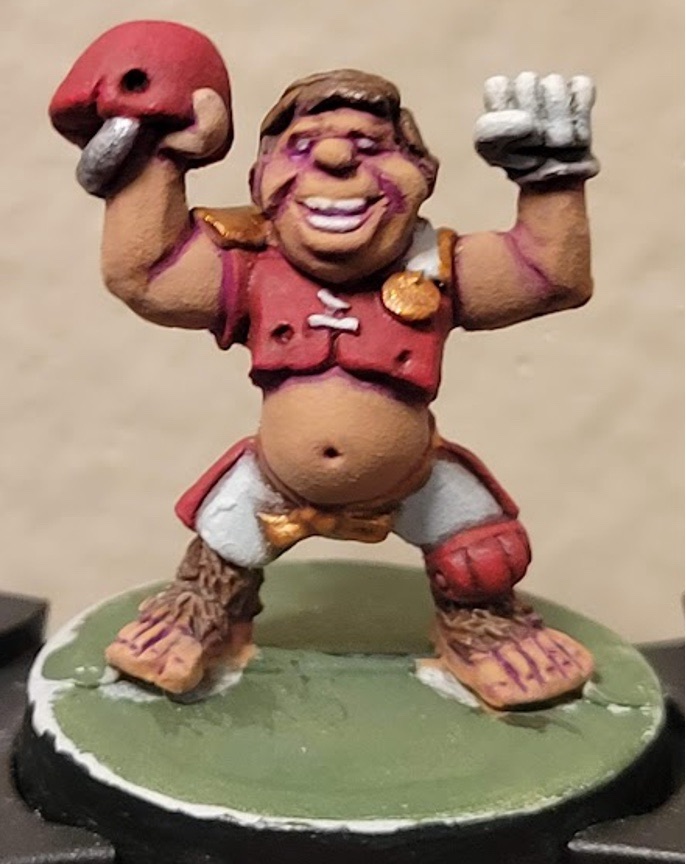
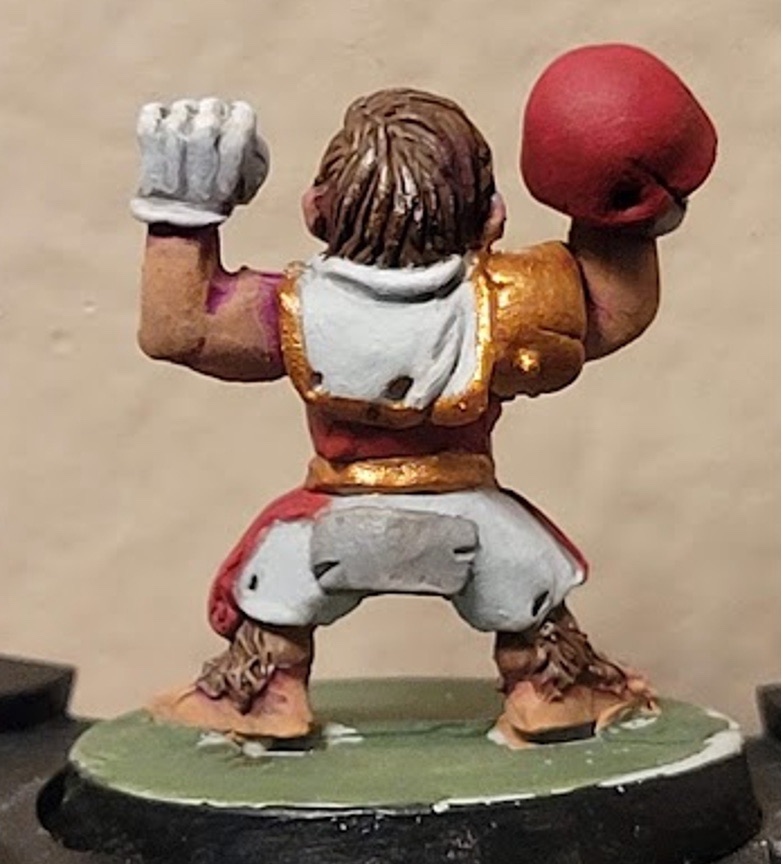
I had recently picked up a few triads from Two Thin Coats (Black to dark grey, Ivory to white, wave 1 greens) and wanted to test out those paints. So I selected my Batman Halfling, Bruce Wyne. Bruce’s main colors are Grey and black, with yellow and blue as secondary colors. I wasn’t planning to glaze this time, so I expected the highlights to come across a little more cartoony than Argenti. I did REALLY like glazing the Vallejo Red-Violet into the skin recesses, so I started with that. I cleaned up all of the basecoats. They had accumulated a lot of chips and I had applied a very sloppy wash, which had really dulled the colors. I worked the skin a bit. It’s not my best work, but it’s definitely better than it was.


You can see I had a little trouble highlighting the black, especially on the helmet and shoulder pad. I still haven’t figured out how to highlight spheres. So I basically edge highlighted and picked out a few bright highlights. I suspect this will be a problem with the whole team. I was really pleased with the yellow highlights. You can really see them on the shoulder pad, but they ended up really helping the model pop.

Finally, I finished by basing the model with Geek Gaming Scenics spring “sawdust grass”. I just applied a layer of semi thick PVA and dunked it into the sawdust. So far, it’s been pretty durable. I will definitely add a white Blood Bowl lines (time permitting) once the team has been cleaned up.


Then I jumped over to Bisquey Batson (Shazam! Or Captain Marvel for you comics OGs out there). Bisquey had the same problems as Bruce. Again, I started by glazing red violet into the recesses of the skin and then brightening the skin up. Then I started working on the whites. I’m pretty sure the basecoat color was the grey from the old citadel foundation paints. I wanted to preserve some of that color in the shadows. I… didn’t do a great job. I used Ulthuan Grey as the next highlight, which REALLY popped the whites. I finished with some very limited highlights from Two Thin Coats Trooper White. I’m still working on Bisquey’s reds and golds, but he’s definitely moved up in the world. I am planning to finish him this week and get him based.


 Next up? Thor Odinsoup is on deck!


A Tale of Many Warlords- March


Howdy! I don’t know about you but the month of March felt more like a week than a month and I cannot believe we are already a quarter of the way through 2024 already. The good news is that the Warlords have been hard at work this month getting some stunning minis painted.

The even better news is that we have added another member to our already stacked writing crew. If we add any more all stars to this crew we will be giving the AP a run for its money. Without further adieu lets get started with our newest member…


Joe

Salutations! I’m new to AToMW crew and generally a novice hobbyist. I’ve been playing Blood Bowl since ~2010 but have recently begun to expand to Necromunda and Kill Team. I’ve been painting for a while, but I’ve never made an effort to push myself to develop past a basecoat + shade. I’ll be using this space to catalogue my experiments and motivate continued hobbying.

The Junktown Jesters – House Escher, Necromunda

I arbitrate a local Necromunda campaign (some of the AToMW also participate), but I don’t currently play. A local one-day event popped up with a fairly low gang rating (600 vs the usual 1000) and that convinced me to make the push to paint up a few Escher. The Escher have access to all sorts of poisons and that enticed me to give them a try. 

I had a batch of Escher already assembled from the Necromunda Underhive box from ~2017. I picked the figures with loadouts similar to my desired gang list and primed them with Vallejo white primer from an airbrush. A quick note: I had upped my painting by underpainting and then applying contrast paints (which is my form of Slap Chop). I prime white, cover the miniature in a wash, and then dry brush heavily to restore highlights. I’ve mostly switched back to using true acrylics (you can judge the results yourself), but I still do this to pop details and help with shading. I struggle with shading and highlighting.

I decided to start with a Necromunda base, which I primed white… like an idiot. It still worked, but it required a lot more work than if I had just primed it black. I’ve learned my lesson. However, I was VERY pleased with the results. I even freehanded the hazard stripes (which you can probably tell!).

This “recipe” is not mine. I took it from Brush and Boltgun and use it almost exclusively now. There is certainly more I could do, but this was good enough for me. I ended up painting about 3 more before moving on to the ladies.

I had included a death maiden in my gang, but I didn’t have any death maidens built. I also didn’t really like the poses included in the plastic GW kit. Instead, I used one of my two resin Kira the Huntress models (she’s the OG Death Maiden after all). I’ve never played Escher before and this was an expensive conversion. I decided to protect my investment by magnetizing the possible weapons she could have. In the end, the magnetization wasn’t perfect, but it did work out. I ended up magnetizing 6 different arms (3 left, 3 right) for use but decided to focus first on a needle pistol and stiletto sword. 

You can see an example of my underpainting here. The body has been coated in diluted indigo ink (roughly 10:1 glaze medium to ink). I use glaze medium to dilute this wash because I believe it coats the model more smoothly and pools nicely in the recesses. It does dramatically increase the dry time though. 

I was pretty excited about how this model was turning out. I had also settled on a theme for this gang. Every member was going to be painted like a member of Batman’s Rogues Gallery. The Death Maiden seemed like a perfect fit for Poison Ivy.

I knew that I wanted to do a dark green/bright green color scheme. I also knew that I wanted her to have an inhuman skin tone (Death Maidens are pumped full of chemicals and brought back to life). The greens are both done with acrylics (Forest Green from Reaper and Moot Green from GW) with special care to leave some of the indigo underpaint showing. I think the skin was Gauss Blaster Green from GW. I used contrast paints for the hair, leather, and horns. Overall, I thought this was a dramatic improvement from some of my previous work. The model had some clear shadows, but still comes across flat due to the lack of highlights.

I really wanted a grenade launcher in my Escher gang. I own nearly every Escher weapon pack. None of them contain grenade launchers. I did happen to have an extra genestealer cult grenade launcher. Now listen, I cannot claim to be a kitbasher. However, I was feeling adventurous. So I cut some stuff up, dremel’d off an extra hand, and made an ostentatious ONE HANDED grenade launcher.

In hindsight, I would make some changes (especially under the barrel). At the time? Oh man, this was like doing cocaine. I made this stupid little thing from parts that didn’t go together! Also, a character with a over-sized gun? I knew just the one…

Harley Quinn has that obnoxious popgun in the animated series. I decided this grenade launcher would be its spiritual successor. I challenged myself to do the quartered red/black pattern (first with contrast, then redone with acrylics). I also worked to keep the indigo undercoat on the skin and whites to make them cool whites. I was shooting for a white pleather look with the belts and skirt. I’ll need to go back and find a way to make it stand out a little more from the skin. I also want to add red diamonds to the grenade barrels. This became my favorite model from the bunch.

Just to speed things along, I finished up my leader (represented as the Joker) with quick contrast paints over a slightly modified underpaint job (I added some specific highlights with white before the contrast paints) then painted two Juves, the Dee Dees (from Batman Beyond: Return of the Joker).

You’ll notice I didn’t do anything with the feathers. I still have no idea what to do with them, but I was running out of time and decided I’d come back to them later. I haven’t.

Overall, this was a HUGE hobby project for me. The turnaround was roughly two weeks and I felt like I really pushed myself to try some new things (or revisit things I haven’t done in 5 years… like magnets). I know, dear reader, you have no benchmark for my skills. You’ll just have to trust me that this was a significant step forward for me. I do plan to revisit these ladies, expand the gang, and spend some more time bringing them to life in the future.

The Wynna Dun Warriors – Dwarves, Blood Bowl

My gaming goal this year is to have played every team in Blood Bowl at a tournament. I have 7 teams remaining: dark elves, high elves, elven union, amazons, lizardmen, chaos dwarves, and dwarves. My dwarf team is from the now defunct Star Player Miniatures and was purchased back before GW returned to Blood Bowl. They’ve been assembled and primed for a LONG TIME. I finally decided I was ready to play them. It’s ~12 players total and I’m using them to practice layering and highlighting. Another note: I was terrified of ruining basecoated models with bad highlighting. No more! I’m gonna learn to do this. And generally, I’m quite pleased with the results.

This was my test model for the dwarves painted back in January. I was very pleased with how the skin turned out. I think I did Darkoth Flesh over a basecoat of Tan Skin from Reaper and then did some baby highlighting. I also highlighted the beard and the greens. The beard turned out okay, you can barely tell on the greens. I was still very intimidated here. So I watched a couple videos, notable this one by Vince Venturella, and decide I was never going to get better by being scared. So i adequately thinned my paints and decided to take a crack at another line dwarf.

Look at those greens pop baby! Was this perfect? No. I definitely highlighted a few things too much, but I had a blast. It was awesome to mix the colors (I went with 3 colors with a midtone between) and see the model start to come alive. These images don’t show it (I was so psyched about the green I temporarily forgot the rest of the model), but I did go back and work on the rest of the model. The skin and hair didn’t turn out as nice on the model, but I was still very happy with the end result. On the table, no one will ever notice the flaws but they will notice how much his helmet pops.

I was able to get one more of these experiments done, this time a Troll Slayer that had been partially basecoated months ago.

Again, I was very happy with the greens on this model. I love the way that the bent knee under the skirt pops. I think I over highlighted on the helm, but again it will still look pretty sweet on the table top. Again, the skin turned out okay. There was a lot of skin here and some miscasting of the metal along the back. I will try some different things in the future.

Heartsdale Hedonists – Chaos Chosen, Blood Bowl

I had to put the dwarves on a brief hold because I needed to paint up a model for the Big Lick Brawl team tournament that happens in Roanoke. Due to the team build requirements, I was unable to play one of my 7 missing teams. This will happen again in June for the Amorical Cup. Ah well.

I paid a fellow named Rawlin to paint my Chaos Chosen team way back. It was my first fully painted Blood Bowl team. I absolutely love it. However, when GW revised the rules for Chaos Chosen in 2020 they gave them access to either a minotaur, ogre, or troll. I have a minotaur, but this time my team includes an ogre.

Here is the minotaur from the team, Aurum Barre. I was very hesitant to say “Hey! This mino is an ogre” because folks are gonna forget. Instead, I’ve decided to try and paint up a Chaos Ogre to match this team painted by someone with significantly more skill than me. I decided that this was probably a fool’s errand, so I should probably use this time to keep trying new things. First, I decided to do a zenithal highlight with my airbrush. Second, if I was going to spend the time doing a zenithal I might as well try to glaze to keep those shadows. Oh, and I decided to make my own base using greenstuff to mimic the bases from the painted team. 

Here is the ogre post-zenithal. I don’t think this picture really does it justice. I did a three-tone zenithal (black, grey, white) and you can definitely tell where the model has shadows and highlights. I was generally pleased with the result. If I continue to enjoy glazing, I may continue to improve my technique.

Here is my attempt to greenstuff the base to match the rest of the team. Again, this turned out much better than I expected. Applying the primer really made things come to life. We’ll see how it goes.

I started by working on the skin. My friend Joe has been pressing me to try glazing into the recesses to make my skin pop. Well I finally did it! I used Vallejo Red Violet and went to town. You might notice the recesses are quite stark… I definitely needed to dilute my paint some more. Oh well! I’m gonna be glazing some more highlights onto the skin, so we can touch-up as we go. The almost cartoon contrast looks really awesome on the table.

I also decided to glaze some more red violet into the recesses of the pink too. Again, very pleased with the results. I did manage to do some work on the fur and apply to some blacks, but I didn’t get any pictures of those! I’ll finish him up this week. So you’ll have to wait until next month for the finals, dear reader!

Overall, a pretty good month (even if I sneaked a few things from Jan/Feb in here too). Thanks for stopping by! 


Michael S.

This month I’ve been working on a few different projects in parallel. My primary focus for the beginning of the month was my heresy-era Death Guard. I’ve enjoyed the game a ton and am excited to get a fully painted army on the table. I got a lot of models basecoated a few months ago, but still had a lot to do.

I finished painting most of the details on a 5-man support squad wielding plasma guns. I had a ton of fun painting some awesome plasma glow on the guns. 

In some of the games I’ve played, I’ve felt like I needed a small cheap unit with a little extra punch in taking out heavy infantry. Hopefully these guys will slot in nicely! All I need to do here is paint some lenses, apply a bit of streaking grim to the rest of the unit

Similarly for my Death Guard, my tactical squads had been on hold initially as I was waiting for some legion heads from Forge World. I had two squads of 15 set aside and primed, along with another Heavy Support squad. 

I made the least progress on this unit, but still made a big step towards finishing them! I was able to lay down all the base colors, which leaves just a quick wash with Mortarion Grime left. By putting down all the metallics and colors before, I can go over the whole model and achieve some subtle shading/grim all over. This complements some detailed weathering using streaking grime.

Last on my list of projects is a unit of Skeleton Warriors for my Tomb Kings army. I am super excited about how these came out, and how efficient I was able to make the painting process.

I started out with a zenithal undercoat, which is the norm for me at this point. Zenithal undercoat + contrast is quickly becoming my favorite way to paint line troops, and even some centerpiece models. My only variation is that I dislike using a black undercoat in MOST situations. Instead, I like to work with dark colors that match the overall done of the model. I personally find pure black makes a lot of colors look weirdly washed out as they move into shadow. In this case, I started up from Stynlrez’s dark brown primer.

From there, I layered on a few transparent paints to quickly build up the base of the model. I had fully painted up a test model, just to make sure I knew the direction I would be taking things. 

From there I was able to easily assembly line the whole painting process. I managed to get most of the base colors down, and all I have left is some select edge highlights and shading the gold on all the models.  For this unit, I opted to go with a slightly cold undertone on the gold. Starting out with a greenish-gold, I washed it all with purple to further push some colors into the shadows.

Thats all for me this month! Next month, I’ll be a bit busy, but my goal is to completely finish all 3 of these units and complete building all the models from my Tomb Kings army.


Austin B.

March Progress

In our last monthly update article, I had mentioned my lack of motivation after recent incidents had left me drained, both physically and mentally. The feeling continued on throughout much of February, leaving me dry on content to post for you all. Even as I pushed through base coating 90 Night Goblins, I wasn’t really feeling it – more just going through the motions. It was all very robotic. This, coupled with a growing dislike for how the Night Goblins play, at least as a pure force, really didn’t give me much reason to keep up work on the madcap maniacs this month, much to my dismay. But a couple of other projects filled the gap for me this month instead, and I have made some impressive progress in regards to them, even with my seemingly dwindling time to spend upon these projects. So what are these projects, you might ask? 

Well, my local game store runs game and demo days for a few different games, on a consistent schedule. The last Tuesday of every month, for example, is Bolt Action day, while the first Tuesday of every month is Star Wars Shatterpoint day. This only started in January, but my absence from life for two weeks meant that I missed the inaugural events. Still, I mention those games specifically because they are what all my progress this month will about. We’ll start with Bolt Action 

Now, I already played Bolt Action, though not with any regularity. I have a few friends who play, but we switch between games constantly. Meanwhile, the other closest store to me runs their Bolt Action game nights on days in which I am normally working in the office, almost two hours away. So it would be safe to say that any drive I had for painting up my remaining backlog of Bolt Action models was fairly low. And I have quite the backlog! Finally, however, at the end of February, I was able to attend the second Bolt Action day, and I had a lot of fun! It was nice to bust out my armies and terrain, and show things off, and even better to play again after a long time of having not. And with that, I felt my motivation come surging back to me, and I felt the urge to paint up my Bolt Action once again!

I own, at current, three different armies for the game. My initial force, Canadians, are mostly painted, with enough done to play up to 1500 points without any bare plastics (or metal!) in sight – but I have plenty alternate units for varied lists that still need work done on them. I have also been slowly working on Italians (Decima MAS to be specific) as an Axis-aligned force to sit opposite my Canadians, though I still have much to grab (and paint, of course) before I can count them as complete. However, it is my third force that we will be discussing today: the First Special Service Force, or just the Force – or FSSF – for short. Though to the Germans they were known as the Devil’s Brigade…

The Power of Motivation – Or How I Stopped Worrying About The Details And Just Started Painting

https://cdn.discordapp.com/attachments/1154092584961069176/1217532312330178660/20240313_133206.jpg?ex=66045e53&is=65f1e953&hm=dc780d33cfbd62d4210c2d536aa6b41858172f892071d91b133848644b39eda4&=

The Force! While I am still missing a few special weapons and vehicles that I would like to add to it, it’s already at a size far above a standard game.  And yes, that’s my terrain in the background!

For a brief overview, the FSSF was a joint American-Canadian commando unit, initially conceived and trained for sabotage operations in Axis-occupied Norway. With the operation’s cancellation, they were instead deployed to Italy in late 1943, where they participated in such major battles as Monte la Difensa and Anzio. While short lived – being disbanded in late 1944 – the Force was the model for the future Special Forces Groups and other foreign equivalents. It’s an oft-not discussed unit participating in an oft-not discussed theatre, so I certainly implore those interested to look into this unit – and honestly the whole of the Italian campaign – further. Luckily, Warlord Games has somewhat recently released two campaign books on the subject of the Italian Campaign, which are filled with plenty info, scenarios, and new units and armies specific to that theatre. In-fact, it was the impending release of Soft Underbelly which got me into the game in the first place!

https://cdn.discordapp.com/attachments/1154092584961069176/1217532312590483606/20240313_133256.jpg?ex=66045e53&is=65f1e953&hm=8387e5a0da8d3d2b80bf91cc0c208e422d70dcd6b53ba8804e47061226346f27&=
https://cdn.discordapp.com/attachments/1154092584961069176/1217532312946872442/20240313_133300.jpg?ex=66045e54&is=65f1e954&hm=4d60bcf7b57d2144a0810321e1d60b5dae629db176474ed75104960d5df28f50&=
https://cdn.discordapp.com/attachments/1154092584961069176/1217532313227759736/20240313_133308.jpg?ex=66045e54&is=65f1e954&hm=58ea933b6a32e61e9058223e4b03642c1d9f2c8d08e9bd869804ba1680556781&=

Infantry make up the backbone of any Bolt Action list, and I have a lot of them here! Armed with a mix of rifles, carbines, submachine guns, automatic rifles, and even the forgotten Johnson light machine gun, I have a lot of choice here!

But enough about history, I want to dedicate this little section to the topic of motivation! Motivation is certainly something we mentioned a lot in relation to the hobby, but I do not really see it discussed much beyond that. Yet it is something that affects us all – and our progress – greatly. Highs can really help us push through tough projects, while lows can make those projects even tougher. It can sometimes be hard to motivate yourself, but the communities and people we surround ourselves with can be powerful motivators, which I am sure can be seen above. And if you can harness that motivation when it does come to you, you can achieve great feats… That is, if you can do so before it leaves you once again.

https://cdn.discordapp.com/attachments/1154092584961069176/1217532313882071120/20240313_133346.jpg?ex=6616d354&is=66045e54&hm=0df2b1066628f313ffbd1d0ac188ca27b9bda9a8f712a7b0bd58e33efe80547f&=
https://cdn.discordapp.com/attachments/1154092584961069176/1217532314171736185/20240313_133615.jpg?ex=6616d354&is=66045e54&hm=e77ab4acb396460101ba3c9f2a3b70424b89d31a656bd0ca87e116d94a957fe6&=

Some commanders, to lead from the front and the back! As well as various weapons teams, and a group of medics. Meanwhile the 456th Parachute Artillery Battalion provides some much needed “heavy” fire support, with towing provided either by the mules, or the Dodge ¾ ton truck. The mules were especially useful to the Force in the rough, mountainous terrain of Italy!

For me in particular, I struggle constantly with the fact that I can be a bit too detail-oriented, and I put a lot of time and effort into my models. This makes for some stunning work but doesn’t necessarily make for timely completion of projects. Even smaller projects such as Blood Bowl teams can take me long periods of time to complete, and I can often find my motivation waning part-way through, especially for longer projects – hence why finishing up some of those incomplete teams are a part of my overall hobby goals for this year! So how did I knock out an army like this in a little over two weeks? Well, just as the title for this section says, I just stopped caring about the details.

https://cdn.discordapp.com/attachments/1154092584961069176/1217532313592795197/20240313_133338.jpg?ex=6616d354&is=66045e54&hm=464ba8a52abd347660fbf6cc86305e8962e9ba83f04c9af1ec2c1b7d61d4957d&=

The vehicles are where the majority of the actual detail work was put. Particular care was taken with the placement of transfers to make them look correct – though I did not go so mad as to add the bumper codes!

You’ve probably noticed from the photos so far that these figures aren’t quite up to the same hobby standard as the Night Goblins I have been sharing so far. The idea with this project wasn’t necessarily to produce a truly stunning force, but to simply knock one out as fast as I possibly could. I had a lot of miniatures to paint, having collected all my various options to allow me to build effective forces at various game sizes. The Force here is 82 models (more once you count the mule drivers and vehicle crews amongst those numbers), and I needed to be able to get through it all at once or I knew I was liable to not finish it, ever. Even now I’m still waffling on painting the last pair of vehicles I have for them – though incentive to finish them is low with how much fun the GMC in particular has been to run!

As a last and fun little note, all the infantry models for the Force are metal. Yes, metal! The models are mostly from Artizan’s specific Devil’s Brigade line, or their line of US Paratroopers (due to the similarity in uniform cut). There are a couple of models from Warlord (an MMG team, and both Jeeps) and Brigade Games (a pair of Johnson LMGs). Meanwhile the GMC and ¾ ton truck come from Rubicon Models. And the Mules? Well they’re actually from Wizkids’ Pathfinder Deep Cuts line! I really love the fact that I have my pick of manufacturers in regards to Historical models, and hopefully I’ll be able to show off a few more interesting finds throughout the year as I show off some of my other Historical projects.

I have actually gone back since these pictures and finished the basing on these model, adding flower tufts and clump foliage to really give them some life. I may show some of that off in next month’s update…

May The Motivation Be With You, Always

Now that I have probably talked to death about Bolt Action, let’s move onto Star Wars Shatterpoint! Before this month, I had not played a single game of Shatterpoint. I had an interest in it as it was first coming out, but my friends did not seem as excited. So I held off on getting anything for it. However, seeing that my local store was running a game and demo night, I figured I may as well try it out. And with the recent release of the two Ewok Squad Packs, my interest had already been piqued yet again. So I went to the event, and much as the Bolt Action one I had a ton of fun. The group was very friendly and inviting, and the game was really enjoyable. Not even a week later I was walking out with the two Ewok Squad packs to start my own burgeoning collection… followed by the Fearless and Inventive Squad Pack a week after that! I was fully hooked. And with progress on the Force coming to a close, I was already feeling the draw of another Force…

https://cdn.discordapp.com/attachments/1191771768231305389/1223363961043550399/20240329_160605.jpg?ex=66199579&is=66072079&hm=5fd062848d82e589b5fb5ad860fca6c3862ad0cd107f11be6a8a3034ddd208e5&
https://cdn.discordapp.com/attachments/1191771768231305389/1223363961467179028/20240329_160658.jpg?ex=66199579&is=66072079&hm=77f790a701f1c044f364f47f620aab2ff2a569d216c8b44b3c66e852bc8a2491&=

That said, progress on this front has been slower. I haven’t had the same amount of time in these last few weeks as I did in the first two weeks of this month. As such, only the models in the first image are actually complete – and not even, as their bases have yet to be done! But I still have not decided on how I want to do their bases, anyways, so I am leaving that to the end. Still, I have been chipping away at this little project every day or so, putting paint to brush when I can – when I’m not playing, that is! Hopefully I’ll have this lot done by the time we update next, maybe with some new additions…? I’ll probably talk more then about my experiences with the game too, hopefully then having more than two games under my belt.

Revisiting My Goals

Now, as I had noted earlier on in my part of this post, I have actually not been entirely enjoying the way Night Goblins play as a pure force in The Old World, and the arrival of the Orcs and Goblins Arcane Journal – as well as the returning models – has given me a lot more options to mull over. It is very likely that I will be revising my goals in regards to my Old World army, switching to another list which contains fewer – or maybe even no – Night Goblins.  We shall see. I have been mulling over lists for both the Nomadic Waaagh and the Troll Horde Armies of Infamy, as well as just some standard Grand Army lists with more Orcs about. I’ve still got my current focus squarely on Shatterpoint, and I have a few other projects I could turn to in order to consume my time as I think, but hopefully I will have a more concrete idea on what I want to be doing with my Orcs and Goblins come either next month, or the month after, as well as maybe some things to show you to that effect! In any case, that is all for me at this time. Tune in next month to see what entirely different project I decide to do then! 


Kevin C.

Now that all my guys have been assembled, based, and primed, it was time to paint. I did attempt a zenithal priming job with these guys. I used a dark primer (either black for the knights or brown for the filthy peasants) over all the miniatures, and using a Wraithbone or Grey Seer primer from the top for a zenithal coat. While it did give me a good lighting on the miniatures, it ended up being mostly a waste of time, since I used several coats on my knights, so the primer made almost no difference.

Heraldry

So, I know that Border Princes Exiles list is all the rage for Net Lists for Bretonnians these days, but honestly I couldn’t imagine doing anything other than an Errantry War list. The entire lore behind Bretonnia just screams going out on a quest, so of course I had to do it. Many people balk at the idea of having to paint several different heraldic devises, but I see that as a feature, not a bug.

However, unlike my previous army from 15 years ago, I decided to be smarter about this army’s heraldry. Real-world French heraldry would generally use five colors (red, blue, black, green, and purple) and two metals (gold/yellow and silver/white). Purple was incredibly rare due to its expensive nature, so it was generally reserved for royalty, leaving us with four regular colors. In-lore Bretonnia tends to shun the idea of using green in heraldry, for two reasons. Green is cheap to produce, so it tends to be worn by peasants, therefore not something that noble knights want to use. Also, green tends to be associated with the Fey (i.e. The Green Knight), which is also not something knights are keen to emphasize. So, that leaves us with black, red, blue, white, and yellow.

Moreover, we should not just use the combinations willy-nilly. According to the Rule of Tinctures (yes, it’s a thing), charges of color should not be on a field of color, and charges of metal should not be on a field of metal. So, one should not have a white emblem on a yellow field, or a black emblem on a red or blue field. This limits your emblem/field tincture combinations considerably.

My Paint Scheme

So, much of my paint scheme was shamelessly stolen from Duncan Rhodes’ great tutorial on YouTube, making changes for the Citadel paints (since there no reliable vendors for Two Thin Coats in my area) and changing up the heraldry. That being said, I think the tutorial worked out great – check it out for yourself.

For the emblems, I was able to find some really great decals on Etsy, since the Bretonnian army set only came with a very limited set of axe decals (not anticipating people using multiple heraldries for their knights). 

https://www.etsy.com/listing/1611494612/decals-fantasy-knights-mixed-heraldry

I managed to get all 12 knights, two lances worth, painted before the end of the month, and I’m pretty pleased with the results.

I am hopeful that I can complete the last four knights (the three Pegasus knights and the Duke on Royal Pegasus) by the end of next month – in between my kids’ Spring Break and a planned trip to Texas.

What Else I’ve Been Working On

I was able to finish a group of miniatures that have been on my shelf for over a year (received for Christmas 2022) – my Norse Blood Bowl Team! I wasn’t terribly pleased with the eyes on the guys, but I’m glad with the color scheme.

And I can’t forget to add these nice bad boys, for when my Vikings get thirsty…

Until next month!


Jerry S.

March was a busy month for me, I spent over half the month out of town but I was able to some of my in-progress minis with me to get some much needed hobbying done. All in all I got most of what I wanted to achieve done this month so I can’t complain too much.

To start, I finally began painting my epic minis. I began with painting the bases for all of my White Scars infantry as well as a couple knights I had sitting around. While I haven’t began painting the infantry, the popular opinion seems to be that painting the bases separately is the way to go.

As you can see, I decided to paint my bases a very light grey with some darker black/grey road accents. This very neutral basing scheme should really let the brightly colored miniatures pop. I will likely stick to a similar scheme when I begin painting the Legions Imperialis board that has been occupying my 3d printer the past few weeks-very excited to track the progress on that.

I started small with the infantry bases but the fun on Epic scale modeling is the ability to field truly massive units and there is nothing more massive than the mighty Warlord Titan.

Titans in a Epic Scale

As many of our readers may know, I subscribe to the belief that the best models are blue models, and as such, my titans will be members of the bluest Legio: Legio Astorum aka, “The Warp Runners”. Known for their speed and their blue color scheme.

Step one: the superstructure has been based, washed and dry-brushed. I stuck with a simple scheme for the metallics because I’m lazy and because I felt that the blue and yellow armor plates should be the highlight of the model.

Really happy with the way this model turned out, the pale yellow accents really works well with the dark blue primary colors. I still need to add transfers, and GW has yet to send me the 120mm base this big guy will eventually call home but I’m waiting until I finish the last three titans before I add transfers and the final basing.

Booty Shot

After the Warlord, I decided to stay big, but not as big. I was lucky to trade away half my Legions Imperialis starter set to fellow warlord Austin for the above pictured Warlord titan as well as the 2 Warhound titans below and since I was cruising through the Warlord I thought the Warhounds were a logical next step.

Growing up, I remember seeing my first Warhound titan in a Gamesworkshop. I was only in my early teens but I was blown away by the size, detail and design of the iconic model. All these years later I am still enamored by the Warhound titan and I have actually built and painted 2 in full scale.(I walked throught the building process on this very blog!) Seeing these legendary models in Epic scale has been a treat. The Gamesworkshop design team has really brought their A-game with these minis and even standing at a quarter height these warhounds are still stunning models.

Warhound #1/4: I haven’t named any of my titans yet but I based the color scheme and livery off of my 28mm scale Warhounds
Warhound Titan #2/4: I really love these models, I had much more room to add detail and I will likely go back at a later date to add some more.

Tombs and their Guards

Next up on the docket this month was my burgeoning Tomb Kings army. Last month I showed off pictures of my first regiment of Skeleton Warriors decked out in turquois and white scheme that my friend (and fellow warlord) Mike and Fiance have affectionately dubbed the “Tarheel scheme”.

This month I went way back to some models that have been hiding in a box for over a decade since I bought them new in a now closed model train store. I am happy to report I finished my 20 skeleton-strong unit of OG tomb guard as well as the original Tomb Herald from 20 years ago. My plan was to finish 2 units of my Tomb kings but unfortunately as often is the case, life got in the way of that.

Nonetheless, I am very happy with my progress this month and am happy to see this army grow!


First Up we have the first painted character in my army- The ubiquitous Tomb Herald. This is hardly my favorite model- in fact it may be my least favorite model that I own but alas, I have to get it done.

Since the main theme of my army will be based around the mortuary cult who’s colors are red and black, I decided that the army’s banner should have a similar scheme. I’m not sure this was the correct call as the browns combined with black and a dark red don’t really allow the banner to pop on the table as much as I would like so I may change that later.

My gripes with the color scheme on the Tomb Herald are not present in these tomb guard however as I think the scheme really works for these elite warriors. While the new Tomb Guard are absolutely beautiful models I love these old school skeletons for different reasons. I think they more perfectly fit the theme of the Tomb King’s Mortuary Cult that I am building toward. I love these models even with their flaws and they will be a regular on the tabletop in my house.

The first 10 Tomb Guard, I have 20 painted but unfortunately I forgot to pick up super glue at the store this weekend so the second 10 are missing their shields-I promise they are done though!
A closer look at these fantastic models.

A question for our readers, what good are Tomb Guard if they have no tomb to guard? Not much good at all I suppose, which is why I got to work on my printer and was able to print out a beautiful tomb that will over time grow to a full Tomb Complex and serve as a fitting battlefield for my games of Warhammer: The Old World over the next couple years.

A full body shot of my first Tomb Kings Terrain, complete with Tarheel skeletons to show scale.

There never seems to be enough time in the month to get done as much hobbying as I’d like but I am pretty happy with my results this month. Between work and a much needed Vacation, I was only home half of March so I can always fall back on that excuse.

April is looking to be another crazy month for me in the UCH household. With more travel taking my time away from my hobby projects, I will temper my expectations on Hobby progress. With that being said I hope to update y’all in a month with at least one more Tomb King’s unit completed, hopefully some sort of update on my Legions Imperialis army and if everything goes well, I hope to have my full scale Reaver Titan prepped and cleaned for a very productive May.


Well that’s all we have for you this month over at Urban Cowboy Hobbies. There’s a lot still to come this year so stay tuned. Let us know in the comments what you are most excited to see in the next couple months!

A Tale of Many Warlords- February

The weather is starting to better, the days are getting longer and it’s finally time for another installment of your favorite Warhammer blog series. This was the first full month many of us had our Warhammer: The Old World minis and as you are about to see, we made a ton of progress, if not a lot of painting progress….

Michael S.

This month I spent more time than I hoped assembling models.

The Stone Age

I am naturally a bit slower than most when it comes to the building and painting process. I absolutely HATE seeing mold lines on a mini while I am painting, so my excitement to build some retro models lasted about 10 minutes, or as long as it takes to trim horrendous mold lines from a single skeleton torso. Many years of building modern kits has spoiled me on what I consider a long clean-up job for a mini, so after crawling across the finish line for my first 10 skeletons, I knew I had to change something about my process.

The Industrial Age

Knowing I had to build another… checks notes62 skeleton warriors drained me of most of my remaining excitement. I was in for the long haul and there was no turning back.

One of the few redeeming qualities of miniatures made in the 90s/2000s was the ability to mix and match parts. Very few pieces were numbered, and all you had to do was glue some arms to a body and that body to a base. It wasn’t until somewhat recently that mono-pose kits became the norm much to the displeasure of kitbashers everywhere. Another bonus of these interchangeable parts was that there was ALMOST no way to assemble your minis incorrectly. With this in mind, I pulled out my heavy duty clippers and got to work clipping out all the remaining skeleton spearmen. After about 15 minutes of focused work, I was left with my very own homemade box of citadel skulls!

My gameplan here was to streamline the process by building them all at once in an assembly line.

  1. Clip out all the parts
  2. Use a sharp hobby knife to cut away any extra material left from the sprue
  3. Use a dull hobby knife to scrape away any mold lines
  4. Use some fine sandpaper to smooth out any harsh lines left by previous steps
  5. Assemble

With a plan in place, I wasted no further time. I trimmed each piece, and moved it to the other side of the bin. Each step only used a single tool, so I didn’t have to worry much about picking up and putting down the same tool hundreds of times over the course of the whole kit.

This was the most time consuming part of building, but if you want great looking models, you have to start with a cleaned miniature. This is even more important for older models where the molds aren’t in great condition. The images below show a before and after of some pretty severe mold slips. That’s definitely going to leave a mark if not addressed in assembly. You’ll notice a few mold lines on the spine that just aren’t worth the effort, but the legs trimmed up nicely.

Mold lines that follow sharp edges on the model are often missed. I find taking a few seconds to clean these adds a lot to a mini’s final appearance. Edge highlights on super sharp edges (Like the shield on the right) have a tendency to be unnaturally thin compared to even a razor thin edge highlight on more rounded corners. Making sure all of your “sharp” edges are similar in shape makes it easier to get a good consistent edge highlight. Since the shields are going to be a major focus of these soldiers, it pays to take a little extra time now to prep them.

Once I took my final pass on all the parts, I sorted them as I went into small bins to keep parts of each type together. This made the assembly stage fly by. All in all I was able to assemble the other 30 spearmen in about 9 hours from start to finish. While it is by no means blazing fast, I am reasonably happy with the amount of time I spent given I was able to make all but a few mold shifts completely disappear.

From here on out, the rest of the process felt like assembling a lego kit.

The Information Age (Learning From My Mistakes)

Don’t play tomb kings.

Just kidding! Despite my desk being covered in a fine dusting of plastic shavings, ranking up my first two squads of warriors brought back all of my excitement and more. With larger projects, it easy to lose sight of the end goals, so breaking it down into smaller chunks really helped me stay motivated.

Tools For Retaining Your Sanity

Flash Scraper

Throughout my build of my Tomb Kings army, my most valuable tool has been a very dull hobby knife. A dulled blade is the perfect tool for scraping at mold lines, and is much less likely to damage a part then a sharp blade is. I have tried several other tools, including some dedicated micro deburring tools and have yet to find anything that is as easy to use and effective as a dull hobby knife.

Extra-Thin Plastic Cement

Some textures are just plain awful to clean if a mold line runs over them. In particular, plasma coils and rib cages come to mind. My preferred method for quickly tackling these is a quick light scrape with my dull hobby knife and some extra-thin cement. Brushing over just a tiny bit is usually enough to melt any shavings stuck in the detail and help hide the join.

Rubber Bands

Another useful tool was a handful of rubber bands in various sizes. Some parts, particularly the Skeleton Horses, just don’t want to stay together. Snapping a rubber band around parts as they dry helps speed up the assembly line process of building immensely. The Necrolith dragon also benefits from the added pressure to keep the ribcage together as it dries.

Other Projects

I sadly did nothing else this month except clip, sand and assemble tiny small skeletons.


Austin B.

February Progress?

Unlike the others, I have had to build fairly little this month. Between the fact that my army is composed of primarily of the mono-pose, single piece Night Goblins from Battle of Skull Pass, and I’d already done a fair bit of building last month, all I really had to do this month was rebase… checks notes… 90 goblins! Not really the most exciting process, but a far cry from removing mold lines from and assembling models nearly as old as I am. A simple afternoon and that was done. So now it was time to paint them, right?

Nope! Unfortunately I had some rather personal issues arise that tore through the first three weeks of this month, leaving me both short on capability and motivation for anything hobby related. While I have now begun the long process that is painting a veritable horde of goblins within the past few days, I am not even close to where I had hoped to be. Still, the process has been started, and I hope to have all or most of these basic bobos (gobos?) done by the next update.

C:\Users\austi\AppData\Local\Microsoft\Windows\INetCache\Content.Word\20240221_225823.jpg

Shush on the desk. It’s organized clutter, damnit! Maybe… Now, where did I put that pot of Nuln Oil again…?

Now, progress wasn’t on a complete standstill during the tumultuous early weeks of this month, and I was able to assemble a few further hero models and some unit fillers, mostly comprised of spare bits and the Looncourt models from Warhammer Underworlds. I won’t show those off quite yet though, as I still have a bit of work I want to do on them.

“February” Progress

Now, despite what was stated above, I am not without any work to show off! Between the time of our last post in January, and my unfortunate incident in early February, I was able to get a few more miniatures painted. Firstly, I finished up four more members to join the Squig Hopper unit for the model I showed off in the last update. The other five will come in time…

Furthermore, I was able to get ten Squigs done for a Squig Herder unit. They’ve been let loose! Where are their herders? Well, you’ll hopefully see them next month, so they can round off (or round up) the unit.

And last, but not least, I was able to paint perhaps one of my favorite models from the new Gloomspite Gitz range, the Loonboss on Giant Cave Squig. While he cannot lead my armies in the Old World, he’s still certainly an intimidating presence! The sickle-blade, the mask, the giant squig tongue… Ugh, I just love everything about this model.

Well, that’s it from me! Hopefully I have more to show you all next month. Much more…


Kevin C

So, as this is being posted, I am currently out of my house due to asbestos abatement, so my hobbying availability has certainly taken a hit in recent weeks. That being said, I was able to assemble the entire boxed set of Bretonnians before I left. Here are my thoughts:

The first thing that came to mind was just how much the sprues have changed in the past 20 years. Compare and contrast the two sprues, Men-at-Arms basically unchanged from when they were released back in … checks notes… 1998, and the Lord on Pegasus that was just released.

The tightness of the Lord on Pegasus sprue is definitely more in fashion these days, I assume thanks to the significant advancement in CAD software over the intervening years. I do appreciate the lack of waste that the smaller, tighter sprues offer, but at times they make it hard to cut pieces off the sprue cleanly, due to the weird angles. I have definitely had this problem with some of the newer kits, like the kill teams and this Lord on Pegasus. More on him later…

Knights

The knights were delightfully simple to build. I chose to keep the rider and the shield removed from the horse until after I have painted them, so that I can get to the hard to reach spaces while painting. 

Don’t mind the reindeer water mug…

I like keeping helmets on all my models whenever possible. Not because I am bad at painting faces (or, not only because I am bad at painting faces), but it helps to build the uniformity of the unit. I will be differentiating them in different ways, however, mostly through heraldry.

Archers

Don’t get me wrong, I like archers. However, they definitely have the peasant, unclean look. I actually prefer the older monopose archer models from the early 1990s which always looked … healthier to me? Anyway…

It is a good thing we have those stakes and braziers – they are a must for any Bretonnian player. That being said, even though there are tons of stakes with these archer sprues, there are only two 100x25mm bases for them to go on, meaning you can only construct a single unit with stakes. I’m going to see if I can procure more long narrow bases for more stake emplacements.

Men at Arms

So, I’ll be honest, I don’t like the look of these guys. Filthy peasants. That being said, I am so glad Games Workshop made the decision to move all infantry to 25mm bases. These guys can actually finally rank up cleanly. Well, with the exception of the banner knocking the guy behind him in the face. You know, the banner that doesn’t count for VPs for your opponent? Yeah, that one…

Similar to the knights, I have kept the shields off these guys, in order to be able to reach the rest of the miniature behind the shield. On the table, I will probably run these guys as a single large unit, but I ended up building two command sets, just in case.

Duke on Pegasus

Alright, now I’m really going to gripe. This was easily the WORST kit I have ever had to build. The instructions were bad, but I’ve had that before. What really made this kit terrible was two-fold: the miniature itself is hollow (most likely to reduce cost of plastic), and the joins were flat. This means that I have to hold the pieces together, often at weird angles, and they did not want to stay together.

Even after completing the model, instead of feeling a sense of accomplishment of a job well done, I just lifted my hands in disgust and said “good riddance”. I am not entirely confident it will stay glued together through the painting process, namely because the joins are so flipping precarious. As I said, I hated building this model.

Putting It All Together

Well, despite delays in shipping thanks to freak weather in Memphis, and having to deal with unexpected home repairs this month, I was able to build the entire army in the month of February.

My hope moving forward is that I will be able to finish painting a unit for each of our future updates, and given that, should have the entire set done by mid-summer.

Now to wait until nice, low-humidity weather, to be able to prime. Meanwhile…

In Other Hobby News

I was able to finish the rest of my Legions Imperialis miniatures, as well as a pair of Baenblades. I still do not like painting the infantry, but having them all complete is a nice feeling.

I put everything I currently own for Epic together (that has been painted, at least). What kills me is that, it is 20 tanks and 88 infantry bases, and the whole of it only adds up to 1850 points. Still waiting on those aircraft to get back into stock, as well as those support boxes…

I was able to get a good game of Legions in against my buddy Pox a few nights back. He has been printing terrain almost nonstop for the past two months, so he’s got a pretty sizeable and impressive table. I still lost, mostly due to my own mistakes, but it was good to finally put a fully painted army on the table.


Jerry S

February was one of those months in my hobby journey where it felt like I was getting nothing done. Looking back at the pictures of what I worked on this month however, nothing could be further from the truth. While I wasn’t spending my hobby time painting, I was certainly still moving my project(s) along.

After finally getting (most of) my Tomb Kings kits from Games-workshop, I was able to start the long and arduous process of building my skeletons. Michael detailed that terrible process more eloquently than I ever could up above so I will spare you the details.

My goal for the month was to get my “Battleline” built and ready for the painting booth and I am happy to report that I was successful! I actually was able to sneak in a couple Sepulchral Stalkers and some Ushabti as well(not pictured).

All told I’ve assembled 40 skeleton spearman, 20 archers, 20 Tomb Guard, a Casket of Souls and several different character models.

I still have a pile of models to build but I thought this was a good launching point to begin the painting phase. I’ve always been a sucker for teal tomb kings livery. To me, it just works perfectly with white and I had a ton of fun painting different shield designs on each of the warriors. This something I haven’t often done in my hobby history so I took every opportunity to vary the shields here. I already have some more ideas for the second and third batches of spearmen as well so we all have that to look forward to!

While this first block isn’t perfect (I already have some ideas for improvements I want to make), I am happy to have locked in my scheme and I am sure to refine it over the next…100 skeletons….

In other hobby news, after many years of wishing and wanting, I finally decided to snag a PLA printer. I grabbed the P1S after seeing the incredible results one of my friends was getting from his and I am absolutely in love with this machine. I’ve only had it a week but I have been testing and printing at a furious pace.

The main reason I bought this printer was to print terrain for my various game systems and to test it out I printed the below tower and cottage. As you can see the detail is outstanding and the setting I used were more “fast and dirty” than I would use going forward so I have high hopes as I learn how to use this amazing tool.

One of the main draws for Legions Imperialis for me is the ability to create the truly epic landscapes that we all imagine our battles to be fought. The next couple pictures are some proof of concepts for an industrial spaceport board that I plan on printing, building and painting ahead of a Legions Imperialis campaign this summer.

While I did not get as much final product done this month as I would’ve liked, there is no denying that I got a lot of work done. I hope to get some more finished minis out in March though. My goal as of today is to get my block of 20 Tomb Guard finished, quickly followed by a character or two from my tomb kings. After that I hope to get some paint on some Legions Imperialis titans as I wait for jetbikes to release.

Finally, I am hoping to keep up the pace with printing, I have a ton to learn with CAD and I hope to get some epic terrain pieces out here in the coming months.


Mike P. – https://www.instagram.com/middleearth_mike/

An Epic Saga of Mike’s Miniatures

Oldhammer Heroes

It’s been quite the month, albeit with precious few hours to dedicate to my hobbies. Work, life, you know how it goes…

However, amidst the hustle and bustle, I’ve managed to make some progress on my builds and put paint to a few models. In today’s article, I’m excited to showcase some of these creations along with the meticulous steps from inception to completion.

Currently, my focus lies predominantly in the realm of the Old World. There’s a certain charm to those aged metal GW sculpts, each one brimming with character even after two decades.

A group of figurines on a table

Description automatically generated

Following the assembly of the models—admittedly less labor-intensive with metal ones—I embark on a methodical assembly line process. Any gaps within the bases are deftly filled with green stuff (special thanks to Jerry for supplying me with this same line of green stuff a few years back). This meticulous step ensures a seamless finish, ready for the application of texture, typically sand, onto the base. Once the green stuff has set, I meticulously apply a uniform coat of PVA glue onto the base before plunging it into my sand pit. Though this entire process can span about an hour, the crucial point lies in allowing ample time for the sand and PVA glue to fully cure before progressing to priming.

A person holding a small model

Description automatically generated

A plastic box with small figurines in it

Description automatically generated

Once the sand has fully set, the model is primed and ready for the next stage. For priming, I rely on “Stynylrez” primer applied through an airbrush, ensuring a flawlessly even coat. Gone are the days of struggling with old rattle cans, where achieving the pristine flatness I desired seemed like an elusive feat. Given the material of these models, multiple layers of primer are essential to guarantee a solid coat, a meticulous process that demands patience and attention to detail. I can’t count the number of models I’ve had to abandon due to botched priming attempts, underscoring the importance of taking the time to get it right.

Once the primer has fully cured and every layer is meticulously covered, it’s time to dive into the exciting realm of painting. My approach to painting involves a blend of simple yet labor-intensive techniques, including basecoats, washes, layering, and highlights. It’s a methodical process that demands patience and attention to detail. With each miniature, I find myself investing hours, ensuring that every brushstroke contributes to the final masterpiece. While this meticulous approach may result in slower progress, the end result is undeniably worth it.

In the past, I’ve experimented with prioritizing quantity over quality, rushing through projects in an attempt to churn out as many miniatures as possible. However, I’ve come to realize that the depth of my affection for a model is directly proportional to the time and effort I invest in it. The miniatures that receive the full extent of my attention and care hold a special place in my heart, each one a testament to the passion and dedication poured into its creation.

Introducing a recent addition to my painting arsenal: the two thin coats paint range. In fact, I dove headfirst into this new venture, acquiring the entirety of wave two and half of wave one without hesitation. Let me tell you, these paints have exceeded my expectations in every aspect. Their smooth consistency and vibrant pigmentation seamlessly complement my existing Citadel paints, resulting in a harmonious blend ideal for layering and highlighting techniques.

After numerous painstaking hours of meticulous brushwork, I proudly unveiled the final iteration of the three models I had been diligently working on. The culmination of this laborious process revealed a level of detail and depth that truly surpassed my initial aspirations.A figurine of a person with feathers

Description automatically generatedA figurine of a viking with wings and a cape

Description automatically generatedA figurine of a person with a sword

Description automatically generated


As you can see, we are all hard at work over here at Urban Cowboy Hobbies and I can honestly say the best is yet to come for each of our warlords. Stay tuned as each of us keeps moving forward with our hobby goals and I hope that we have motivated y’all to get after it yourselves.

Adios,

Jerry

A Tale of Many Warlords- January

Howdy Readers! Welcome to January’s issue of A Tale of Many Warlords. Lets waste no time and get right into introductions, First up we have the Master of Disaster, and a very good friend of mine- Mike!

Mike P

An Epic Saga of Mike’s Miniatures: A Tale of Battlefields and Brushes 

In today’s opening exploration, we delve into a topic that captivates the mind and sparks curiosity. Join me on this journey as we unravel the intricacies and discover the nuances of bringing Warhammer to life. From its historical roots to its contemporary relevance , we embark on a thoughtful exploration that aims to deepen our understanding and ignite meaningful conversation along the way. Welcome to a journey of discovery and enlightenment with our exploration my Hobby. 

Rewind to two decades back, my journey into the realms of Warhammer began during the days of my youth in Middle School. It was a defining moment when I laid eyes on my inaugural Warhammer Models – the gallant Bretonnians, encased in the enchanting allure of an ancient Battalion Box.

From that pivotal moment, I found myself utterly captivated. The allure of the hobby became irresistible, compelling me to immerse myself in any way possible. I embarked on my inaugural journey, assembling my first army – the Warhammer Fantasy Vampire Counts. I eagerly earned every penny, even raking leaves and mowing lawns for a chance to expand my collection. The enchantment deepened as I delved into the mesmerizing pages of army books, developing a profound love for the old world and everything associated with Warhammer and Games Workshop. So intense was this passion that it led me to start another army, and thus, my quest for amassing an Empire Army began.

From the enchanting realms of Warhammer Fantasy, my passion for the hobby flourished. A delightful memory that still echoes in my mind is attending the Midnight Release/Mega Battle for ‘Battle of Skull Pass’ back in 2006 – an event immortalized by the poster that proudly adorns my collection (still can be seen in the above photo). As the years unfolded, I expanded my horizons, assembling an Imperial Guard (Astra Militarum) Army for Warhammer 40,000 and delving deeply into the Lord of the Rings Strategy Battle Game during my High School days. The pinnacle of my Warhammer Gaming golden age unfolded between 2007 and 2011, where playing all three systems at a Games Workshop at the Bel Air, MD store became the epitome of my tabletop adventures. I mean I was there every Saturday, every Sunday, and when I was finally able to drive I was there on week nights too. Reflecting on those years, every game I play today carries the spirit and memories of that golden era. 

Then came the first heartbreak in my hobby journey: the closure of my local Games Workshop. A familiar sorrow for many seasoned hobbyists, it marked a somber and perplexing chapter. Determined not to relinquish what had become a significant part of my life, I persevered by redirecting my hobby pilgrimage to a store thirty minutes south, nestled in White Marsh, MD. Far from surrendering, I took a leap and applied to join the store as a part-time employee. To my delight, I secured the role and served as a part-time team member at the White Marsh Games Workshop from 2012 to 2013. Every moment was a joy, engaging in discussions about the hobby with longstanding enthusiasts, newcomers, and everyone in between. It was more than a job; it was my calling.

Regrettably, in 2013, that shop met a similar fate when it was closed down by Headquarters. This event marked the onset of what many seasoned hobbyists refer to as the ‘Hobby Dark Ages.’ It’s a phase where we still cherish the hobby but find ourselves detached, not keeping up with it as passionately as we’d like. It’s a shared experience among enthusiasts, a period of hiatus that everyone eventually encounters. My own Hobby Dark Ages persisted until 2017 when I had the pleasure of meeting new hobby buddies. This rekindled my fervor, and I once again found myself deeply drawn to being an integral part of this vibrant and awesome community.

Since then, I’ve had the pleasure of connecting with amazing individuals within various Warhammer hobby communities. My journey has taken me to tournaments and events spanning the United States and even across the pond to the United Kingdom. Throughout, I’ve remained dedicated to crafting my own Warhammer hobby experience to the best of my abilities. 

Continuing my journey, I’ve taken a proactive approach by crafting my own hobby bucket list. This endeavor has led me to exciting experiences such as attending Adepticon, Las Vegas Open, and Warhammer World not once, but twice—stories that deserve articles of their own, reserved for another time. Among the aspirations on my bucket list, one goal stands out prominently—I am determined to establish and sustain my own podcast. In fact, a few years ago, I ventured into podcasting, creating my own show. Despite the initial enthusiasm, it didn’t progress beyond the third episode, but this setback only fuels my determination to make it a success in the future.

At present, my journey in the Warhammer Hobby is thriving. Nestled in the depths of my basement, I’ve curated a captivating hobby room—a haven where creativity and passion converge. Bolstered by a steadfast circle of hobby friends, our collective enthusiasm fuels the vibrant exchange of ideas and inspiration. Fueled by a resolute drive, I am unwavering in my commitment to advance my quest within the Warhammer Hobby. The combination of a dedicated space, a supportive network of friends, and an unyielding determination sets the stage for an exciting and fulfilling continuation of my Warhammer journey.

My Now Basement 2024: A gaming and hobby hideaway with full 6×4 table, towers of painted miniatures (some are hidden on that back wall), and a painting station to keep those creative juices flowing. It’s something that Ive always wanted- working 20 years for and is still a continued work in progress.

In closing, as I continue to embark on the ongoing journey of these articles, my aim is to delve into topics that currently captivate my attention as well as that of the audiences. Beyond sharing my personal projects (currently working on Warhammer Old World), I am eager to address questions that may linger in the minds of fellow hobbyists. Curious about the experience of conventions like Nova Open or Adepticon? Wondering about the logistics of a North American hobbyist making their pilgrimage to Warhammer World? These are the queries I aim to explore and demystify.

Warhammer World: This was the first picture that I took as I hopped out of my taxi in 2022.

If you have your own ideas or burning questions, don’t hesitate to reach out to me on Instagram @middleearth_mike. I’m here to engage with the community and bring forth content that resonates with your interests and inquiries. Until then, be good to each other and keep on hobbying.

I’m looking forward to seeing what Mike has to show us this year, an incredible painter, I have a feeling we will be seeing an incredible Warhammer: Old World dwarf army coming from him this year.


Next Up we have a new friend of mine and another longtime Warhammer enthusiast-Kevin!

About Me

I am a 38-year-old college professor and suburban dad of three. While I did a little bit of miniature wargaming in middle school, my real hobbyist career started after college for me, over 15 years ago. My very first army was Bretonnians, and while I have collected many armies since then, they have always remained my first love.

Granted, I was not a very good painter back then. This was just when Foundation Paints were just coming out (those are “Base Paints” for the youths), and so I was delighted with just doing one layer of paint and being done. I did try to paint all the knights different colors though.

About ten years ago, I sold (almost) my whole army. I just had my first kid, and I was not getting any games in, so I decided to sell the army and clear off some space. 

I have regretted it ever since. The only painted miniature I have left from that army is one standard bearer on Pegasus, because I loved how the model turned out. It’s not my best, but I remain quite proud of it.

What I have been working on recently

I have admittedly really gotten into skirmish games these past two years, namely Kill Team, Necromunda, and Blood Bowl. A lot of folks in my area play these games, so I’ve been very motivated to get some miniatures on the table. As an added benefit to the Kill Team boxes, I was able to add to my terrain reservoir, which will hopefully come in handy with the games I have planned next year.

Some of the kill teams have been truly fun to paint, and less taxing than painting a whole army. Below are some of my favorites.

I have also started collecting an army for Epic…. Sorry, “Legions Imperialis”.

Another army that I have sold and regretted selling was my rather large Vostroyan 40K army, so I decided to recreate my Vostroyans in 30K (even though technically they did not participate in the Heresy).I’m not as excited about this army as I am about Bretonnians, but my friends are gearing up for a campaign so I figured I’d join in.

What will I be working on?

The number one hobby goal I have this year is to rebuild my Bretonnian army, only better. My main goal is to have each knight in its own heraldry, which much more thoughtful layouts of the coats of arms. I will be aiming to make some progress on these guys each month, hopefully a unit a month.

In addition to this project, I have a few other small projects to split up in between. Two Blood Bowl teams (Norse and Halflings), two kill teams (Votann and Kasrkin), and a new Necromunda gang (Cawdor) to split up my hobby work. I’m hoping I can share pictures of al of these guys as I complete them.

Kevin’s enthusiasm for his Brettonians has been palpable, and I think we have a lot to look forward to as we watch him recreate his army of yesteryear.


Michael S.

About Me

I walked into a Games Workshop for the first time about 16 years ago with no idea how much fun I’d have immersing myself in all of the aspects the hobby has to offer. From playing, painting, and reading as many Black Library novels as I can get my hands on, I’ve spent countless hours enjoying 40k and Age of Sigmar alike. Like many long-time fans, I’ve picked up and put down the hobby for periods. My most recent return to the hobby was in 2018, shortly after the release of 40K’s 8th Edition. I always tried to make time for hobbying during college, but it wasn’t until after I moved back to my hometown that I was able to make time for more regular hobbying and gaming sessions with friends.

Just over 5 years later, I find myself still enjoying the hobby just as much as I used to! Gaming and hobby sessions find themselves farther apart these days, but I still find myself coming back to miniature wargames when I get some free time.

What Have I Been Doing Lately

In the past year, I jumped on the Horus Heresy train. I had a great time playing my first few games and got a little in over my head reinforcing the 14th legion before my Age of Darkness box was fully painted.

In addition to making steady progress on my Heresy army, I’ve picked up a small Malifaux crew to hopefully get into some non-GW wargames. Putting the tiny models together was an absolute pain, but the sculpts themselves are beautiful!

In between larger goals I’ve also been taking time to work on unpainted units and develop a method for painting large units quickly. I’m guilty of having plenty of unpainted miniatures and getting far too invested in the details when I do get around to painting. I’ve been working on staying motivated and making sure I move quickly through rank-and-file minis so I can play with a fully painted army.

What Will I be working on?

Since the announcement of the Old World, I’ve been looking forward to finally getting a taste of Warhammer Fantasy. I was always too much of a sci-fi fanboy during Fantasy’s heyday to delve into the game, but in the past few years, I took a dive into Age of Sigmar and found a lot to love about the game. After playing a handful of games (and pouting about the double-turn), AoS quickly became my favorite wargame. When Fantasy’s return was announced, I immediately knew what army I would play…

You can expect to see lots of updates from me on the building, basing, and painting of the Old World’s spookiest skeletons.

Between updates and posts about my Tomb Kings force, I’ll also be aiming to include various smaller projects from my collection including various 40k and Sigmar models to break up the monotony. Here are a handful of pieces in various stages of completion that I am excited about.


Austin

About Me

I was introduced to the hobby by a friend of mine during middle school, soon to be 15 years back, when he brought in a Games Workshop catalogue. I was immediately enamored and begged my parents to let me begin playing, and for my birthday that year they brought me to the local GW and I picked out the Battle for Skull Pass set, with my initial focus being mainly on the Dwarfs. While I had a bit of a hobby low period in 2013 and 2014, by 2015, now having a job and no sense of finances, my hobby really kicked into high gear. The rest is history, and I have been playing not only Games Workshop games, but all manner of miniature games ever since – though now with a bit more restraint to my budget!

Over the past few years in particular, I have actually moved away from the likes of 40k and Age of Sigmar. While I have kept up with the Specialist Games, A lot of my hobby focus has shifted instead towards historical gaming. I have been thoroughly enjoying the likes of Black Powder and Bolt Action. Some of my friends are even musing over Pike and Shotte, so maybe we will see some of that from me in the coming months…

What Have I Been Doing Lately?

Over the past few years, I have committed myself to a myriad of projects, some of which have been false starts, and others of which I am very proud of. In terms of completion of projects this past year, I am all over the place – something which I am trying to remedy – but I have been able to complete several larger-scale projects, including two more Lord of the Rings forces: Theodred’s Guard, led by my converted Prince Theodred, and a Doubles half for the Black Gate Opens (which I plan to eventually make into a full army). I’ve also gotten a very solid amount of Prussians done for Black Powder.

C:\Users\austi\AppData\Local\Microsoft\Windows\INetCache\Content.Word\20240117_114922.jpg

In between the larger projects, I have been working occasionally on smaller ones, such as Blood Bowl teams and Necromunda gangs, as well as loads of Battlemechs. Though again, some false starts do mean I am left with some of these only partially completed, while others remain in-progress as palate cleansers.

Of course, my pride and joy of this past year has to be my Legions Imperialis force. This is perhaps my fastest force I have taken to completion, breezing through a fully 3000 points in only a few weeks. That said, I still have more to work on for it, including several Titans, as well as upcoming releases to bolster my forces and provide much needed transportation and fire support…

What Will I Be Working On?

Like some of the others here, the announcement of the Old World has brought me much excitement and jubilation. Initially, my plans were going to simply be to rebase and finish painting my Dark Elves, which would have been a fairly simple task as they are mostly complete. But as I was organizing my “pile of shame” and figuring what I could sell or what I wanted to keep, I came across a box of the new Age of Sigmar Squig Hoppers, reminding me of my start in the hobby with the Battle for Skull Pass set. And when a friend mentioned he was trying to get rid of a horde of those BFSP Night Goblins, I knew what I had to so. And so my main hobby goal will be the completion of a Night Goblin horde, the opposite side to the force I began with all those years ago! And I have even finished a test model!

Between my progress on the madcap maniacs, I’ll also be aiming to complete more models for my Corpse Grinder Cult gang, to aid in my group’s ongoing campaign, as well as finish off my Vampire and College of Life teams for Blood and Dungeon Bowl respectively. I will also likely work towards my initial plan of finishing off my Dark Elves, and updating them for the Old World – though perhaps much more slowly than initially anticipated. Besides that, some more Legions Imperialis will likely fly off my painting desk, and I even have some terrain in the works for that game that I am excited to show you all! Otherwise, who knows what else I will do in the meantime? I still have more mechs, as well as Italians, and Prussians, and even some sneaky magpies, that all need to get done eventually. Though whether the horde of cloaked hooligans will give me time for them or not is yet to be seen…


Jerry

After reading through these awesome write-ups and looking at some incredible models, I gotta say how excited I am to see the progress of each of these talented grog nards through the year. I will bring up the rear this time by giving a brief intro to who I am, how I got here in my Warhammer journey and how I plan to use 2024 to make some hobby progress.

I began my Warhammer journey about 20 years ago with the Lord of the Rings: Fellowship of the Ring starter set; I was instantly hooked.

Fast forward a few years and I discovered my number one love: The Imperial Guard in 40k. I’ve collected four Imperial Guard armies in the 15 years since, painting several hundred infantry and scores of vehicles.

Gaunt’s Ghosts! The novels were a key factor and I’ve luckily been able to grab a small group of the old metals over the past few years.
A Sample of Steel Legion that I finished a few years ago. I’m always looking for additions to this group so there may be more of these on the way if I snag a good deal.
A small group of Catachan that I painted previously, never did decide on a basing style for this group.
I’ve decided to spare you from going over my whole Cadian force but I cannot go over my hobby history without sharing my Cadians. Here is a sample of the whole force but I assure you, the above group does not even scratch the surface of my Cadian collection.

While the Guard was my first, greatest love, there has been other projects that have piqued my interest. I have spent a lot of time painting and playing Lord of the Rings and more recently the Horus Heresy. I actually just finished my second Horus Heresy army, a small Zone Mortalis Word Bearers force.

A small contingent of the Word Bearers force I finished late in 2023.
My pride and joy, one of two Warhound Titans I finished this year.

Like several of my other warlords, my recent interest has been focused on the new Legion Imperialis and Warhammer: The Old World. For most of the next year, my focus will be on building, painting, and hopefully playing a new army for each of these systems.

For Legions Imperialis I eagerly await the release of bikes of all variety to begin a small White Scars force. For The Old World, I intend to finish the Tomb Kings army I began over 10 years ago. I am incredibly excited for these two games as the predecessors of each game were discontinued before I expanded my hobby away from Warhammer 40k.

Knowing me, I doubt my attention will be completely focused on Epic White Scars and the Monarchs of Khemri. My mind already wanders to other projects in the world of Warhammer Fantasy….The Empire sure does look good these days. I also have a veritable mountain of terrain that needs work for Horus Heresy. Oh and one other project that looms large above my desk…

A little preview of a project that may take my attention this year.


Thank you for reading the first installment of A Tale of Many Warlords! Now that we all know each other and have our feet under us, I look forward to seeing what my fellow warlords have in store for this year.

Please feel free to leave a comment below on what you think, what are you looking forward to the most? What models should the warlords paint first? Let us know below!

As we go through this journey, I’ll also be sharpening my WordPress skills so I ask that you please comment any issues or suggestions for me below.

Don’t forget to subscribe! If you are only interested in following the Tale of Many Warlords, you can select your subscription preferences in the “Subscribe” tab above.